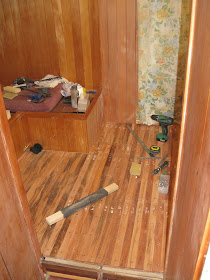
Well, here we are comfortably into the New Year of 2019, and may it be a good one for everyone reading this. I should like to think that my little boat will swim this year, but to be perfectly honest, I shouldn't like to bet too much on it. So we'll carry on as before, one day at a time until the job is done.
The best news is that the New Year will see me starting a new project. The interior is almost complete and I can get on to the decks at last. That will be exciting. It will also be very hot as I shall be laying them through the middle of summer in temperatures that will be in the 40°s C at the top of the shed. However, if my usual progress is anything to go by, it will probably be winter by the time I finish and things will have cooled down.
My last post saw me fitting the galley sink. I then coated everything and have to say it looked rather magnificent! I put this coat on immediately to stabilise the rather excitable tigerwood.
I then sanded it all down again, and fitted wood plugs to all the screw holes.
Finally I could start one of the real lolly jobs: putting down the cabin sole. I've been looking forward to this. The bits of masking tape have numbers on, so that the pieces all go back in the same place when they get glued down.
Gluing the pieces in by the settee front was more than a little awkward, as I had to work under the lift-up settee extension. I decided to take the wood up the side of the boat - the white paint just looked out of place.
Screws out, glue cleaned up and everything sanded waiting for plugs to be fitted.
I rummaged around and found some offcuts of tigerwood that were perfect for fiddles around the top of the drawer locker. Oddly, the athwartships one looked too heavy and needed to be planed down to look right.
I have spent a long time agonising about how to drain the sink and finally hit on the idea of a 'grey water tank'. This eliminates holes through the hull, means I don't need to empty a container every time I use the sink and avoids a lot of pipework cluttering up the space under the sink. I realise that this solution would not suit many people, but it fits in with my way of thinking.
The water containers will live under the cabin sole, so the floor boards are effectively hatches, to give me access to the bilge. In order for them to land securely, once they were cut down, I had to add some thickness to some of the existing floor bearers.
Everything was 'dry fitted' and all the pieces of wood were carefully marked so that they would go back in the right places and not get mixed up.
Again, I covered the side of the boat with tigerwood, leaving white paint only on the stringer, which I think looks rather good. I used paper to make a pattern
and then MDF to make a more solid one I could fit accurately.
Finally, all the wood was fitted and I could get down to gluing it down.
I took out all the hatches and put them on the table. Quite apart from anything, it's about 5°C cooler down at floor level than it is in the hull, now that summer is well and truly here. I added some microballoons to the glue mix, so that it is closer in colour to the wood. Some of the pieces of wood needed a bit of persuasion to line up to the one next to them and occasionally there was a small gap that couldn't be straightened out, however hard I tried.
Then I had another big sanding session, followed by the cutting and fitting of no fewer than 420 tigerwood plugs. My knees are looking rather the worse for wear after all this!
Because this part of the boat will have stuff spilt on it and a lot of foot traffic, I wanted to be 100% sure that there were no little crevices to trap dirt and go mouldy. So I mixed up filler and went over the whole sole carefully, filling in every little hole I could find. And then, of course, it all had to be sanded. Again.
One major job left to do in the interior: make the saloon table. You may remember that I mocked one up several months ago. I got it out and dusted it off. I tried it out. It seemed too high. I cut 50mm off the legs. It still seemed too high, but everything I read told me that I'd already made it too low, so I daren't take off any more. I hope it's OK. I hate eating my dinner at chin level.
I pulled down some more tigerwood from the stack and cut it to length.
I assumed it is called tigerwood because of its stripey appearance, but have come to the conclusion it's because the wood goes wild as soon as it's unlocked. Send it through the saw and it wriggles and wobbles all over the place. Somewhat hopefully, I clamped the pieces to be glued into the table leaves, to saw horses to 'keep them straight'.
Then I glued them up and left them overnight to get used to the idea.
After sending them through the thicknesser one leaf was perfect; the other still showed a tendency to bow.
I slapped epoxy on both sides as quickly as I could, clamping them flat again, each time. Again, I left them overnight hoping that they would stabilise. Once this is posted, I'll be taking the clamps off. Fingers crossed that the tiger has been tamed!


No comments:
Post a Comment