I wonder if it's just me, or does everybody find that "I'll just do this ..." jobs are the ones that take forever. Its seems to be the silliest little jobs that take the longest.
While I was laying the deck, the intention had been to 'pop' down below and finish off all those little jobs that hadn't been done, while I was waiting for glue to dry. Great idea, but failed in practice because there were always so many other things to do while the glue was drying. No worries, I said to myself, I'll just knock them over and get on with the cockpit. That was three weeks ago and last week I wrote out the list of what still needs to be done. I don't think I'll be starting the cockpit next week, either. I seem to have spent half of the past few weeks going in an out of Whangarei looking for bits and pieces. Most of what I've been doing is hardly worth photographing (finishing the wiring to a 12 volt plug in the saloon, which involved trying to find decent cable clips - Paul at All Marine ended up giving me some nice copper ones he had left over from one of his jobs; cutting hose for the 'plumbing' to
exactly the right length, etc, etc,) However, there are one or two photos that might be of interest, so it's probably worth writing my blog today.
Many moons ago, I tried to purchase the most wonderful little woodburner, only to find it was no longer in production. So I bought Raoul's Flick which was almost as nice, but was black all over. I like a bit of colour and as the poor wee thing was a bit scratched from having been ordered long before it was required, I decided to paint it in two colours. So part of it is a sort of dark sage colour and the rest is black. It looks pretty good, actually, but more so in the flesh than in the photo.
However, when reading the instructions (yes, I do!) I saw that they suggested firing it up before installing it, because the paint has to be 'seasoned', so to speak, like a good frying pan. What fun! I've been desperate for an excuse to see how it goes.
Well, as you can see, it goes very well indeed. It was the easiest thing to light and went off like a little rocket. The damper is just amazing: close it off and the fire almost goes out, open it a wee crack and it comes back to life: wide open and you have a little blast furnace going. As so many people have told me that I'm installing the fire all wrong, it's nice to know that I can shut if off so effectively. It should reassure them. Anyway, I left the damper wide open and sure enough, once the stove had got good and hot, I could see fumes rising from the surface. I just hope it was hot enough for long enough.

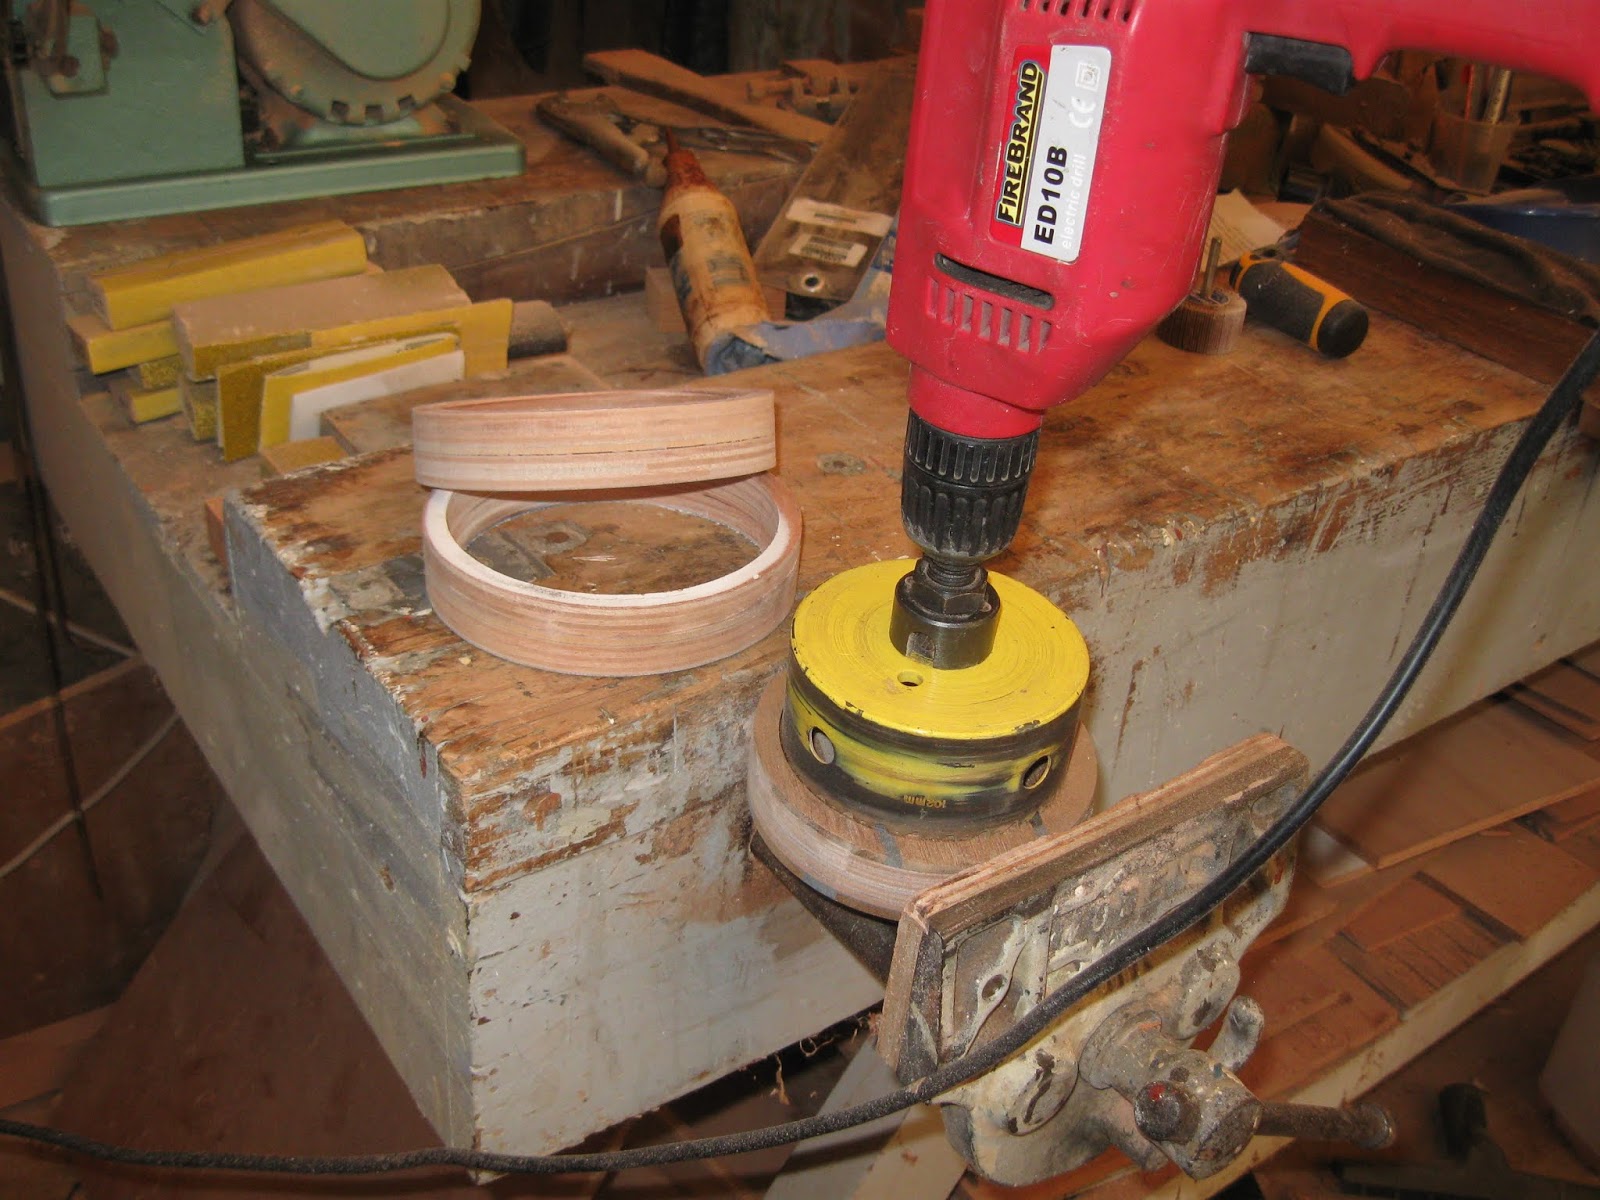
A lifetime of being short of cash has made me somewhat chary of throwing things out and sometimes this pays off. Again, many moons have passed since I cut out the holes for the port holes, but I couldn't bring myself to throw them away, so stacked them under the bench. Well, I had cut out two 127 mm holes in my deck (for the decklight and chimney) and needed spacers around these holes between the headliner and the deck. Not only were my cutouts the ideal size, but the hole up the middle allowed me align them perfectly.
I then took the 127mm hole saw (thank you, Norsand) and cut out the correct size hole. Clever, eh?
In the meantime, I had got out varnish for some reason, so could put some on the brass and finally fit the remaining portholes. (Or starboard holes as one wag would put it.) Finally, they are all in. You might think it's extremely idle of me to try and put off polishing these. Correct.
Neurotic as I am about leaks and rot, I did the WEST thing on the machine screws for the chimney. The red thing in the background is (inexplicably) known as a chimney jack and is of a very special silicone rubber that is supposed to tolerate a higher temperature than is normally the case. It comes in red, red or red, to differentiate if from the less heat-resistant type of 'jack'. I dare say I can live with it. The best thing I can see with it is that it can move up and down with the chimney, as it expands and contracts. From past experience, the vertical component of this can be disconcerting to say the least.
This is one of the holes in the deck. I think the one for the chimney, but they all looked much the same.
And here I am fitting the
Air-only ventilator that goes in the heads. They are complicated things to fit, and being somewhat dumb about these things, I had to print out the instructions to ensure that nothing was forgotten.
Having fitted it, I am entirely convinced that it will keep the water
out (watch
this video if you want to be reassured); however, I'm
not entirely convinced that it will let any air
in!!
Still, it looks very seamanlike on deck, next to my lovely little decklight. (Davey's via Classic Marine)
These chimney jacks are a wonderfully snug fit, but my copper downspout (yes, I know it will probably melt) has a seam on the back. I had to go and buy some bolts for it from
Steelmasters because the ones that came with the jack were (a) magnetic stainless and (b) the wrong length. While I was there I saw they had this (apparently) magic silicone tape, which bonds to itself and is very heat resistant. I could press it into the seam, and rolled up a couple of little sausages of the tape to put on either side. I hope it works!
And finally, I have just about got all the trim cut and fitted. These fiddly little bits of wood are enough to drive me into a nervous decline. Dry fitted, they certainly made a big difference, however. Once they are all varnished they should finish off the deckhead very neatly.


3 comments:
I've had an eye on those air-only vents for a while, but had always wondered how they'd perform (or fail to perform) when inverted.. from that video you linked to, Annie, it looks as if even upside-down, they keep the water out. Even though from the diagrams of how they work, I can't for the life of me see how!
Thanks very much for the link!
As always, it's good to see how you're getting along.
Love the fire. What's not to like?
Regards Tim
As I said in the blog, Garyck, I'm perfectly convinced that they'll keep out the water: I'm just not at all sure that they'll let in the air!
I'm, thrilled with the fire, too, Tim: I hope the abovementioned ventilator ensures that I get sufficient oxygen in for it. It would be a shame to be asphyxiated by CO!
Post a Comment