The moment we've all been waiting for. But first, let's get the boat finished, should we? Not long now ...

I had decided that I wouldn't move on to the boat until I had the cushions covered, to protect the foam from damage and from getting dirty. FanShi is a small boat and the saloon is right by the companionway. There is every chance that the seats will get sea water on them sooner or later and once the cushions gets salt in them, they tend to get very damp and clammy in colder weather. Therefore, I covered them with polyurethane-coated fabric, which will have loose covers over it. This has the added advantage that when the loose covers are being washed, the cushions are still protected.


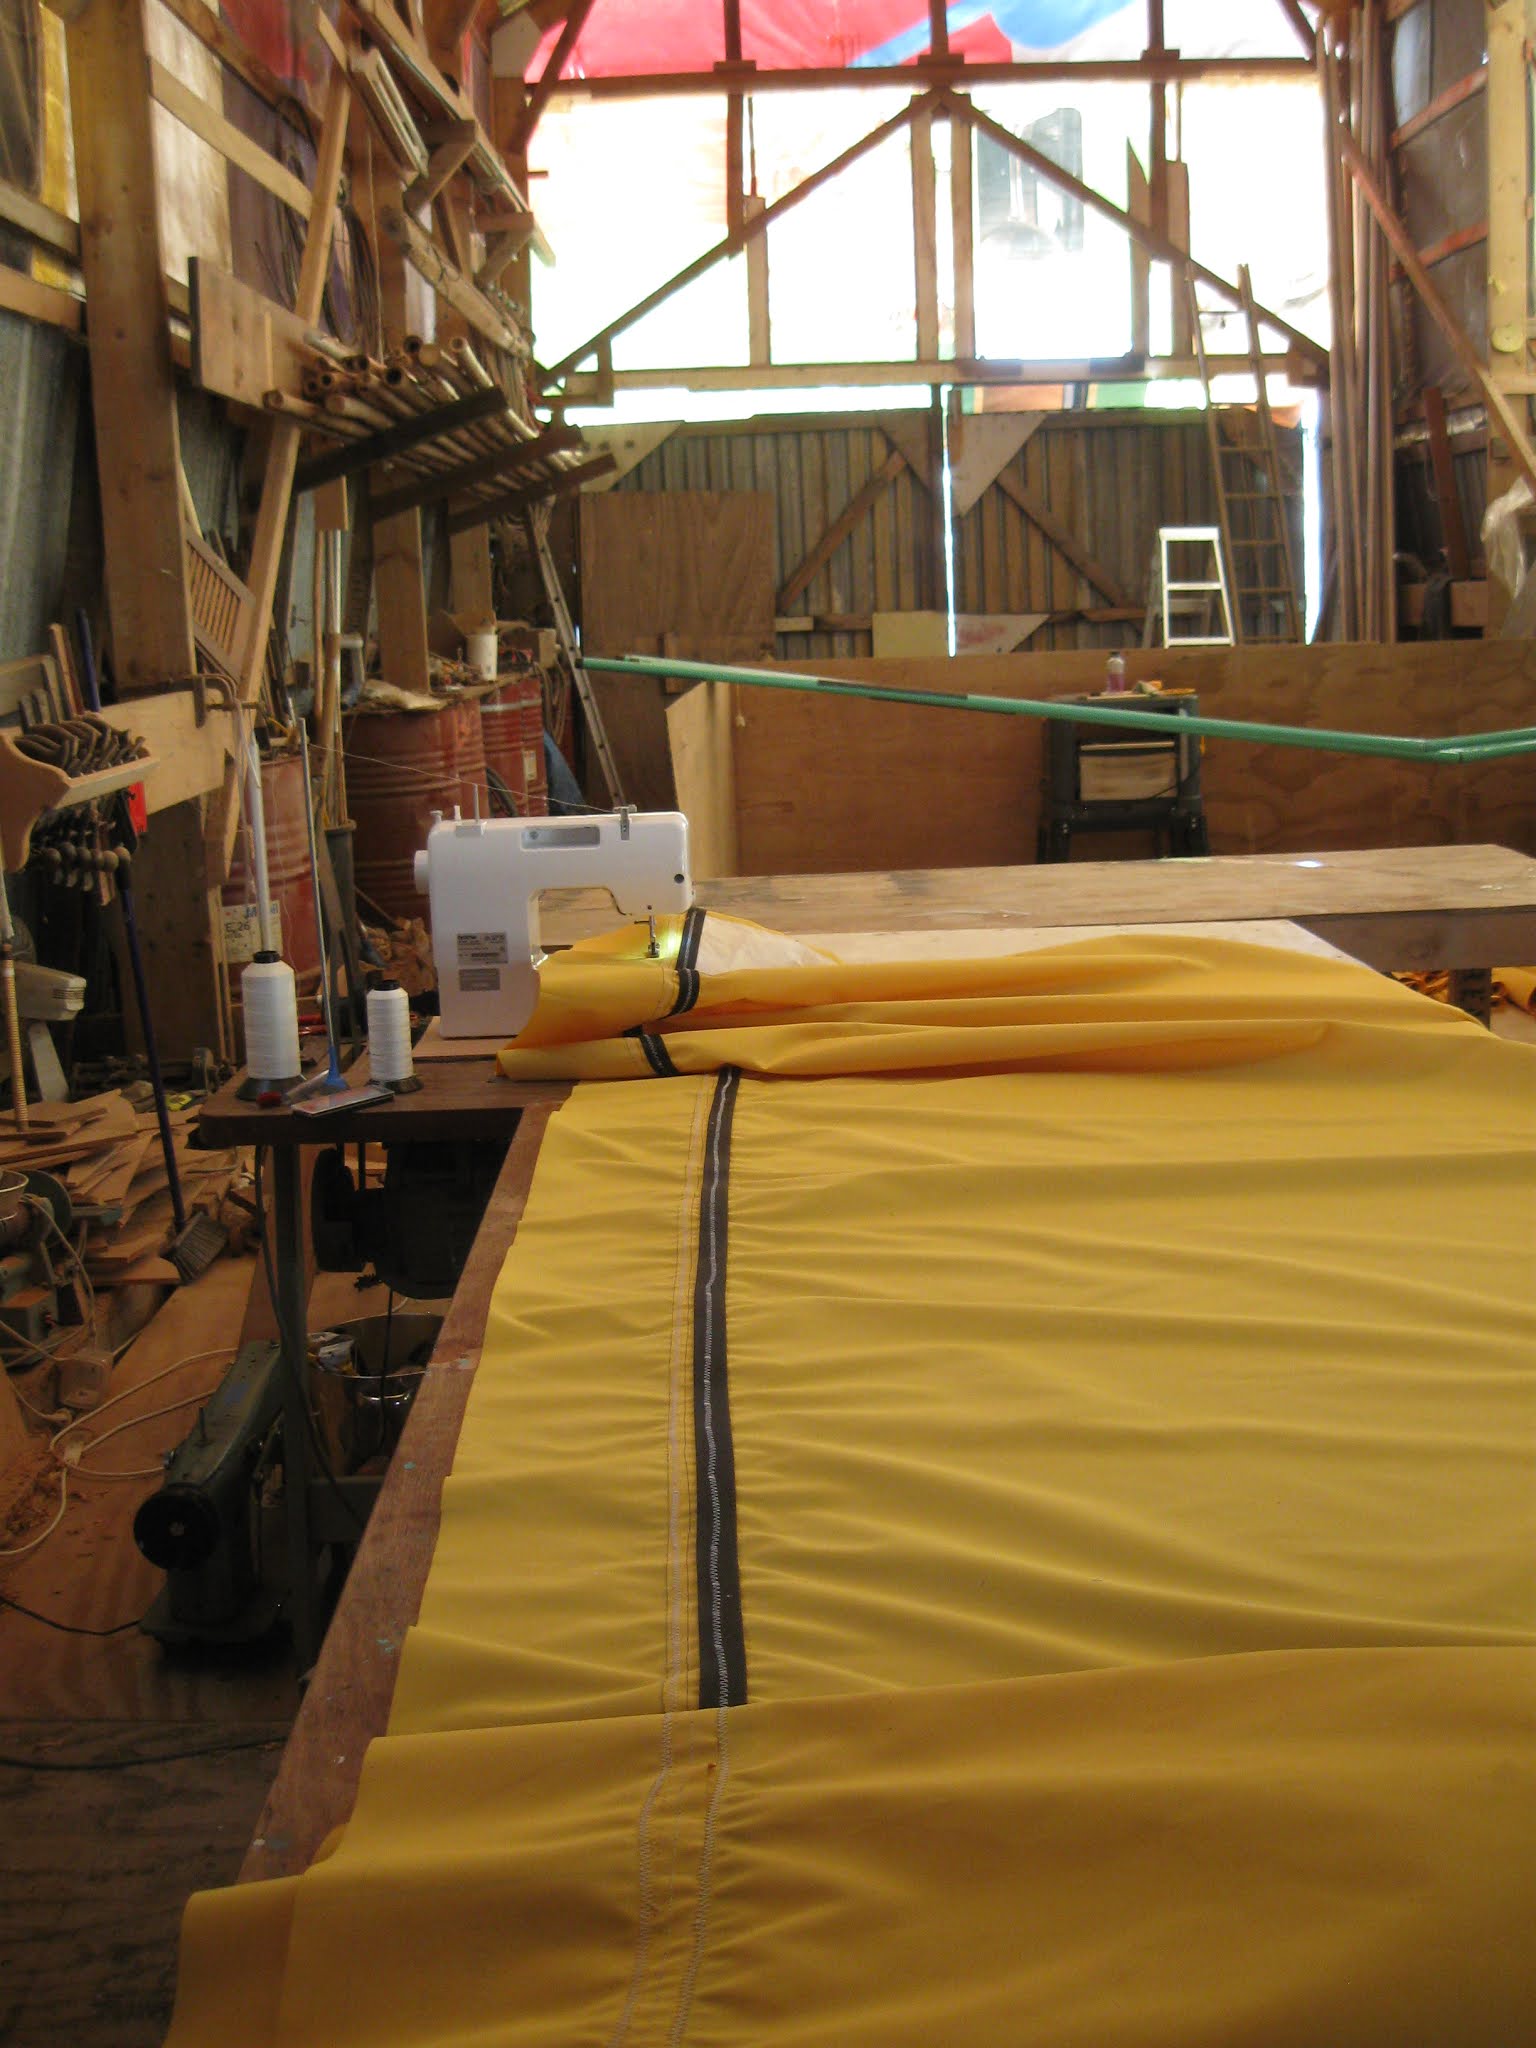
With the cushions out of the way, I could turn my attention to the sail. David had sent me drawings of the different panels and I had bought the fabric, Weathermax 80, many moons ago. My friend Alan, was visiting in Zebedee and, as he enjoys making sails, was keen to be involved, not in the least because the design of my sail is somewhat different from what Alan has built.

We started marking the sail out on the table.

This kept the cloth out of the dust, but it was too wide for the table. I can get things muddled at the best of times, and having to keep moving the cloth around opened up more opportunities for things to go worng, so we soon got down on the floor with chalk pencil, lead pencil, rules and tapes.


I cut the cloth using substantial shears that I keep for sail making.


We cut every piece out before sewing up the sail, each one carefully marked.

Then we stacked them on the table, ready for sewing. Unfortunately, Alan needed to leave at this stage, so missed out on the sewing (and frequent unpicking!) stage.
I started with the bottom panel, the one next to the boom. I made my first mistake here, believing I could do as David does, and have the boom in a pocket. However, due to the more conventional way in which I rig my lazyjacks, and also due to my being so short, I have to have them adjustable so that I can work on the sail, I ended up taking it off again. Instead I added adding tabs to the foot of the sail and laced it to the boom.
With the Christmas holidays imminent, I thought I'd better arrange for my mast to be stepped. A local engineer, Bruce Yovich, has a tiny crane, and he has stepped and unstepped my masts (and those of other junkies) before, for a fraction of the price of the big cranes. (One of the strange aspects of NZ boating life is how few yacht clubs and boatyards have their own crane for stepping masts.) I was pleased that I had contacted him when he told me that he planned to be on holiday from just before Christmas until the end of January! He promised to come and step the mast the following afternoon. I dropped sailmaking, asked a couple of people to help me move the mast and got everything ready.

A fellow customer of All Marine, who is also building a boat, had been chatting to Paul, who works there. When he heard about my project, he asked Paul to give me a facsimile Chinese coin to put under the mast, so I put it alongside a New Zealand $1 coin surrounded by the anti-chafe plastic that goes between the mast and the tabernacle. It was such a kind thought, and it felt like double luck for my little boat!

Alan had helped me dress the mast, so it was quite straightforward putting it in its tabernacle.

With the mast stepped, I felt that the end was definitely in sight. FanShi was now indubitably a finished boat. After all, plenty of people who build their own boats, go along to and have their sails made by professional sailmakers! However, I still had mine to get completed.

Arne Kverneland of the JRA, suggests stapling seams, tabling (hems), etc together before sewing. A lot of people use 'basting tape' - a thin, double-sided tape, popular with sailmakers - but I have found that (a) it doesn't stick that well to fabrics such as Sunbrella, which are a lot less smooth than polyester sail cloth and (b) if it does stick, it's very difficult to get off again, should you put two bits of fabric together the wrong way (which I do constantly, in spite of all the graffiti). Moreover, it's quite expensive and tends to gum up the needle. Arne's idea is simply brilliant. (Anyone interested in building themselves a sail for a junk-rigged boat is strongly recommended going to www.junkrigassociation.org and scrolling down the left-hand side to Junk Information/Public Domain File By .../Arne Kverneland. There is a wealth of information here, which makes the whole business seem very achievable.)

The sharp-eyed will have noticed in earlier photographs, a much larger sewing machine on the table and may well be thinking that my mantra "Small is Beautiful, Lees is More" has been taken to ridiculous extremes by replacing the commercial machine with the little domestic sewing machine in this photograph. In fact, I had been so impressed with its wonderful ease of use, when sewing the polyurethane-coated fabric for the seat covers (which the big commercial machine didn't get on with), that I'd decided to use it as much as possible on the sail. I found it a lot more controllable than the big machine which easily runs away with me.

I don't believe that junk sails require a lot of reinforcing in the corners, but can see no harm in beefing them up a little. Phil, who runs UK Sails in Whangarei, had given me an offcut of a jib he had been altering, and I used this polyester sailcloth in the corners. It is a lot stronger and more stable than the Weathermax. I covered the polyester with Weathermax to protect it from UV and because it looks more attractive. At around 10 or 12 ozs, I thought the sailcloth would be too much for my wee machine, but it pushed the needle through without hesitation. In fact I ended up doing the whole sail on the Brother machine.

When the panels had all been sewn together, I took the sail out and laid it on the grass to see what it looked like. To be honest, a cambered sail just looks like it needs a good iron, so it didn't really tell me a lot!
I then took it back into the shed to add webbing all round the edges and to sew on the various tabs for lacing the sail. I had decided to avoid metal fittings as far as possible.

The sail is attached to the yard with straps of Weathermax, sailcloth, and Velcro. (No critical comments, please. I have thought about this a lot, am well aware of the various reasons why it may not work, but fancied trying out the idea.) I reckoned that attaching these to the sail was going to be a real challenge for the Brother, so changed up a needle size. It certainly baulked at the task, but oddly it was now reluctant to sew what it had sewn before. Against all the rules and all my experience, I decided to experiment with a needle a size down from what I had been using. The little machine proceeded to punch its way through Weathermax, sailcloth, Velcro and the webbing tabling with barely a stutter. I am seriously impressed with this machine and would say the only drawback of using it is that it is so diminutive it was a bit of a squeeze getting the cloth under the arm. However, a great advantage it has over the big machine is that you can raise the presser foot extra high to get a thick pile of fabric into place, which was a godsend.

Finally, the sail was finished, the battens pushed into their pockets and the yard and boom lashed into place. One more sewing job remained: the pramhood.

I have made one of these before, for Paul's La Chica. I remember it being very difficult and that I was not exactly proud of the result, so I decided to try making a pattern first. Because the framework is not really all that it should be and the tubes are much thicker than I would have chosen, I knew it was going to be even more of a challenge than Paul's.

I used an old sheet as my pattern and spent quite a lot of time making the three panels. I used each one as a guide to the next. Although they are really quite different, they were sufficiently similar that it was easier than starting from scratch each time.

I then laid the bits of sheet on the Weathermax and cut it out. I still needed to do quite a bit of fitting to get the cover looking acceptable, not in the least because the framework isn't quite symmetrical. However, I was not displeased with the final result. I forgot to take a photo, but it can be seen on the boat in later photographs.

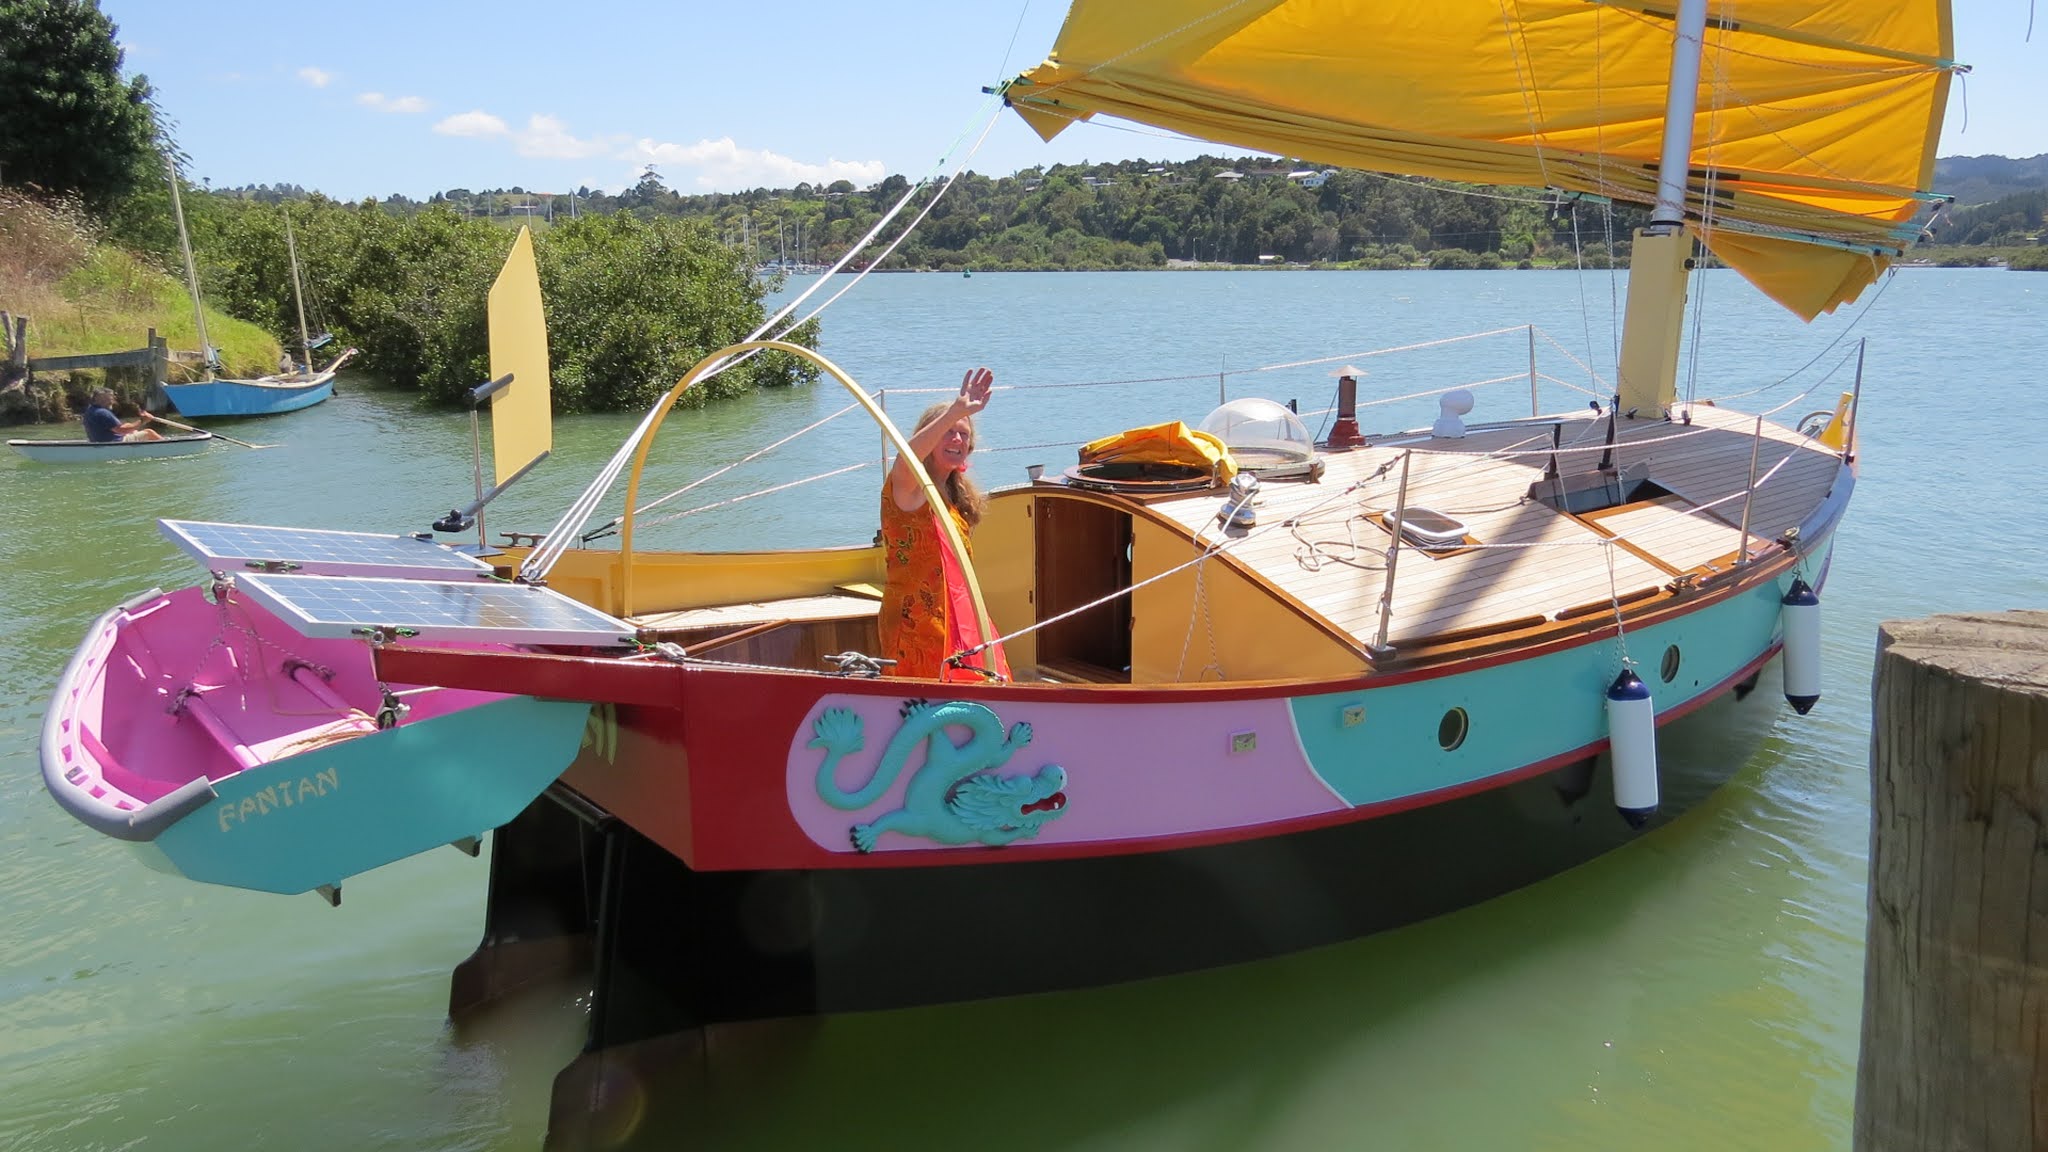
A friend helped me to get the sail onto the boat and at first light on the calm morning that followed, I slowly bent it onto the boat. This is the first photo before many of the control and standing lines have been fitted. It took several attemtps to finish the job, because the sail had to come down as soon as there was any breeze. That was the final major job on the boat: I still needed to give the dinghy a refit and there were the usual 101 tasks that needed attending to, but at least I could go and confirm with the slipway team that I would be ready for the boat to be launched on 15th January.

On the afternoon of the 14th, the yard brought round the machinery for moving FanShi to her final place ashore, ready for splashing the following day.

You'd have to say she looked a bit bewildered by what was happening!

It was exciting to walk alongside her as she was towed along the track towards the slipway - it was the first time I had been able to step back, walk around her and spend some time looking at her from all angles. I was very pleased with my quirky little boat, and, while I can see all the mistakes that I made and all the things I could have done better, there is enormous satisfaction in realising what I have achieved.
 At last FanShi had moved within sight of the water and was ready to be launched. Rather than put credits on all the photos that follow, I'll mention the photographers' names here. Many, many thanks to Heather Brown, John Gibbs, Roger Scott and Paul Thompson, for not only taking the photos, but for having the patience to send them to me, while I've been anchored with a poor signal (and my primitive devices!)
Launching day dawned sunny and calm: exactly what I would have asked for. Friends had suggested I start the outboard motor which, as is the nature of the beasts, decided not to go. David and then John came and worked their magic on it, nobly getting grease on their clean hands to sort out its issues. Quite a crowd had gathered and I was more than a little embarrassed to keep everybody waiting.

Finally, however, we were ready and I climbed down the ladder for the last time.

Slowly and gently, the cradle was eased towards the water.

It is traditional for junks to launch bows first, and the yard (and slipway team!) had kindly indulged my whim on this. FanShi appeared to look at the water somewhat apprehensively as if she wondered just what was expected of her.


I climbed on board before she went too far.

I love this photograph of the boat from astern, waiting for her bow to lift.

Now was the time for the champagne. David, who designed SibLim, had sent me some local New Zealand Deutz bubbles with which to launch the boat. I'm sure he must have been so upset not to be there, but sadly, the Covid pandemic made that impossible. However, one of my friends sent him a video as soon as we floated, so at least he was almost there. I gave a little dedication to the boat, and thanked all my friends, but cut it short before I burst into tears. The bottle opened with a satisfying pop and (small) gush of foam and I poured a little of the champage over FanShi's eyes, so that she can see where she is going and keep us both out of trouble.

Then willing hands took hold of the warps and led her alongside the small wharf.

I grabbed fenders out of the locker and we tied alongiside for a while, so that I could talk to all those people who had come without boats and wouldn't be joining us on the water.

The champagne was passed around like a loving cup, with all of us reminded of how lucky we were to be able to celebrate this way in a time of Covid.

From the far side of the slipway I could see how she floated - only a little bit down on her marks.
I had duly started the engine again, but there was a light breeze from astern and a handy anchorage directly ahead. It seemd a shame to spoil everything with all that noise.
So, saying goodby to the last of the shore party, I hoisted up a few panels of sail and took FanShi out to anchor (To be perfectly honest, I felt a lot more confident of sailing her out than motoring her out!)

She slipped along with a somewhat startling burst of speed and I was glad I had been so conservative with the sail I had raised!

I had both boards down, knowing that I would have to turn in a hurry.

She turned on a sixpence and within a few minutes both anchor and sail were down. FanShi was finally launched and afloat.

After enjoying (but in truth, not really taking in) the fact that we were finally afloat, I went to join many of my other friends on Le Canard Bleu, where we celebrated finally seeing the FanShi floating and ready to set sail.
My thanks to all of those who helped me in this project. I won't name them here, in a public blog - you know who you are and you know that without your moral and occasionally, physical support, I would never have succeeded. Another chapter of my life has ended, but I hope there will be many more pages in this book.
Congratulations Annie on a wonderful outcome to such an intensive and challenging undertaking. And many thanks for sharing the journey with those of us priveliged to watch with keen interest and deep admiration. I trust that this will be not an end but an exciting beginning for you, Fanshi and your amazing community of friends and companions. With best wishes for your future adventures.
ReplyDeleteMany congratulations Annie. And thank you for documenting the journey so thoroughly and engagingly. It’s been fascinating to follow and has brought to life technical topics that I’d previously lacked the gumption to engage with. I’m particularly impressed by the tabernacle, and see that you came up with a design for a mast collar about which the mast can pivot.
ReplyDeleteI hope you have much pleasure in your future cruising.
Kind regards,
Pete
Leeds, UK
Hey Annie,
ReplyDeleteCongratulations to you and FanShi!
What a beautiful vessel you've crafted... a lovely reflection of her builder. May she bear you in safety wherever your dreams beckon.
Fair winds and reasonable seas,
Dave and Anke
Thank you all for your kind comments. Believe me, one month later and it has been all worth while. The past 5 years now seem like no time at all and there is so much to look forward to.
ReplyDelete