Anyway, once I had the deckliner fitted in the forecabin, it needed trim putting up. This was essentially to hide the less than perfect joints: it's not easy manhandling large sheets of floppy plywood, trying to fit them to a pretty extreme camber and end up with gaps that you are happy for people to see. Now that I have plenty of kauri, I can make the 'mouldings' that I want. Just as well considering that the forward one snapped in the middle just as I was fitting it. The photo shows all this trim on the table being coated, but I should not have coated the forward one: the epoxy stiffened it up too much.
This is the quadrant at the after end, being trial fitted and the photo gives some idea of the camber.
Next job: to put the plywood around the tabernacle to reinforce the deck. I made the first two pieces out of 6mm ply, which wasn't such a good move because of trying to force it down to the camber, with relatively little to screw to and nothing to clamp to. This is the first piece, coated underneath, sanded and ready to glue. I decided to use offcuts from the 4mm deckliner for the rest of the reinforcing - there's heaps of it, anyway.
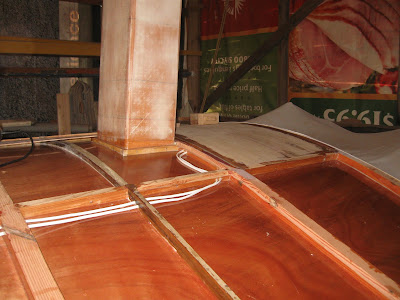
The 6mm ply is down forward of the mast and you can see wires leading from it, going back to the switch panel in fact. I thought long and hard about this: when the wires corrode, as they eventually will, I won't be able to pull them out and replace them. However, the alternative is to run them visibly inside the boat (David's clever idea of how to run the cables didn't work in practice). I've decided to keep them invisible for the moment and when they do corrode away, then I'll run them inside the boat, with some sort of disguise. And who knows - maybe I'll be dead before they do, in which case it will be someone else's problem!
SibLim Club members, Rob and Maren gave me a roll of foil-backed foam insulation, left home from their house build, some time ago, and I'm putting this between the two layers of deck. It doesn't show very well in the photo, unfortunately. You can also see the 4mm piece of ply I'm about to fit on the deck.
On the port side now, with the reinforcing being fitted around the tabernacle. I've finally found plywood thin enough to staple - just like the Gougeon Bros recommend!
Back into the saloon and getting the back rest sorted. I decided on 590mm because that's (for some reason) what David and I chose more moons ago than I care to think. So here it is set up to cut using my latest toy, the most wonderful battery powered 150mm circular saw. Every girl should have one!
And here is the backrest in place. Notice anything? Yup, it looks way too high and interferes with the port hole. So off I go to the Internet, to some magazines, to my sailing and boatbuilding books and look at everybody else's back rests. I would say that 450mm is much more usual than 590, so that's what I'll go for. Of course, somehow I've got to deal with the fact that the kauri 'tongue and groove' on the after bulkhead (to save **** weight) doesn't go down far enough now. This tiny bit of weight saving has caused me heaps of grief - quite apart from finishing in the wrong place again, it's awkward to work round. Let me suggest to anyone thinking of going for this effect, to cover the whole damn bulkhead in the panelling and forget about the 300 grams of extra weight.
Meanwhile, I'm working on the deckliner in the heads. Here's the port panel cut and coated on one side. Small and rectangular - what a joy!


