Search This Blog

Badger

Badger
In Greenland

Iron Bark

Iron Bark
Under full sail

Fantail

Fantail
At Russell Boating Club's Tall Ships Regatta

Blue Water Medal

Blue Water Medal
Blue Water Medal

Books By Annie Hill

  • Brazil and Beyond
  • Voyaging on a Small Income
Showing posts with label SibLim Club. Show all posts

17 June, 2018

Three jobs at once

In theory, the boat should be coming along in leaps and bounds: I have three jobs I'm working on at present (a) reinforcing the deck around the tabernacle (b) fitting the deck liner in the heads (c) the saloon.  Obviously when something has glue or paint hardening in one place, I can get on with something else.  However, Life, as so often, has been getting in the way, and if it's not JRA stuff, it's long emails around selling Oryx, long phone calls to friends about Stuff, birthdays, visitors (nearly always welcome), a launching to attend (lucky devil) and so on.  Most of this is great fun, but it can get frustrating when I feel like I'm on a roll and then I have also to deal with tools breaking down and needing replacing, plywood to be bought or just the usual day to day cooking, cleaning, washing, etc, etc.  Whinge, whinge.  My apologies, but maybe it helps explain why I haven't blogged for so long.

 Anyway, once I had the deckliner fitted in the forecabin, it needed trim putting up.  This was essentially to hide the less than perfect joints: it's not easy manhandling large sheets of floppy plywood, trying to fit them to a pretty extreme camber and end up with gaps that you are happy for people to see.  Now that I have plenty of kauri, I can make the 'mouldings' that I want.  Just as well considering that the forward one snapped in the middle just as I was fitting it.  The photo shows all this trim on the table being coated, but I should not have coated the forward one: the epoxy stiffened it up too much.

 This is the quadrant at the after end, being trial fitted and the photo gives some idea of the camber.

 Here are all the bits of trim varnished and in place - including the wretched bit of quadrant on the forward bulkhead, which I ended up varnishing in situ.  When the deckhead was finally in place, it looked like the inside of an igloo and I wondered if I'd made a big mistake.  I'm not fond of acres of paint, in truth, but all this white paint is to keep the interior of the boat light.  However, the bits of trim made a huge difference to the overall appearance and it's quite acceptable now.


 Next job: to put the plywood around the tabernacle to reinforce the deck.  I made the first two pieces out of 6mm ply, which wasn't such a good move because of trying to force it down to the camber, with relatively little to screw to and nothing to clamp to. This is the first piece, coated underneath, sanded and ready to glue.  I decided to use offcuts from the 4mm deckliner for the rest of the reinforcing - there's heaps of it, anyway.

The 6mm ply is down forward of the mast and you can see wires leading from it, going back to the switch panel in fact.  I thought long and hard about this: when the wires corrode, as they eventually will, I won't be able to pull them out and replace them.  However, the alternative is to run them visibly inside the boat (David's clever idea of how to run the cables didn't work in practice).  I've decided to keep them invisible for the moment and when they do corrode away, then I'll run them inside the boat, with some sort of disguise.  And who knows - maybe I'll be dead before they do, in which case it will be someone else's problem!

SibLim Club members, Rob and Maren gave me a roll of foil-backed foam insulation, left home from their house build, some time ago, and I'm putting this between the two layers of deck.  It doesn't show very well in the photo, unfortunately.  You can also see the 4mm piece of ply I'm about to fit on the deck.

On the port side now, with the reinforcing being fitted around the tabernacle.  I've finally found plywood thin enough to staple - just like the Gougeon Bros recommend!

 Back into the saloon and getting the back rest sorted.  I decided on 590mm  because that's (for some reason) what David and I chose more moons ago than I care to think.  So here it is set up to cut using my latest toy, the most wonderful battery powered 150mm circular saw.  Every girl should have one!

 
 And here is the backrest in place.  Notice anything?  Yup, it looks way too high and interferes with the port hole.  So off I go to the Internet, to some magazines, to my sailing and boatbuilding books and look at everybody else's back rests.  I would say that 450mm is much more usual than 590, so that's what I'll go for.  Of course, somehow I've got to deal with the fact that the kauri 'tongue and groove' on the after bulkhead (to save **** weight) doesn't go down far enough now.  This tiny bit of weight saving has caused me heaps of grief - quite apart from finishing in the wrong place again, it's awkward to work round.  Let me suggest to anyone thinking of going for this effect, to cover the whole damn bulkhead in the panelling and forget about the 300 grams of extra weight.

 Meanwhile, I'm working on the deckliner in the heads.  Here's the port panel cut and coated on one side. Small and rectangular - what a joy!


01 April, 2018

Recycling wood

I was very lucky, at the start of this project, to acquire a pile of kauri, which had originally been milled for cold-moulding.  This is what I've been using to panel the bulkheads, and make the doors, etc. Along the way, I've managed to acquire some more, but it's not easy.  The reason that it's not easy is that the magnificent kauri forests that covered the north of North Island, when the British settlers arrived here, were swiftly cut down and the large trees - which can grow to tremendous size, almost entirely eradicated.  (You can see photos, and read about one of these remaining giants, here.)  The trees are now protected and you need permission to cut one down (although this is too often either given or ignored), which makes buying the timber difficult.  My good luck is holding however: as I mentioned earlier, my friend Gordie has been preparing his mother's house to sell, and stored underneath was a pile of kauri cladding, some of which came my way.

Covered in old paint and the dust of ages, it was less than prepossessing, but it has cleaned up beautifully.  Because of the lead in the old paint, a full-face respirator was needed - unpleasant in hot weather.  However, JRA membership secretary, Linda, who is presently visiting NZ, wanted to join the SibLim Club, so valiantly donned the mask and cleaned up some of the boards for me.

 The paint generally came off easily, but some green paint underneath, was quite stubborn.  However, when I took to it with the random-orbit sander, I could remove it with no problems.

The reason for getting some of this cleaned up is that it should be perfect for making the small fore and aft bulkheads I am installing by the companionway. One of the drawbacks of putting bilge boards in a small boat is that it pushes all the accommodation that much further aft.  However, the anchor tackle on this boat is as heavy as I can handle, so this is a compromise I have to work round.  If you happen to be running with the washboards open, a dollop of water can land on the settee or the cooker, which is something I would prefer to avoid.  Rain can also pour in when you are having to go in and out to check on the chart, etc.  I would prefer for this not to happen, so am installing these bulkheads to prevent it.

 I put down an almost full sheet of plywood in the galley/saloon area, so the first thing I had to do was cut this to fit.  I plan to install a grating between these bulkheads to catch drips from oilskins, etc, which made things easier.

 The now-cleaned boards of kauri were fitted one at a time, with a lap cut in the edges of each one to join them together.

 Here you can see where the lap has been cut.  You can also see that there are plenty of marks in the timber from its previous life.  Not the sort of thing that would be acceptable in a superyacht, but I like the idea of using recycled timber, so can live with these marks quite happily.

 When they were all cut out I dry fitted them, so that I could work out where the fore and aft deck stringers are to be fitted.

 The next job was to glue them up.  Noel, a well-known boatbuilder who fortunately works for Norsand and has an incredible collection of tools, once again kindly lent me some sash clamps for the job.  As well as pushing the joints together, the weight of the clamps tended to keep the bulkheads flat.  It's still occasionally getting very hot in the middle of the day, and even century-old kauri will start to move.

Once they were glued together, the holes and odd gap in the seam were filled with epoxy.  I drilled out some of the nail/screw holes and put kauri plugs in, so that they were less obtrusive.  It was a bit tricky to decide at what stage to do this: too many plugs in the bulkhead would look a bit odd, too.

 In the meantime, I have been fitting, routing, coating and preparing the framing for the deck, the reinforcing around the mast and the liner.

As well as the continuing task of getting the portholes polished up, so that I can install them. I really want to get these done soon, so that when I fit the deck liner in the forecabin, I can close it off from all the dust.


14 January, 2018

Happy New Year

 My apologies for not having blogged for a while, but Christmas, New Year and Tall Ships can all take their share of the blame.  And I did try to have a bit of a holiday in the holiday season! 

Our Tall Ships junket must have been the longest ever, starting well before the Tall Ships Regatta and, indeed, I believe that there are still junkies up there, sailing in company and socialising even as I write.  My own effort to join in was looking to be a disaster, when the car that I share broke down the day before.  A severe gale came along later in the day to give me a sleepless night, as I battened down the shed and then was kept awake by its shuddering through the night.  The Friday before Tall Ships dawned blowy and wet, but I caught a bus up to Opua, persuaded my kind friend, John, to collect me from the car ferry and arrived to find that conditions had moderated sufficiently for me to get out to Zebedee, where I had been offered a berth for the night.  He was the only boat I had the slightest chance of boarding, being in a more sheltered spot than most of the fleet!  Conditions moderated sufficiently for us to be joined by several other boats and the mandatory pre-Tall Ships Race dinner was enjoyed by all who managed to make it.

 The next day dawned bright, but breezy and I have to say I was less than enthusiastic about sailing around with a large group of other boats.  it may be a 'friendly' race, but people do get competitive ...

Roger Scott took some great photos and here is one of Zebedee and Blondie storming along before the start line.


We made a bad start, largely due to the fact that neither skipper Alan, nor helmsman, Annie, had bothered to pay a lot of attention to the instructions.  I reckoned my job was to point the boat as directed so lay the blame squarely on Alan's shoulders.  Our sole crew member was too busy watching the other boats to get involved until Alan asked her: "Just which beacon are we supposed to use?"  Hmm, we'd chosen the wrong one.  However, Zebedee took off in hot pursuit of the fleet and we slowly overhauled every single junk, bar Tystie (and we even got ahead of her for a while) leaving Alan ecstatic and me exhausted.  Zebedee is a bit of a brute, close-hauled in gusty conditions and insists that his mainsheet be eased before he will bear away in a gust, so that was Alan's job.  At one point it felt extremely hairy, with boats all round, rocks not far to windward, me desperately trying to leave boats enough room to windward and those to leeward desperately trying to get past us and clear.  Not really my cup to tea, I have to confess.

However, in due course, we were in less crowded conditions, and by watching another couple of canny boats ahead of us, I managed to avoid getting becalmed in the lee of Roberton Island.  That's when we overtook Tystie.  A tacking duel followed, in which we went faster and higher that she did on port, only to lose it all again on starboard.  Sadly for Alan, there was a lot more sailing on starboard than on port, but we still felt that Zebedee had done really well for himself.

 I stayed on for another day of socialising, while the rest of the junkies carried on having a perfectly wonderful time.  I gather there has been much sailing in company, visiting back and forth and blather about all things junk.  This is another of Roger's great photos of Zebedee sailing alongside Fantail, showing off the new sail that Bryan has made.

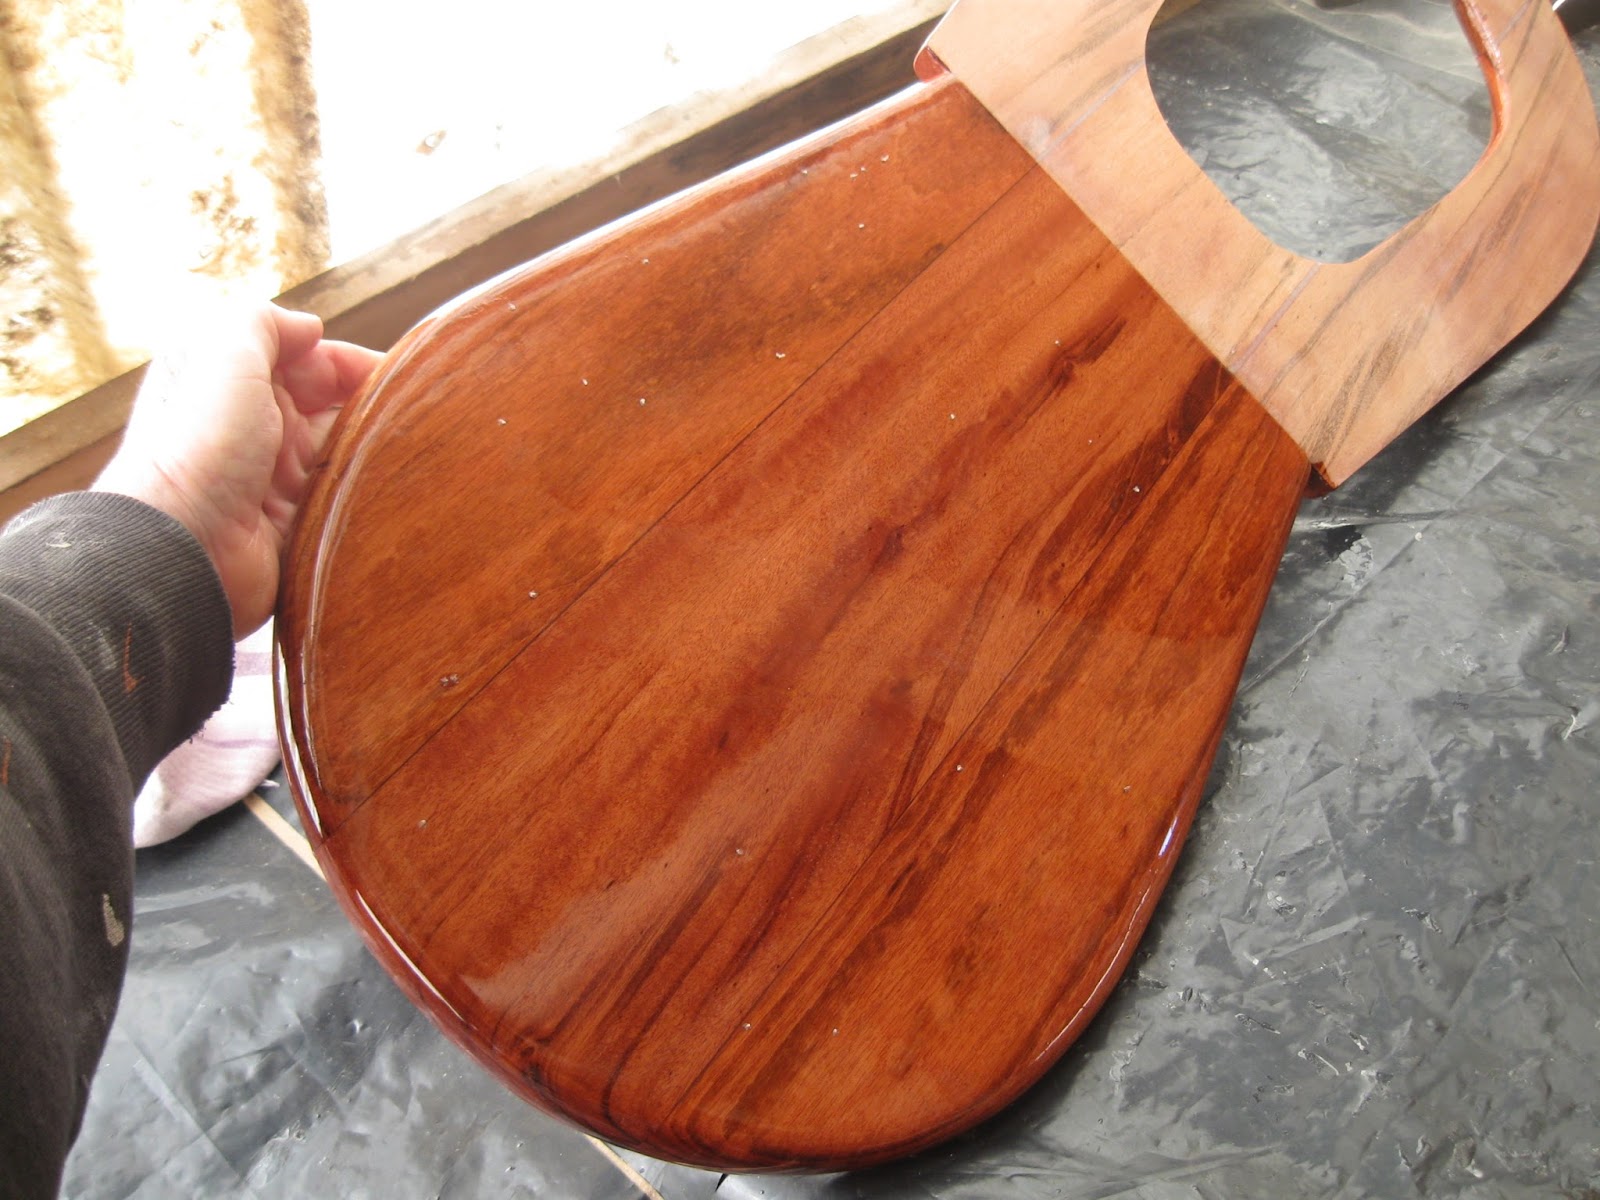
 Anyway, enough of fun and frivolity.  Back to the hard grind.  Just before Christmas, I finished varnishing the forecabin.  I confess to feeling very pleased with it!

 You may recall that back in the dim and distant past, I put the deck on, and anchor lockers in the foredeck.  Belatedly it occurred to me that the chain locker would hold chain and that the anchor would be on the bow and that the two would be connected.  Therefore, it might be a good idea if the chain could come out of the locker without the hatch needing to be open.  After pondering for a while on how to protect the woodwork, I went to Stanley's and bought a second-hand skin fitting for $5 and cut it in half.  It should do the job nicely.

  One of the jobs that I've been frankly terrified of doing, is cutting holes for the portholes.  If I put them in the wrong place, there would be no going back.

I had found a hole saw, the correct size for the cut-out (which struck me as a lucky break), but had also been put off by the dire warnings of the thing getting out of control while I was trying to saw the hole out.  Big, heavy powerful drills can be a handful for most men and can certainly do a lot of damage in my hands.  However, it had to be done, so I borrowed a more powerful battery drill than the one I own and set to.  Apart from taking a long time (I used the slow setting), it was pretty painless.


And the result was most satisfactory.

 This is what it looks like from on deck ...

And this is the view from below.  A red letter day, for me.

Another job that has been daunting me is fitting the deck beams.  This is another of those jobs that just has to be done correctly, otherwise I'll end up with an undulating deck.  Unfortunately for me, joinery is required in order for the beams to notch into the sheer clamp.  However, one of the things that I've learnt is that if I take something sufficiently slowly and carefully (one reason why this boat is taking so long) I can usually figure out how to get to where I want to.

 I marked the bulkhead, planed and then sanded it to match the beam (sending up prayers of thanks to whoever it was who invented gap-filling epoxy, which turns this bodger into a builder) and little by little got the beam, bulkhead, and sheer clamp to match.

 That done 'all' that remained was to glue it into place, with the assistance of clamps and temporary screws.

 Ah yes - I forgot to say that the reason I finally fit one of the deckbeams, was because I wanted to finish off the foredeck (apart from the bulwark capping) and couldn't do that unless the deck beam had been put in place.  With everything masked off, and after preparing the remaining deck box for painting, I set to.

 The first coat was applied with a brush, but when SibLim Club member, Phil, asked why I wasn't using a roller I decided to give it a go.  I'm not the best with these things, but have to say it went on quite nicely.  'But it takes a lot more paint than putting it on by brush,' I pointed out. ' Isn't that the idea?' he asked me.  Duh.

 While the paint dried, and with the bit in my teeth insofar as deckbeams are concerned, I added an extra batten of wood on the inside of the sheer clamps.

 These provide a landing for the inner deck liner, which ends up creating a stiffer deck.

 More framing will be required between the deckbeams and the stringers so the deck is supported and the deck liner has something to glue to.  Fitting that should be an interesting exercise ...

 Part of fitting the deck beams involves fitting the tabernacle.  Or the other way round if you prefer.  It will be a lot easier to sand and varnish it while it's horizontal than when it's in place.  Another job that can be carried out while paint hardens off.

 And while I'm at it, I need to decide what porthole goes where.  The glass is badly scratched in some of them, so I don't want those right next to my face when I'm sitting up in my bunk or in the saloon.  I may as well finish cleaning all of them up while I'm at it.

And here is the foredeck, with the final coat of paint applied.  Once it has cured a bit, I'll sand both it and the varnish down and apply clear finish over the lot.  This makes scrapes easier to repair, if they're not too deep and effectively seals the edge where paint and varnish meet.  When it all starts to look a bit scruffy, all that is required is to coat the lot with a couple of coats of clear polyurethane.  When this boat is launched, I hope to keep maintenance to a minimum!


17 December, 2017

With Christmas just around the corner

It's summer here, and everyone is feeling sociable, so I have had lots of visitors.  No problems - I like visitors, but feel guilty when they leave because I've been chatting instead of working.  Ah well plan like you'll live forever, but live like you'll die tomorrow is my motto!  Bertrand, of the SibLim Club, is presently anchored in the river, and members Mark and Phil are back from Oz.  Pete and Linda returned from their Pacific tour recently and plans are afoot from those lucky junkies with boats, as to when to assemble in the Bay of Islands for the Tall Ships.

 In the meantime, I've been plodding on in the forecabin. I removed the fiddle along the counter top and glued it back into place.  In spite of aligning it carefully, using a hand screwdriver very gingerly and - I thought - making sure that I found all the screw holes, I managed to get it in the wrong place, so it had to come off again and I had to scrape all the epoxy off before it kicked off.  (As it is now around 30C in the shed from about 1100 onwards, this had to be done in a hurry.)  The second time I rested it in position on clamps and that went so easily that I wondered why I hadn't thought of it before. I also fitted fiddles to the athwartships bookshelves.

 I then had to laminate up the fiddle for the bookshelf over the bunk.  The obvious thing was to use the existing one as a pattern, which was made easier due to the fact that I didn't want the new one to be as long.  I made it of two layers and it sprang back, so I then had to add a couple more to it.  These were thinner - I didn't want the fiddle to be too heavy - and they did a good job of locking the curve in.

 That done, I had to fit supports for it.  The shelf is of the right size for books like those the Mariners' Library (Rupert Hard-Davis), used to print.  Once the libraries had every book on their shelves, but now you rarely see them.  I keep hoping someone will bring them out as e-books - perfect for sailors with not too much space for books!

Then I fitted the little brass turnbuttons to stop drawers and doors falling out.  These could be considered an extravagance, but they do look nice and work very well.  Here's the locker with the turnbuttons in place.  I added little hemispheres of tigerwood to the drawers, which don't stick out as far as the fiddle.  This will also prevent the relatively soft kauri from getting marked from a heavy drawer leaning against the turnbutton and stop them sliding back and forth in irritating fashion as we roll down the Trade Winds.  (Yeah Right!)

 The big bookshelves were coated and you can see that there is room for Junks and Sampans.  I trust that there will be sufficient books to hide the bare plywood. I really didn't want to panel the section between the two shelves.  I can't wait to see them filled!

 The next job, which I think is the last one required to complete the fitting out of the forecabin, was to veneer the end grain of the plywood with a kauri 'clashing' (as it is apparently called here).  The first layers were a bit of a disaster, because although the wood was only about 2mm thick, it really didn't want to bend.  It caused a lot of frustration and bad language.

  Sawing some thin stuff off another piece of kauri that Marcus discovered in the wood pile and gave to me, sorted the issue.  For some reason, this wood was a lot more flexible.  And, it was long enough to go round in one length.

 While I was at it, I started on the saloon doorway, too.  By now I have the knack.  The first long length I put in, I - foolishly - precoated, with the result that epoxy got spread around all over the place.  The second one, I carefully coiled up, holding it together with masking tape.  By the time I got to the third one I had worked out to secure the end with masking tape and then to carefully unwind the strip of veneer, make loose loops of masking tape at each 'corner', so that it couldn't escape, but on the other hand could slide easily as it got taped into place.  There are still a few gaps, but hey - this is the 'country cottage look'!  It uses miles of masking tape!  I plane each one down with a teensy-weensy plane before putting on the next layer - just putting generous amounts of epoxy on the wood already in place.  (I can hear teeth being sucked, but it's not exactly structural.)

And while the glue has been kicking off, I've been doing The Big Sand.  Not a nice job: hot and noisy with sander and vacuum going full blast.  It's going to be 'fun' varnishing it all in these temperatures.  I have found that the only solution is to add lots of polyurethane thinners.  The manufacturers' chemists would probably weep at this comment, but from past experience, the coating doesn't seem adversely affected, although I suppose it must be.  I guess it's just so good anyway, that at even 70% efficiency, it's quite wonderful!

So once I've posted this - and sent out a few Christmas e-cards - I'd better get on with it.

03 September, 2017

Sometimes it's a juggle

One of my major challenges, building this boat, is being able to visualise things at all; visualising them so that I can successfully plan ahead is beyond me, so every now and then I have to 'modify' something I've made, because what comes after won't fit around it.  It wastes a bit of time and sometimes makes a mess, but I'm learning to shrug my shoulders and accept it.  We all have our limitations and it's no good ranting at myself about my inadequacies: it just makes me depressed.

I am almost finished in the heads.  (I keep saying this).  All those coats of paint ...

And here I am, busily applying yet more paint.  This is the little door that will allow access to the back of the switch panel.  Next to it is the lid of the composter, to which the seat will be glued.  With a composter, it is apparently better to have no air gap between the seat and the base, or the lid and the seat.  This discourages insects - not that I had any problem with this on Fantail.
 

 One of my favourite jobs is varnishing, and I have a good place on which to do it - a little workbench at scaffolding height, which is away from most of the dust and well lit from the 'clear-lights' on the side of the shed.

Marcus bumped into a bloke he used to work with, a few weeks ago, who said that he had heaps more wood than he needed now that he is semi-retired from his wood turning business.  We went and visited him and bought some nice lengths of kauri, which is the wood I've used for 'tongue and groove' on the bulkheads.  I'm just planing the edge to have a proper look at it.  Lovely stuff - for bookshelves, framing that is to be finished bright, etc.

I was delighted with the finish on the toilet seat lid, until I came back the next morning.  A heap of small flies had not only committed suicide on my varnish, but had spread out their wings to do so.  I suppose I'll have to sand it down again and revarnish.  Sigh.

I had to put in some filleting, and had surplus glue.  Finally, I remembered to bond the bollard and mooring cleat on the foredeck.  The bow rollers will have to wait - they stick out so far that it would make it a nuisance to get past.

While I had varnish in hand, I coated the bulkheads in the forecabin.  Because they had epoxy underneath, just two coats seem to have made a satisfactory job.  If they get too kicked about over the next months (years?) that I'm building, it's no big deal to put on another coat.  You can see that I had a little left over, which I applied to the bulkhead on the composter.

The starboard locker with its lower shelf fitted.  This shelf, from left to right, will hold the beer brewing barrel, the dirty clothes basket (hygiene freaks please ignore their proximity) and has holes for wiring to pass up from the battery, which will be under the cabin sole.  The access hatch is there to check for moisture in the bilge.  I intend to fit an inverter to the 'right hand' bulkhead and I suspect a box full of chargers, recyclable batteries, etc will end up there, too.  Or maybe the box of fuses, connectors etc.  No doubt it will all make order of itself when I moved on board.

With the lower shelf in, I could put in the fore-and-aft bulkhead and the little varnished shelf.  I fitted a piece of trim across the bottom, which is masked off for varnishing.  Thus far, I've resisted the temptation to put a fiddle on the shelf, which I feel would be likely to end up as a 'catch all'.  However, it would also be a handy place to put my mobile phone to charge, or my e-reader, or any of the 101 things one seems to acquire, these days which require charging.

One of the things I failed to consider, was a stringer/frame for the headliner in the heads.  The deck is to consist of teak, plywood, air gap, plywood and that final ply is to provide the headliner.  Marcus showed me how to set up the table saw to create a bevel on the wood, to match the bilgeboard box and to create a landing for the headliner.

Of course, it was all nicely painted, so I had to scrape off the paint in order to fit the stringer.  I made it a little over length so that I can saw it exactly flush with my Japanese saw.  A nice bit of cedar, courtesy of my friend Murray, provided these stringers.

This is the stringer in place before scraping and gluing.  A wedge of cedar will be required at the far left of the photo.

Because I had forgotten about the necessity of this stringer, fitting it on the port side was unnecessarily awkward.  I could get no tools in for screws or pins, but wedges and clamps between them did the job.

Here is a view of the starboard stringer, glued into place.

I thought it was about time we had a 'general view'.  At last those with sharp eyes can see a bit of a difference.  Paint, mainly! But the sheer clamp has been planed down amidships (with more than a little help from Marcus) in preparation for the deck beams.