I was, I think understandably, quite keen to get my teak decks laid; I still had interior trim, lights and hatch trim to fit, but I thought I'd do it 'when I had some spare time'. Whatever induced me to come up with this flight of whimsy, I wot not because, needless to say, there was no spare time. So, the teak was laid and the interior had not been touched. The first job in the cockpit is going to be fitting the bridgedeck. This is going to make going in and out of the cabin a lot less easy than it is now, so commonsense dictates that I get the interior completely finished before I commence work on the cockpit.
I still had some teak to lay - on the deck box lids, so decided to do that first, because they would need teak plugs and there were a few to be fitted on deck, too. Besides, my mind finds it difficult to move from one mode of building to another, so it seemed sensible to carry on with teak before I lost the thread, so to speak.
The deck is laminated, you may recall, from one layer of 6mm ply and one layer of 4mm. I doubted anything was going to be fitting to the nearest millimetre, so reckoned 9mm ply would be fine for the lids. These were duly cut out and coated.
Additional framing had to be added along the sides for the lids to land on. Much cogitating took place while I decided whether to hinge them inboard or outboard. Gordon, (
Tystie's new owner) mentioned that if they were hinged inboard, like his are, there is a possibility of stuff falling out of them, if you are heeled well over and have forgotten to fasten them down. Or so he has been told ... I decided put the hinges outboard, so this also required some more wood fitting around the boxes.
Then came the fun bit of fitting the teak.
While I was at it, I took some of the narrower stock (which will get used up in the cockpit) and trimmed along the edge of the cabin. I raised this to obtain a little more headroom, and as I want the (upper) rubbing strake to run in a fair line along the sheer, it can now run under the teak, which will be varnished. I trust it will all look as though it was intended from the start, when the boat is completed!
The deck box with the extra bits of wood fitted around it. Thank heavens for epoxy, is all I can say. It is so good for this sort of 'retrofitting', which would otherwise require high levels of joinery. I'm not quite sure how I could even fasten things together, if I were building conventionally.
Meanwhile, back on the bench, the deck boxes get their teak glued down ...
and then sanded smooth.
Then a 'dry fit' before sealing the edges. However, even I didn't find these too challenging to fit.
And for once, I didn't struggle with the (simplest in the world to fit) hinges.
What you may not have noticed, but I shall point them out to you in
case, are the 308 teak plugs that have been fitted in the screw holes. I
was astounded that I need so many!
I hope that the lids will rest at a slight angle against the guard rails. If they don't I shall have to make some sort of hook and eye arrangement to keep them in place.
OK, back to the interior. The piece of kauri is to hold the light fitting. It couldn't be put in place until the beading was fitted and so the wires have been sticking out of the bulkhead for what seems like months. (I tested them and was relieved to find that none of the zillion screws that went into my deck had cut through them!)
None of my kauri is long enough to go right across the cabin. The camber, as you will note, is pronounced and it is exceedingly difficult to force even these dinky bits of quadrant into place with out fastening them permanently. I am hoping that I can fit one properly and then cut the second accurately to length. I would reckon the odds at 10:1 at best!
Fitting the mounting for the lamp. The wiring isn't just hidden because I'm precious (although of course I am): it's hidden because there is no appropriate groove in the base of the lamp for it to run down. It's going to be fun and games when I finally come to fit it, I fear.
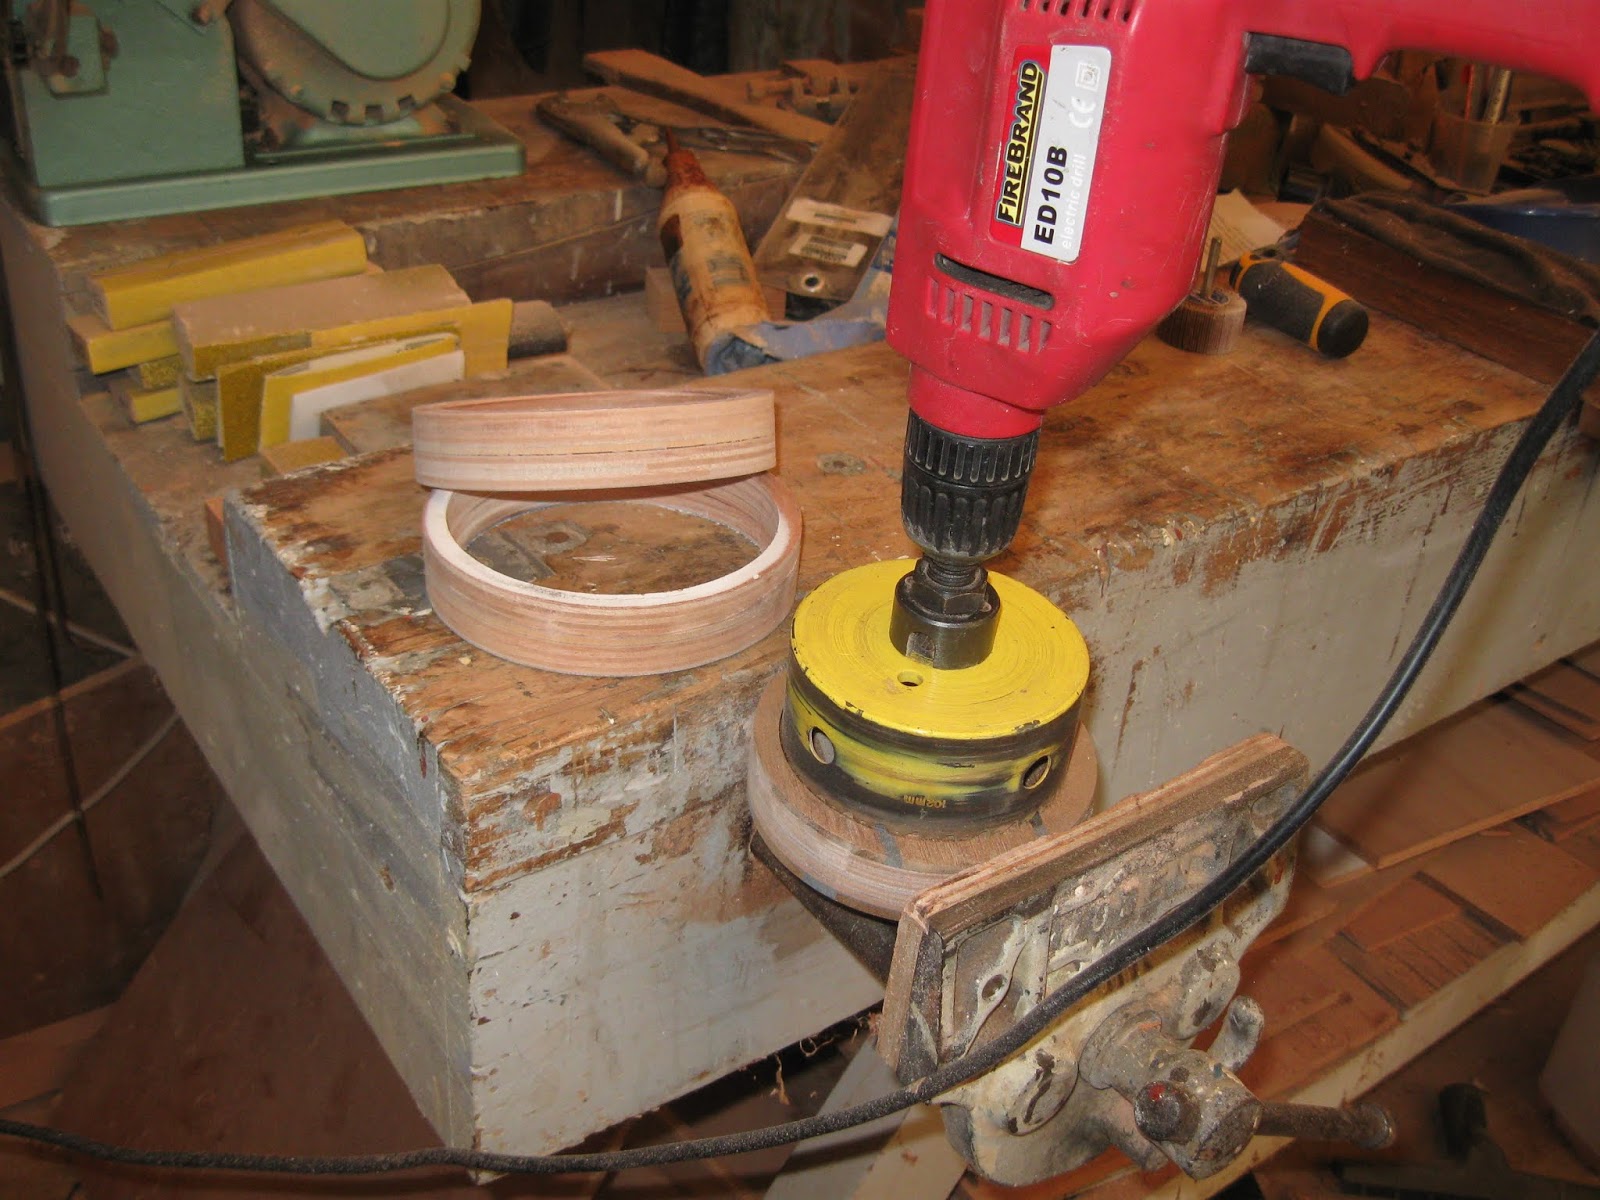
Meanwhile, interior trim will need to be fitted around exterior openings. The hatches are fitted, but still to go are a decklight over the heads, a dorade ventilator ditto and the big hole for the pram hood. The first two can be dealt with by using hole saws and I went and borrowed one for the decklight. It was intensely traumatic cutting a hole in my beautiful deck!
I had to go back and complete the job from inside.
All so that I can fit this.
Ah yes, another hole - I need one for the chimney for my wood burner. I thought the black lacked class, so have repainted a nice green.
The flue is to be made from copper downspout. Some teeth have been sucked about this being too thin. Time will tell, but the price was right, seeing as how the kind people in the shop found me a damaged length. Of course, it won't look nice and shiny like this once the fire has been lit.
Because the stove was built with the intention of fitting something totally different, the hole for the flue was a completely different size from the downspout. After much head scratching, I went into Whangarei to see if I could find some sort of reducer. To cut a long story short, with helpful people passing me along to other helpful people, finally a gentlemen called Carl lent me his dad's crimping tool, saying 'that's how we used to do it'. I managed well enough, even if I did have to use both hands and was right impressed with the result.
I reckoned I'd better fit the bit of copper that will be used to protect the bulkhead, while I was at it. Paul, at All Marine had the brilliant idea of using copper roves to provide for a nice wee air gap. I felt like a real boat builder, hammering in copper nails!
The +/- 150mm copper strip had been given to me, cut from a wider length. I could hardly plane it smooth, so took to it with a file: good enough, I think. (The reason is looks a funny colour is that it still has its plastic film over it.)
Before I can fit the wood burner, I have to light it to 'season' it as it were. The paint gives off fumes on the first occasion. Definitely a job for outdoors, fine weather and a calm day.