Search This Blog

Badger

Badger
In Greenland

Iron Bark

Iron Bark
Under full sail

Fantail

Fantail
At Russell Boating Club's Tall Ships Regatta

Blue Water Medal

Blue Water Medal
Blue Water Medal

Books By Annie Hill

  • Brazil and Beyond
  • Voyaging on a Small Income
Showing posts with label composting toilet. Show all posts

17 September, 2017

Finally, I can tick off the heads

Heaven knows, it's taken long enough.  I will offer the usual excuses of slow execution, much head scratching, one or two steps backwards and all those coats of paint, but finally, I've have completed the fit out in the heads compartment.  Which, let us not forget, included making the composting toilet, which took more googling and tooth sucking than actual work, it has to be said.

It is surprisingly difficult to get bronze fastenings any more.  No chandler had what I wanted, I tried emailing a company in NZ, but they never replied, and Jamestown Distributors, who advertise in Wooden Boat magazine, also failed to respond to my requests for information.  In the end, as I've already mentioned, I went to Classic Marine, who gave me their usual excellent service.
 
As well as the fastenings for the portholes, I'd ordered turnbuttons and 'automatic buttons', made by Daveys.  I love these natty little things, and they make strong catches.  The ones Daveys make come with a wee bush that keeps them away from the frame so that they swing easily.

Here are the doors, finally fitted in the starboard shelving.  As you can see, the frames protrude

so I made little bosses for them to sit on.  To do this I used a 44mm holesaw and cut them out of tiger wood.  They were cut in two just under the screw hole and then glued onto the framework just above the door.

On the port side is the locker which will hold my brewing barrel.  Although this will be stowed at the forward end, I decided to fit an 'automatic button' here in case the barrel works its way aft and leans against the door.  (The brass door fittings can be seen in a later photo.)

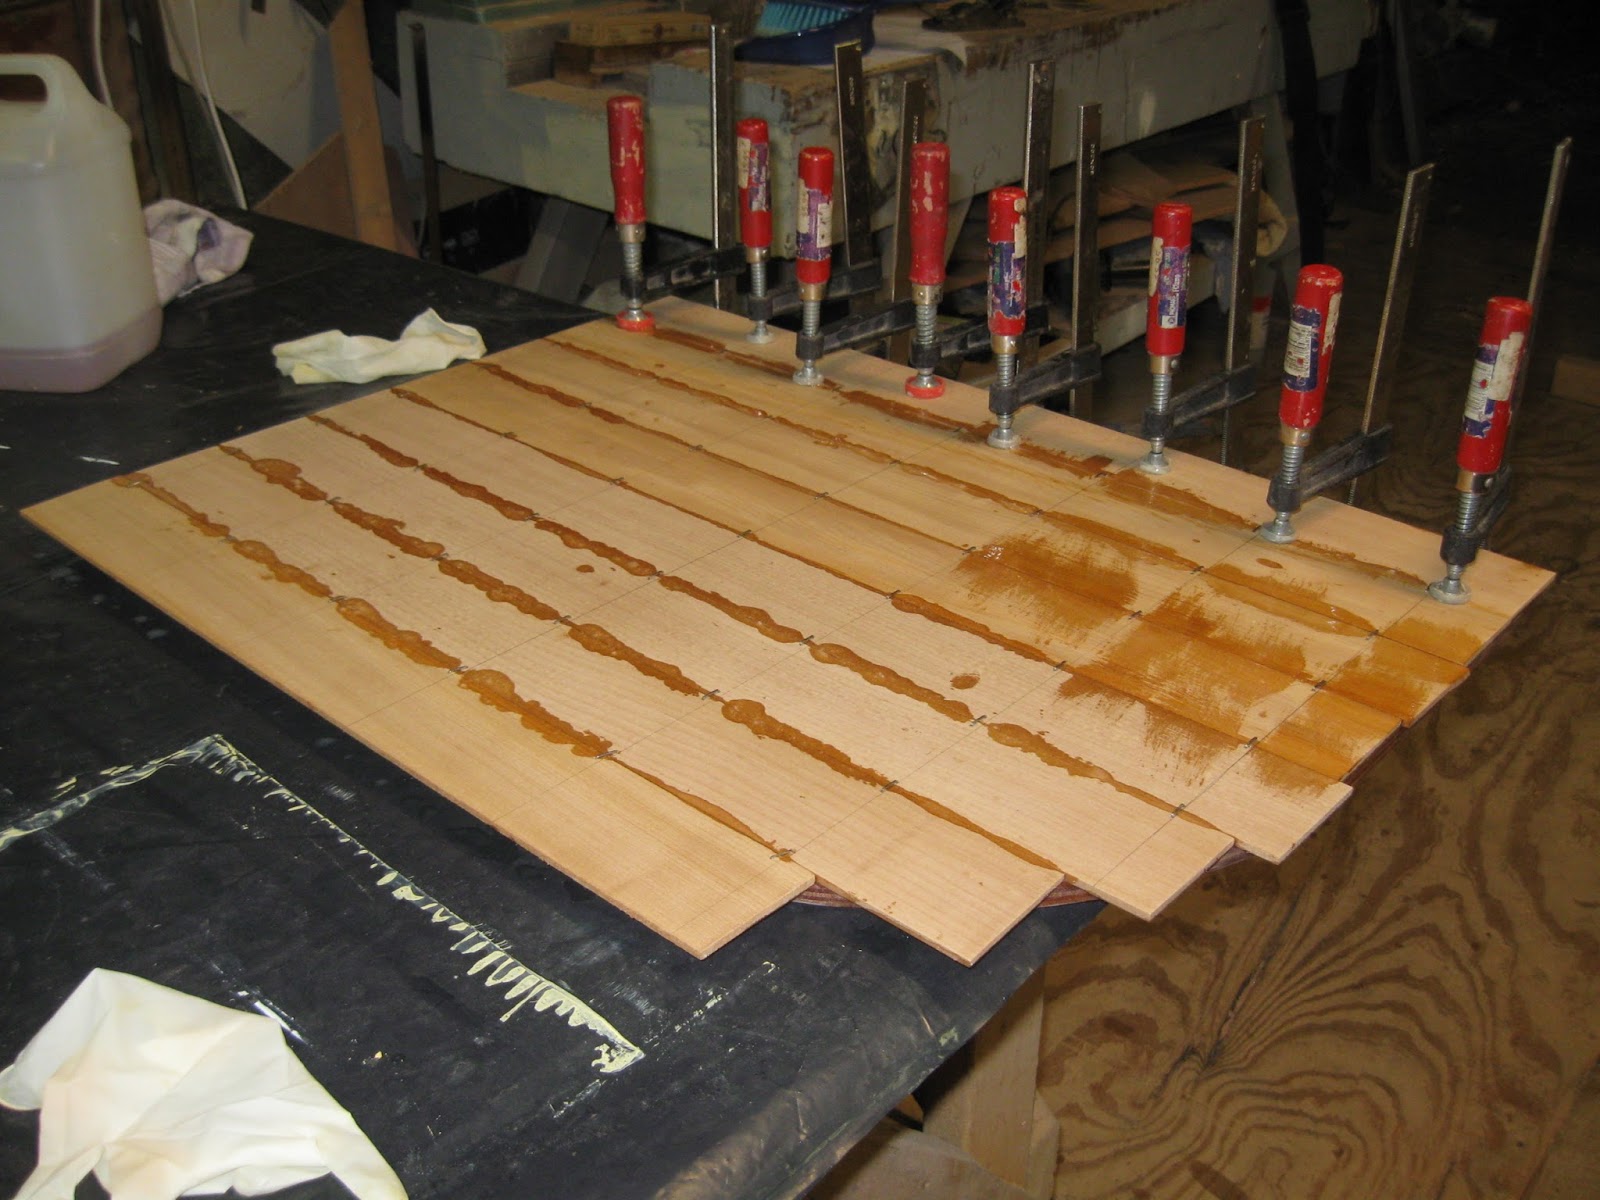
The next job was to fit the finishing wood on the cabin sole.  For this I used the tigerwood, sawn into 6mm veneer, 40mm wide.  It stiffens up the 12mm ply to at least as stiff as the 18mm most people would use.  I made, fitted and finished sanding it over four days, which I think is a reasonable investment of time for something that will require no more maintenance than the occasional clean.

I decided simply to use temporary screws and plug the holes after.  Sash clamps would have been the ideal way to hold the planks down flat, but I don't have any and screws were a quick and easy way of doing it.  Drilling plugs using a drill press doesn't take a lot of time and nor, for that matter, does putting them in.

There are two hatches in the sole area, so once I had fitted the planks, I predrilled some of the screw holes, so that everything would line up properly, and then took them down to glue up on a table.

By using washers between the screw head and the wood, I can make sure that there is minimal damage, which makes final finishing a lot faster.

I put all the plugs in with aliphatic PVA, which is a lot quicker and less messy than epoxy for this sort of job.  When the glue had cured, I used my multitool to cut them off.  This worked wonderfully well - made for the job!

Once I'd finished sanding it, I gave a quick skim along the edges to fair them off a little and soften the corner.

Personally, I think it all looks rather smart.  The framing around the doors (fitted to hide my wiggly jigsaw cuts) add a spurious air of quality, heightened by the 'automatic button'.

The tigerwood will quickly become redder - judging by the offcuts kicking around the shed -  and I think makes a pleasant contrast with the kauri.  You can see the finished composter and the catches on the starboard lockers here, too.

And here is the finished composter, showing the bucket. (I had to replace the orange with a black one: the orange one ended up about 5mm too high!)  The white under the seat is the diverter.


The switch panels were sitting around getting dusty, so I thought I might as well fit those, too.

All in all, I'm rather pleased with the whole thing and more than ready to move on with something else!!

20 August, 2017

Taking time off

I haven't posted recently because my last two Sundays have been taken up with my Enjoying Myself.  Shame on me.

A fortnight ago, it was my birthday, and friends Maren and Rob invited me for a birthday soiree, along with Marcus, Graeme and Roger - good friends and fellow junkies.  Maren greeted us with astonishingly strong cocktails, and I was given the chance of a long soak in a hot bath.  What a treat!  The rest of the afternoon and evening were spent eating, drinking and talking, while watching the sun set in the distance.  There is the most wonderful view over Whangarei Harbour from their house - ever changing and ever beautiful.  We all stayed the night, had a splendid brunch and sat around looking through the NZ JRA library, which is housed there.  Some lovely books about Chinese junks with great photographs.

Roger and Graeme came to view progress on SibLim on their way home, and by the time they left, I'd decided it was hardly worth doing any more.

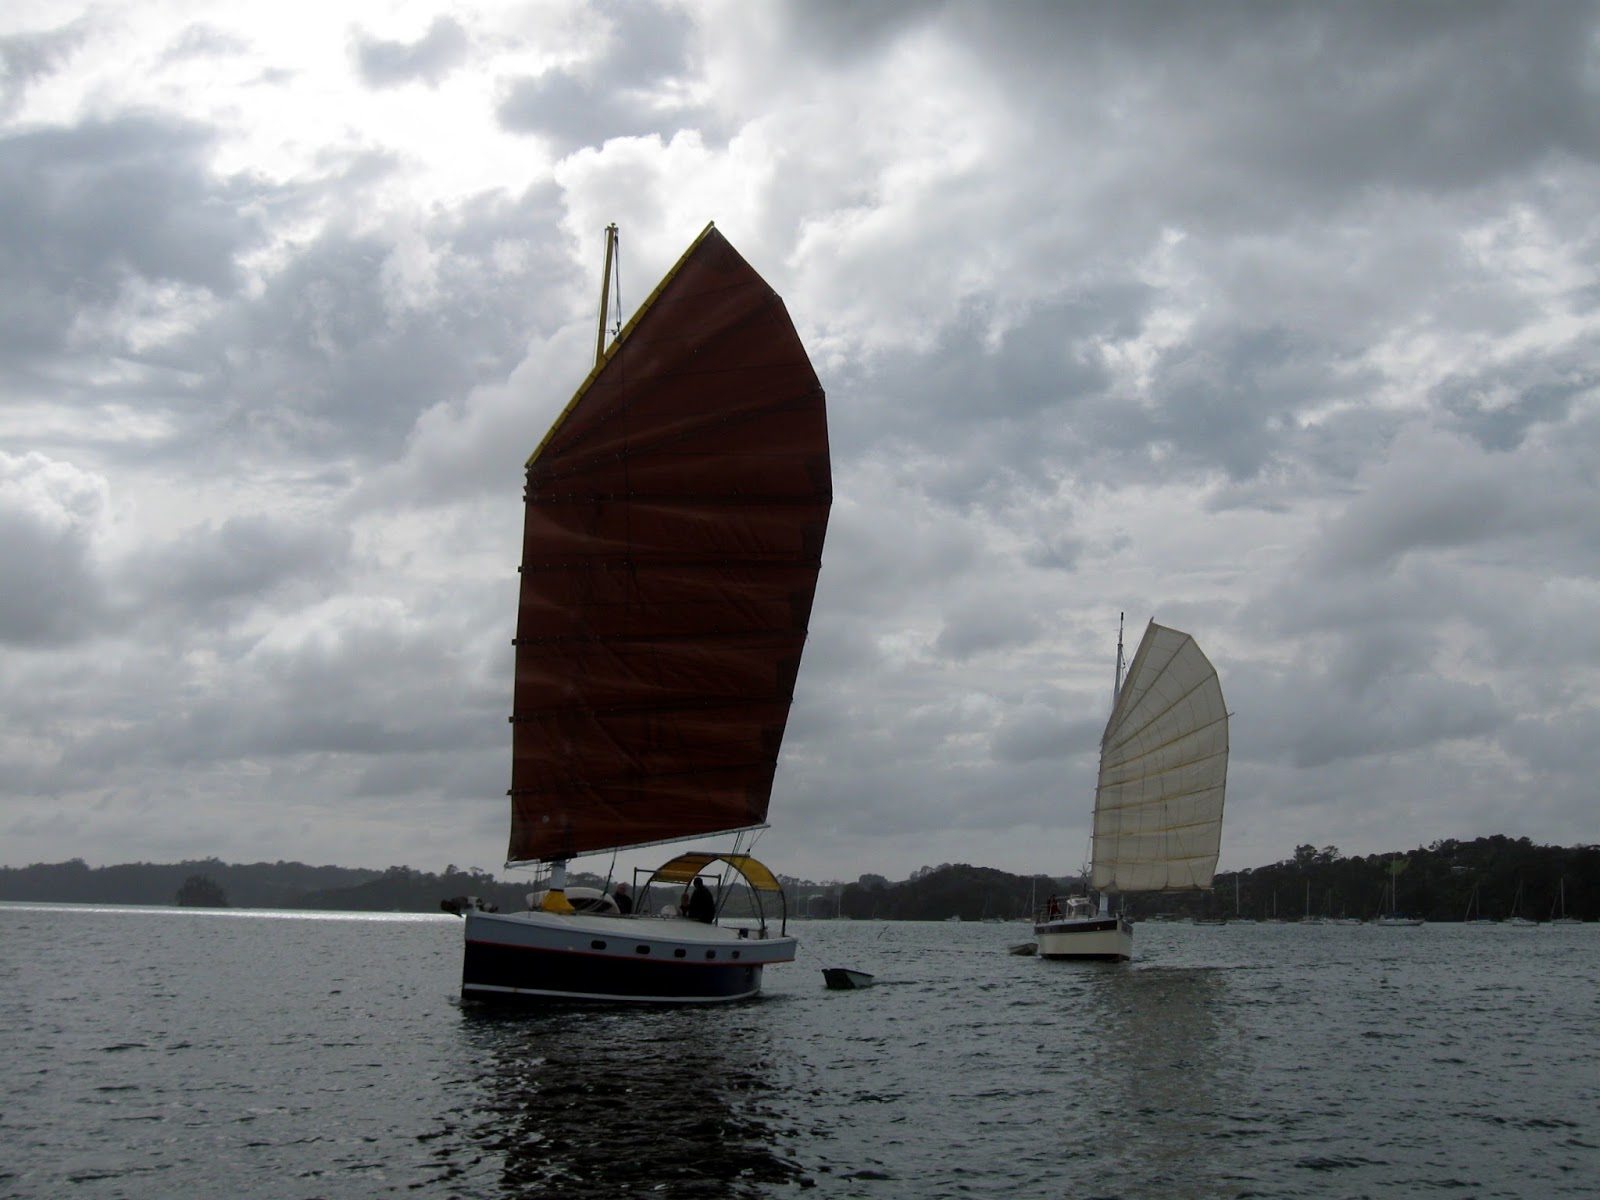
Last weekend saw the Winter junket.  A commendable four boats made it.  I was going to opt out, having done nothing the previous weekend, but was persuaded by the thought of Shoestring's wood burner.  Marcus and I towed Freebie down on a trailer and were joined at Scott's Landing, Mahurangi by Graeme.  By the time we'd rigged the boat, it was blowing great guns, and Marcus was more than happy that he had traded with Walter for Pacific Spray's 2 hp outboard, which drove us manfully over to where Shoestring lay comfortably anchored.  La Chica joined us some time later, and we all snugged down on Shoestring, with the fire burning away.  It was no day for sailing.

However, the next day dawned flat calm and we decided to go out and see if we could find some wind.

La Chica was first away and as she does astonishingly well in light winds, she soon headed away from us up the harbour.  Her weight lets her continue through the calm patches until she finds the next puff of wind.  Sadly, this may be the last time that La Chica will be attending one of our junkets.  Paul fitted her out meticulously, for a single-handed, non-stop circumnavigation, and having got her absolutely ready to go, decided against it.  His cat didn't fancy the idea, and he's come across his 'ideal boat', which is going to be for sale fairly soon - and likely to be snapped up if he isn't around.  All in all, he's decided to spend his time living on board and pottering around NZ, rather than being 'one man against the ocean'.  La Chica must be bitterly disappointed and is looking for a new owner.  She is, as they say, ready to go.  Just add water.  Anyone looking for an 'expedition vessel'?

The rest of us followed along behind.  Shoestring has been languishing for a while, awaiting a new mast.  Finally stepped a couple of months back, Roger has been getting back into the swing of sailing her.  She is using her original flat sail, while he decides what experiment to try next.  (The weedmat sail is being used in the garden, now.)  One of his experiments that interests me is the bamboo battens he is trying out.  They grow plentifully around here and in fact are a weed that people are often more than happy for you to remove.  So they are free - and they look wonderful. 
 
Footprints sailed over from her mooring to sail with us.  I was steering Shoestring, but I'm afraid I couldn't get her anywhere near her sistership when we were sailing to windward - admittedly in very light winds.  However, the wind picked up a bit later and we did better.  Turning back down the harbour the two boats were much better matched with a free wind.  David is an excellent helmsman and knows his boat well.  She sails like a witch.

We all sailed back to anchor again, and foregathered on La Chica for an hour or so, before Marcus, Graeme and I sailed Freebie back to her trailer.  This photo is taken from Freebie showing his bamboo batten: they were thrown into the sail in April with no preparation and still going strong!


Back to SibLim. 

I had made a kit of parts for the starboard side of the heads.  'All' that is required is to put a total of four coats of paint on.  Each side of most of those pieces.  I have had second thoughts about painting inside the lockers - it all takes so long - but thus far I'm sticking to my resolve to do so.


 I had been putting off capping the plywood on the little bulkhead next to the composter, simply because I've never done anything like this before and was scared of making a hash of it.  However, I planed down some short lengths of kauri to the correct thickness and laminated them around the curve.  When the epoxy had gone off, I trimmed the excess and glued on straight pieces at either end. 


 I was very pleased with the result.  I put stainless steel staples in the first layer, to secure it so that it didn't slither about when I came to put on the second layer.  But masking tape held that in place with no problems.  And of course, epoxy is gap filling!

 To locate the panels of the composting toilet box, I used a hot glue gun to stick pieces of plywood to hold it in place.  They show up well in this photo.  I've found that it's worth covering them with packaging tape - the glue comes away easily and can be pulled carefully off the furniture.  If you glue directly to the wood chocks, the glue can sometimes stick so well to your finished surface as to damage it.

With as much of the composter glued into place as I could, I was ready to start painting.  It's much easier to get a decent finish, hand brushing two-part polyurethane on horizontal surfaces than vertical, so I'm doing as much as I can in advance.

Some of the bulkheads had already been primed, but there's still a lot of painting to do before the rest of the furniture can be installed.


Marcus found me some piano hinge, which I used to hinge the toilet seat and also to hinge the lid, which goes on the top of the composter.


One of the problems with doing all this painting, is that it somewhat takes over the workspace of the shed, meaning that somehow I have to work around it.  Although polyurethane soon becomes touch dry, I have to remember not to make dust until it does, and then to check to remove any dust before I paint.

I am going for a satin finish outside on bulkheads, deckhead, locker fronts, etc.  Not only will it look less stark, but it will somewhat disguise the paint strokes.

Forward of the electricity box is a small counter.  In theory, once the boat is wired up, that will be it, but should I need to do anything to the wiring, it will be good to be able to put down the necessary tools and work on the switch panels with everything to hand.  Gluing the wood together at least didn't create dust or require my big table.

There is still more paint to apply, but I'm hoping to start fitting everything in place, soon.

09 July, 2017

Fitting out in the heads compartment

There is a lot to be said for living in a boat shed: it's much more my type of place than a house, but it's not without its little issues.  I was annoyed a couple of weeks ago to discover that the resident rat had broken our accord, which was that s/he stayed down in the boat shed and I had my 'flat' to myself.  When the invasion continued, I reluctantly set a trap.  It was sprung twice, but the rat escaped each time.  However, it apparently decided it was unwelcome and appears to have left.

Then I realised that I might have done it an injustice.  I had seen the rat, but Somebody Else was invading my space and attacking apples, carrots and potatoes.  But it was when it ate the persimmons I had just bought at the market, that I realised my visitor was a possum.  (These are introduced to New Zealand, predate on our defenceless native birds and trees and do untold damage.  They are completely out of control, have no natural predators and number in the millions.  Some of the early settlers had rocks in their heads.) Its calling cards were unmistakable.  So, muttering curses, I blocked off its access and thought that was that.  Well, it found some other weaknesses in my defences, so I spent a whole morning, crawling around in the corners of my living space, blocking and boarding up holes, cursing at the waste of time, the pee and poo it had left behind and the destruction of my fresh food.

This time I was entirely successful, but the possum was not at all amused and spent the night rampaging around, scratching and gnawing at my new additions and keeping me awake.  Surely, I thought to myself, it now realises it is wasting its time.  Apparently not because the next night it tried again. 


Now, the main reason that I'm a vegetarian is that I hate killing things, but after the best part of a week of broken nights, I decided that enough was enough.  I borrowed a possum trap and baited it with an apple - I was not going to give the brute another persimmon!  I was cooking my dinner when I heard the dreadful sound of the trap closing.  With some trepidation I looked out of the door and saw an empty trap.  I went down to reset it and saw that, sure enough, the possum had been tempted by the bait and had taken a bite before the trap sprung.  How it escaped, I don't know, but the story, really, has a happy ending.  The possum like the rat, decided it was no longer welcome and didn't come back.  So now I can sleep again and concentrate on building my boat! 

Since I last posted, I have been entirely involved in fitting out the heads.  The composting toilet has been somewhat altered and refined.  I'm very pleased with how the seat and lid have turned out, in the tigerwood.  I have coated
them with epoxy, as usual, and can see that the wood will look very handsome when varnished.  As I'm intending to use this on my bench tops, I'm very pleased that I took the plunge and invested in it. 

Tigerwood is one of these 'oily' woods that is purported to be difficult to glue.  However, I glued it up as I normally do and, after cutting out the shapes, tried destructive testing on what was left.  As I would have hoped, the wood broke rather than the glue, which was reassuring.


While the epoxy was hardening up, I went back and did some painting.  I had hoped one more coat would finish off the side of the bunk, but when the sun came out I could see that another coat is required.  I shall do it at the same time as I paint out the heads. 


My original thinking had been to have the heads compartment entirely white, because it will have little in the way of natural light.  But a bit of thought made me realise that the side of the toilet will get brushed past and kicked and will require constant cleaning, so I panelled it with thin pieces of kauri. 

I built it up quite high, so that I can lean up against it when we are sailing on port tack.  In this photo you can also see the fore-and-aft bulkhead that is going to form the locker front on the port side.

The other thing I discovered was that the design I was using for my toilet produced something that was far, far too large.  So I made it narrower, which also enlarged my locker.  It was too tall, as well, so I chucked out the water bottle I had been going to use.  I scratched around trying to find a container such as they sell flares in, but they are never around when you need them, so I bought one via the Internet instead. 
One of the good things about boatbuilding, is that there are always a number of rather mindless tasks that allows my mind to ponder how I'm going to do things.  I had long ago decided that the battery (I only need one, not having an inboard engine) was going to be situated in the heads area, together with the fuse panel.  (These are not pretty things and I can see no reason for sitting staring at one in the saloon). 

Having had to struggle with trying to work on wires at the back of switches on a number of occasions, I'm determined that my wiring is going to be both simple and accessible.  The switch panels are going to be attached to a piece of plywood that will hinge down and I decided it would be worth having a counter adjacent, to be able to put things down on when working on the electrics.  I want to ensure that the wires have a clean run up from the battery and that it will be easy to add more should I want to.  So I cut out a fore and aft bulkhead, with room for a counter at the forward end and made a door for the switch panels.

Both bulkheads were then coated.  The next step was to fit the shelves, which required a lot of taking off and putting on of the bulkhead framing, much work with a spirit level and more than a little cogitation as to what was going to be stored where.  My first plan was to put the beer barrel to port, but to make a shelf that it would sit on happily was going to waste too much space, so it's going to end up to starboard.  I need a space next to the toilet for the composting medium and reckon 250mm should suffice.
Working around this means that I end up with a pretty big locker.  There's a fairly narrow shelf at the bottom, which essentially just makes for a level surface, a large one above that and then a smaller, top shelf.  Because of the bilge board cases, the side of the boat generally goes the opposite way to what one is used to.
On the other side, I thought I'd come up with the perfect arrangement: beer brewing barrel, laundry basket and bulk storage of the composting material, making fantastic of a barrel I'd been offered.  Unfortunately, the latter fitted so perfectly that there is nowhere for the wires to run up from the battery, so regretfully I shall have to make another plan here.  But if anything, I have an embarrassment of locker space, so I don't think it will be an issue.

Before I can assemble all these various bits of joinery, I need to paint them, so I can see what I will be doing for the next week or so.


25 June, 2017

The Tabernacle, plus DIY composting toilet


Early in the piece, I decided that I wanted a tabernacle and David supported this idea.  The obvious reason for putting a junk mast in a tabernacle is that you can raise and lower it without the need for a crane: when the mast is stepped on the keel, getting it in or out is otherwise quite an issue.  It's not just a case of undoing the clasp and giving it a shove backwards, but if you position the boat securely - and in SibLim's case, firmly aground would be the secure spot of choice - and then find a suitable strong point, fairly high up, you can use a rope from the mast head to take the weight and lower it under some form of control.  For all that, it's not something I'm likely to undertake lightly.  However, there were - for me - two additional reasons for wanting a tabernacle.  The first is that a mast that goes through the deck can leak.  It doesn't have to, and indeed, it's rarely been an issue for me, but it can do and when it does it's very unpleasant with the likelihood of getting saltwater on my feather quilt - something that is frankly intolerable.  An unstayed mast needs to be keel stepped, but if you bury it firmly in a tabernacle that is keel stepped, you achieve the same ends, but as the tabernacle will never have to come out, it can be glued in at deck level and won't leak.  Point number one.  Point number two is that as I can't afford either the cost or the weight of a wooden mast, SibLim's mast will be made like Fantail's, with an alloy lower mast and a wooden upper one.  I don't like alloy: it's cold and unattractive.  However, the tabernacle could be build out of wood - indeed that would be the easiest way to build it and a nicely varnished tabernacle would be a thing of beauty in my forecabin.  And so it was decided.  That Pete should offer to come along and make me one was the icing on the cake.

BBS Timbers are a pleasure to deal with, there's no doubt about it and their wood is first-class.  I bought the Douglas fir for the topmast from them and it's some of the best I've ever seen.  However, it cost me the best part of a thousand dollars and I didn't think I could afford possibly even more for my tabernacle.  Pete had recently build a topmast for another junkie, here in NZ and had bought some beautiful demolition Douglas fir from St Lukes Timber - a timber yard just outside Auckland, so I went down there one day, and bought two big 2 large beams, each 200 x 150 and brought them back to Whangarei.  They were still eye-wateringly expensive, but about a quarter of what the timber would have cost new.

Pete came along to build the tabernacle just after the JRA AGM, in early April, and an Ozzie junkie, Dieter, came along to join in the fun.  Between them they milled the timber to suitable dimensions and then Pete got to work.  The two large beams were machined into 50mm boards for the tabernacle. There were two, almost knot-free boards which Pete selected for the two long timbers that would go from the keel, through the deck and up another metre to form the sides of the tabernacle.

I have fond memories of the tabernacle that we fitted on Missee Lee, and ever the nostalgia junkie, was hoping to reproduce the effect on SibLim.  Pete and I were delighted - and somewhat surprised - to see we could get the large boards of Douglas fir to bend to a pleasing taper, which will look much more attractive than a straight, solid section.


At deck level there is a laminated block, which provides support at the base of the mast and incidentally stiffens the deck at this point.  We made it of a couple of pieces, with the upper part of kwila, left over from the skegs, which is nice and hard in case the mast does move and chafe a little.


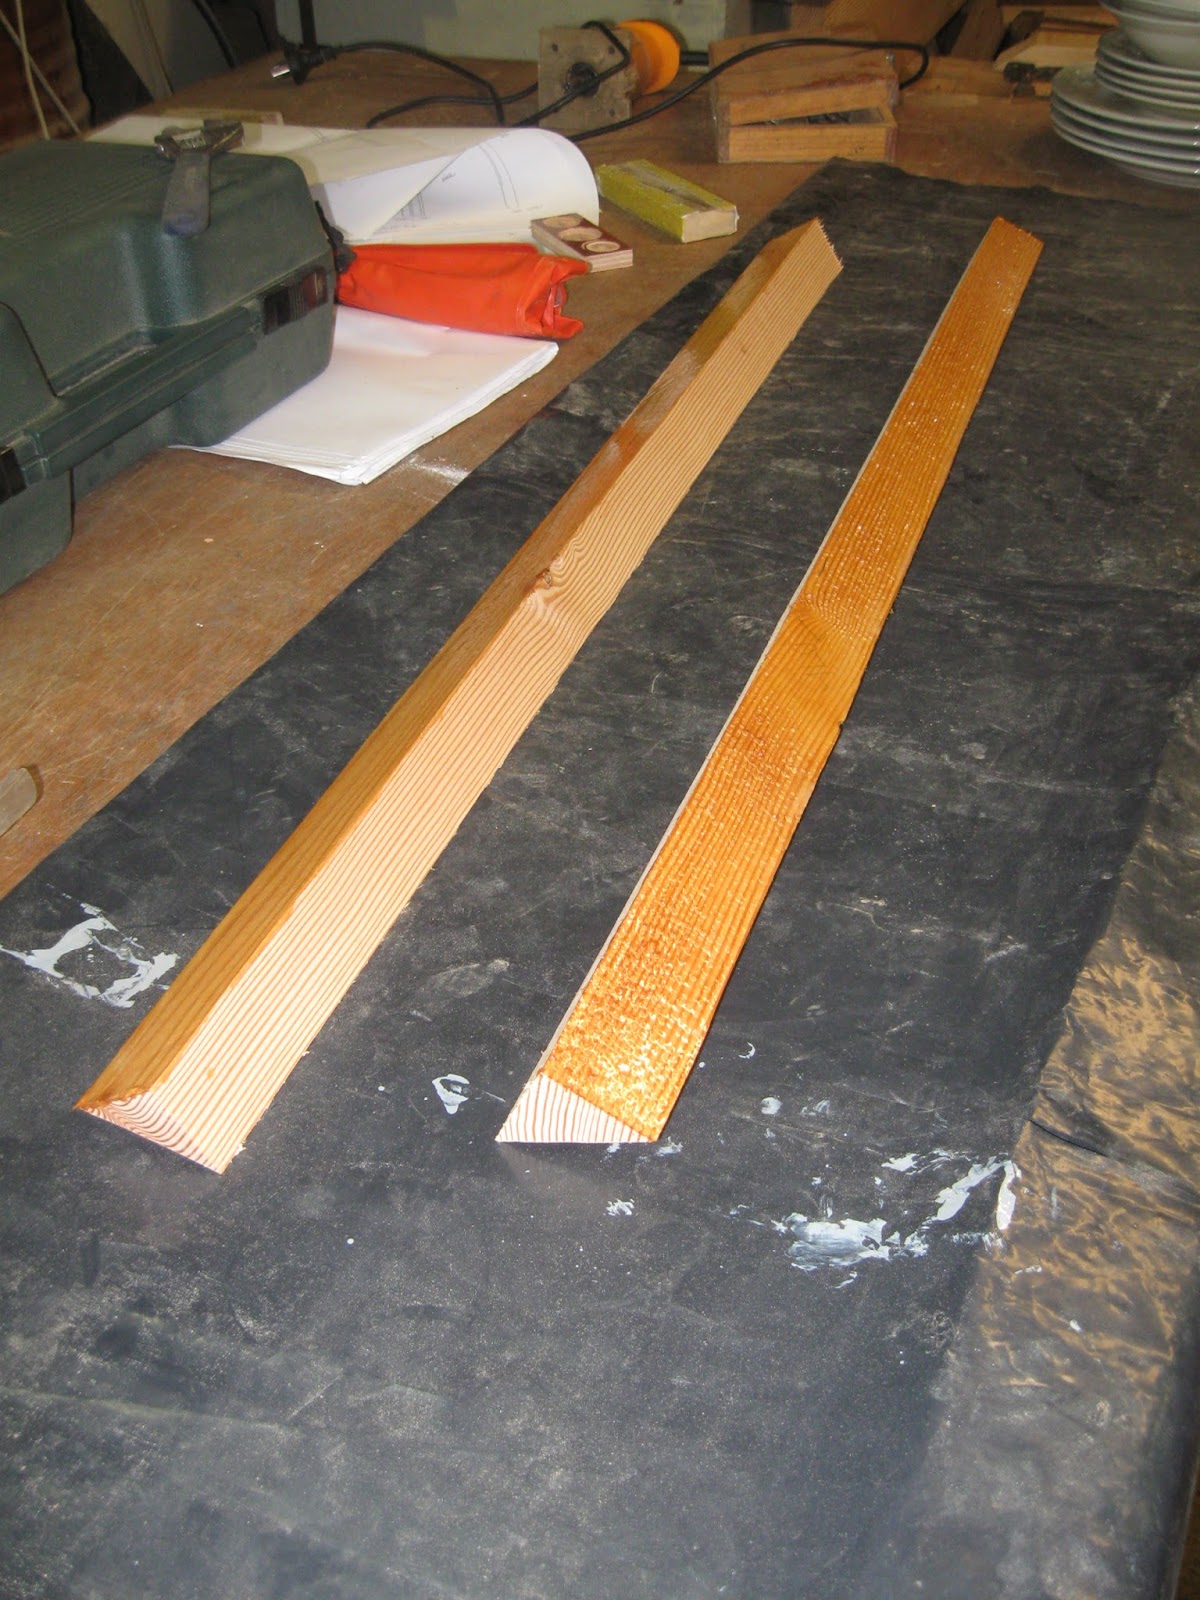
Because the tube is round, we had to make the tabernacle to support this.  We machined some triangular section pieces of Douglas fir and glued these into the corners of the tabernacle to support the mast.  Here I am precoating the sides before gluing the chocks on.


And here are the wedges, ready to be glued into place.


The wedges weren't the easiest of things to clamp into place.  It's times like this when I really appreciate the fact that epoxy really only needs to make good contact between the gluing surfaces, and doesn't require pressure.


Pete shaping the top of the tabernacle where the hinge system (yet to be designed) will fit.  The logical way to hinge the mast would be to put a damn great bolt through it and pivot on that.  However, this would seriously weaken the alloy tube and it wouldn't actually do much for the tabernacle.  The idea is to attach something to the back of the mast - like a tube - in some way use this for pivoting around.  This would be a lot easier with a wooden base, but for the moment the design is 'on hold' while I wait for inspiration to strike.  It's not exactly a priority at the moment!


The lower part of the tabernacle can be left partly open, fore and aft for the sake of aesthetics, because it takes very little load. The fill-in piece is curved to spread loads evenly where it ends.  It's not necessary to take it right down to the keel and completely unnecessary to have timber down the front of the tabernacle.  I debated fitting little shelves across, on which to display objets d'art, but as you would have to sit at the forward end of the bunk to admire them, decided it probably wasn't worth it.  But it would have been a nice little touch.

Douglas fir was laminated into blocking for the base of the tabernacle.  This is where it will sit in what is effectively a mast step and because the loads from the mast will be transferred down the tabernacle to this point, it needs to be substantial.  From pure and personal observation, the partners don't seem to take a vast amount of load - but the foot does.


The main pieces laid out ready to assemble. Above decks, everything is covered in bi-axial glass cloth and epoxy. I hate using bi-axial - it's impossible to wet it out invisibly, which I take a pride in doing.  But it does add strength to the job.  However, as bi-axial fibreglass goes, it went on OK.


Once the epoxy had cured, I sanded everything down and then the back of the tabernacle was screwed and glued to the sides.  While the glue was setting up. we added a couple of clamps just to ensure that it all stayed square.  It's now starting to look something like and those who had been coming to watch now had expressions of slowly-dawning illumination when they looked at it.  Tabernacles for free-standing masts are not really 'intuitive'.


We'd used pretty massive screws to hold  everything together and these required a plugging.  My puny little cutters came nowhere near the job, but fortunately Noel, the Whangarei boatbuilder who works at Norsand has everything in one or other of his numerous tool boxes.  He generously lent me what was required and I spent a happy time, standing in the corner cutting plugs from scrap Douglas fir.


Here you can see the blocking at the base of the mast, and also get a good idea of the nice quality of the fir.


These are some of the screws that had to be plugged.  Most of the time, I remove fastenings when I'm building.  They add cost (and weight!), but they can also make it difficult to do repairs.  However, when you get to such large timbers, you are asking a lot of the glue, so a couple of additional fastenings does add reassurance.


All the inside of the tabernacle, where the mast will be, is covered in glass and epoxy and then coated again. It will all be painted in due course, above decks.  


Below decks, the glass stops and the tabernacle is just coated in several coats of clear epoxy.  This will be varnished, and so I have a 'wooden mast' below rather than an alloy one.  You can see the cut-off point quite clearly here: in spite of my best efforts, the bi-axial glass looks slightly milky due to entrapped air.


Needless to say, we could hardly wait to offer it up and see what it looks like.  It's both long and heavy and it was a bit of a struggle to get it into place without knocking bits off anything.  Pete, in the forward cabin, gives some idea of scale. The yellow batten more or less delineates the line of the deck.  In all honestly, I have to say that it looks pretty massive!  And yes, it is off-centre.  This is to allow for a bigger bunk and means that the sail will end up on the centre line.  Putting masts on the centreline is an occidental obsession.  In the days when the Chinese built large, ocean going junks, they used to scatter the masts around with gay abandon, apparently wherever there was an unused spot.


This photograph is what the tabernacle will look like when sitting up in the bunk.  Thankfully, it is somewhat less dominating.  In fact, I find it very pleasing and a lot more attractive than the alloy tube I had next to my pillow on Fantail.  We took it out again after the trial: I need to make a step to hold it in place, first.

As I mentioned in the previous post, before doing this, I had first to establish exactly how far it was from keel to deck and to do this I had to fit deck beams to work out where the deck was to go.  


By the end of May, I had built up the sheer clamp, ready to plane to shape and notch for the deck beams.  However, it is difficult to get at, and my friend and landlord, Marcus, promised to make me a staging to work from.  This has proven to be a bit easier said that done as he has been otherwise occupied in the Bay of Islands.  However - there is no shortage of work on a boat in build.


I carried on in the forecabin.  I've been giving a bit of thought to insulation.  I don't see my taking SibLim into icy waters, but it can get a bit nippy here in NZ and as well as a wood stove for heat, I will need to consider condensation.  However too much insulation makes for a cold boat in spring and autumn mornings.  So I've decided just to insulate alongside the bunk and have an air gap in the deckhead.  

 Marcus had some insulation material kicking around and offered me some, which I stuck to the side of the boat.  I then made a plywood panel to cover the insulation alongside the bunk and the little chocks are to glue it to.


As usual, I pre-coated the back.  I'd had notions of being able to staple it to the blocking, but even after giving the insulation a trim so that it didn't require compressing, I discovered that there was simply too much curve in the hull here.  So it was back to drilling holes, backing out screws and filling again.

After doing this, I decided to do a bit more preparation work for painting, so that I can get the job done as I go along.  Otherwise it will be an enormous effort at the end of the build.  So I've been coating and filleting along chine logs and stringers, sanding and filling, filling and sanding.  I can hardly go for a 'super-yacht' finish - nor would I if I could - but I'm after something that is neat and workmanlike.
 Alongside the bilgeboards, on deck, are two lockers, which I may well use for firewood.  They should be relatively dry and because they are isolated from the rest of the boat, I will be able to bring wood aboard from ashore, without worrying too much about dirt and insects.  As I walk past them every day, I decided to get some paint inside them.  I also drilled a couple of drainage holes for the inevitable rain water that will find its way in.

This seems like a good time to start on the heads comparment, too.  I have decided on the jerricans that I'm using for my water supplies and flopped down a floorboard to check that they would fit under OK.  No problems.  However, I'm fitting a composting toilet and need to be sure that I have room for a hatch for these jerricans, between it and the bulkhead.
The passage way is offset, but pretty wide.  The original plan was to have the head facing inboard, but perching myself there on a handy bucket felt distinctly precarious.  I'd much rather have the toilet fore and aft with a wee bulkhead to support me.  But that would mean I'd have to shift my planned battery stowage.  Time spent with a tape measure appears to show that this idea will work, but seeing as how I was thinking about, I decided to go ahead and make a composting heads.

I had had a C-head on Fantail and loved it.  But it hadn't been cheap and the wee bottle was a bit too wee for my requirements.  Churning the compost doesn't seem essential, so I decided to try making my own, without.


Accepting having the locally-owned DIY store's logo on the 20 litre bucket saved me $13 and there is no shortage (I regret to say) of disposable water bottles about, so I scavenged one from the skip.  The trickiest part of a composter is keeping the liquids and solids separated, and I decided to invest in an off-the-shelf urine diverter from Kildwick low impact toilets


in the UK.  Infuriatingly, I found a cheaper one at We pee, but I also found plans to make a toilet at the same site.  It's hardly rocket science, but a set of plans does point out such things as making sure the back of the seat is square.  I decided to make my seat, too, out of Tiger wood (Marcus and I bought a load from BBS).
Here is the seat itself, placed on the lid, ready for marking.  You make the hole in the plywood a bit bigger and then secure the seat to it.  Apparently, the thinking appears to be that you ventilate the box, but you don't let air in or out around the seat and lid.  I gather this reduces insect issues too, not that I had any with the C-head.  Behind you can see the plywood cut to size.  The heads bulkhead will form the back and the sole will form the bottom, with everything filleted together, to make it easy to keep clean.  When I tried it all out, I found it was far too high.  I need the height if I continue to use the 6 litre water bottle, but 5 litres should be adequate, so I've decided to cut it down 50mm and see what I can find.  If all else fails, I can buy this from the Little House Company.