Search This Blog

Badger

Badger
In Greenland

Iron Bark

Iron Bark
Under full sail

Fantail

Fantail
At Russell Boating Club's Tall Ships Regatta

Blue Water Medal

Blue Water Medal
Blue Water Medal

Books By Annie Hill

  • Brazil and Beyond
  • Voyaging on a Small Income
Showing posts with label Alcohol cookers. Show all posts

14 July, 2019

Well, I've just about finished the interior, apart from ... and ... and ...  However: enough!  Time to move on.


 Trimming around the forehatch was not something I was looking forward to.  I wasn't at all sure that the opening was absolutely square (it wasn't) and the 'frame' involved mitres, something I dread, in spite of having a drop saw that purportedly cuts them perfectly.  To do the job, I had to go and find a bit more kauri cladding, remove staples and nails,  burn off the paint, trim the tongues and grooves, send it through the thicknesser and then saw it to an appropriate width.  And people wonder why things take so long!

 Once the framing was fitted, I then had to line the inside.  The hatch corners are radiused and I experimented with making radiused pieces of wood using a hole saw, but once I had my dinky piece of wood, I then had to alter the 90° piece of wood to 89° or 91° or whatever my 'right angle' happened to be, otherwise it stood out like a sore thumb.  Finally, I decided that it was more trouble than it's worth, because with the lining in place, you can only see about 5mm of hatch radius and I can live with staring at that, should I be lying awake in daylight.

 The lining is in place and the plugs filling the holes; and I think it looks fine.  All those who have been deluding themselves that I'm a perfectionist can now allow me back into the human race!

And here it is all varnished up.  The beauty of the old kauri never ceases to gratify me.  It is also slightly awe-inspiring (and a tad depressing) to think that the tree it came from could easily have been 1,000 years old. 
 Securing the cooker wasn't as straightforward as it might have been.  There was nothing obviously to fasten to, so in the end I resorted to crude but effective: drill some holes in the side and insert a couple of barrel bolts.

 And while I was at it, I made spacers for my nice china mugs.  I shall fit some method of holding them down, so that they (and the cooker, of course) stay in place when the boat is upside down.  Unfortunately, due to what could kindly be called a design fault, the pan supports on the cooker can only be removed for cleaning once, after which they are loose, because the plastic foot to stop them from rattling breaks upon being removed, so they will fly around the cabin.

 However, the little alcohol cooker (yet another gift from David Tyler) looks pretty natty in place and the bolts hold it down in an impressively solid manner.

 All this time I had been picking away at the trim for the deckhead.  Before I could do anything, I had to fit the quadrants fore and aft, because they have to be forced into place against the camber.

Then I fitted all the fore and aft pieces, and joggled the short lengths athwartships around them.

In truth I really anticipated breaking at least one of them (the carnage in the forecabin left me permanently traumatised), but they were surprisingly amenable and the job went without too much bad language.

An attractive optical illusion comes from the curved centre section meeting the straight side pieces: it look for all the world like a slight S curve, which I find very appealing.

This is the best I could do to get the overall effect.  Small boats don't offer very good opportunities for great interior shots.

I have to say I am very, very relieved to get this trim up.  The deckhead looked like ... well, it looked bloody awful with all the gaps showing between the headliner panels.  Now it looks very presentable and all the wood breaks up what would be a vast area of white into attractive sections.

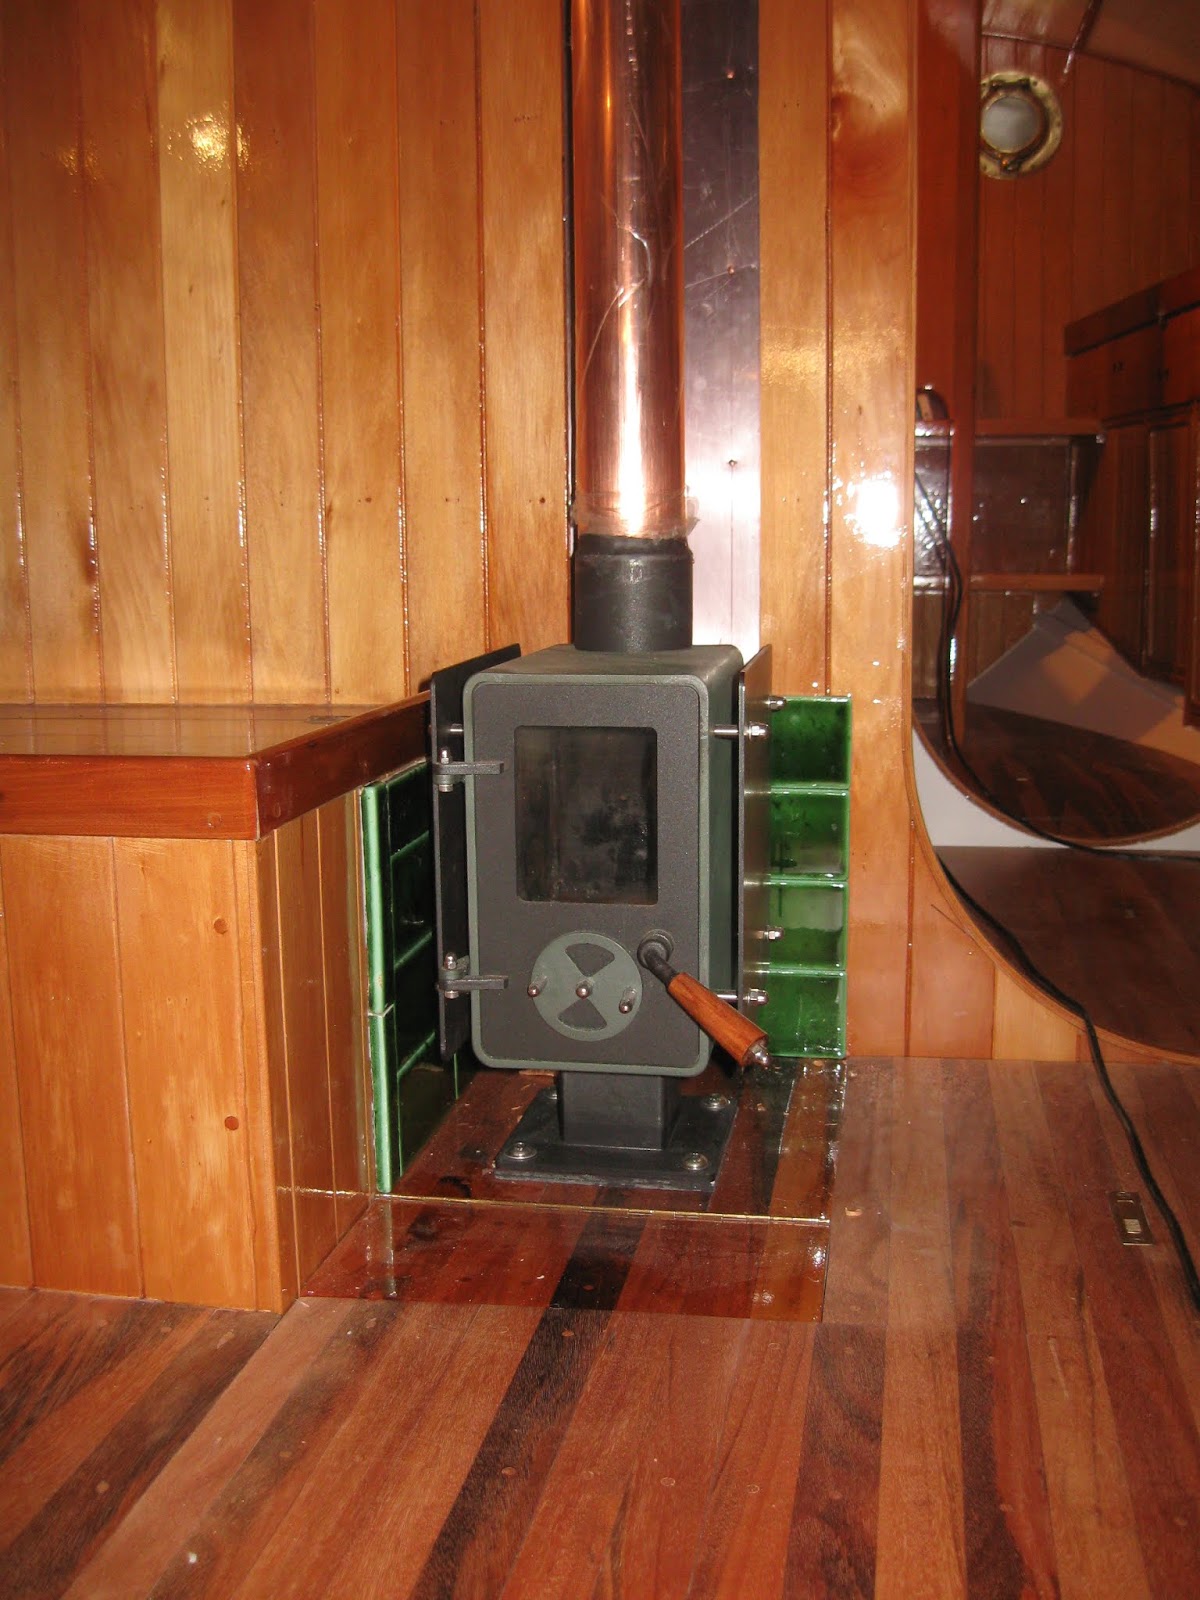
Oooh!  The little Flick!  Isn't it just too gorgeous for words?  I'm so pleased with it and can't wait to light it - I hope next winter!  The green tiles around it are hand-made from Spain.  When you are buying fewer than 20, it doesn't really matter what they cost, but I must say it adds to my conviction that small boats are a Good Idea, if you have expensive tastes like I do.

The cockpit beckons and, to be honest, I'm a bit scared of it.  David and I planned it all out in detail and I'm sure we got it right, but ...

So in order to ease myself into it, I smoothed out stern where the outboard bracket will be fitted.  The three layers had been pretty rough since fitted.

Then I set to fairing the final scarf, which was, in fact, the first one I ever did.  I faired up the one on the other side months (probably years!) ago and it looks perfect, so I hope I can do as well with this one.

Meantime I've been gradually fairing the surround for the galley hatch.  Again I have the radii to deal with, but this time I don't want any framing.  I think it will look too busy and anyway, I'll bang my head on it.  Headroom is somewhat constrained here, so I'll just keep adding thin layers of fairing and sanding it, until it's fit to be painted.

The first thing to do in the cockpit proper was to set up the framing for the bridgedeck, that I took out when I started building the interior.  As it happens, it was about 40mm or so too low anyway.  I've decided to put the bridge deck horizontal, but put a slope on the deck outboard, to help shed water.

This is the panel I removed and before putting it back in, I cut the bottom to match the camber of the deck and allow slightly easier access into the space under the cockpit.  I glued some thin veneers of kauri along its edge to finish it off.

At last - she has moved into the cockpit and glued some wood in place!!  And the first thing I did was to erect a keep-out barrier to prove that I mean business.  In fact this is the last major construction job, although neither building the bilge boards nor the mast are that minor!  Still, it feels good to get going on it.

And this is the view from the inside, looking out.  The bridgedeck will land on the panelled bulkhead.


01 October, 2017

Sometime I sits and thinks; sometimes I just sits

I've been doing a lot of thinking, tooth-sucking and head-scratching recently and a lot of it has ended up with me sitting in a numbed daze.  Two issues are exercising my mind of late.  The first is my fruitless quest for a nice wood-burning stove - preferably one that will burn coal on occasion.

About a year ago, I discovered the most beautiful tiny stove in the world, made by a craftsman near Wellington.  As well as being beautifully made, carefully thought out, the right size and having the essential glass door, it had an additional gorgeous feature: both of the dampers had a huge glass marble set into them through which the light would refract, making glorious colours on the deckhead.  I should have bought it then and there but, foolishly put it off, not wanting it to be kicking around too long in case it got damaged.  A few months later I wrote to buy it and David, the creator, wrote back to say he was sorry, but he'd gone out of business.  People just weren't prepared to pay for good stoves and he couldn't afford to keep his workshop going.  And it wasn't even particularly expensive.  I could have wept - very nearly did in fact.

Since then I've been looking for an alternative.  I want it to be attractive, I want it to have a glass door, but the space for it is only 12"/300 mm wide, and I need to have an air gap between the stove and the settee.  Thus far it's impossible to find what I want.  So if anyone knows of a nice wood/coal burner, maximum 10"/250mm wide, but preferably less, with a window in the door at an affordable price (ie maximum NZ$1,000), please let me know.

The other thing that has been exercising my mind is a cooker.  I don't want gas - the bottles that are easy to refill weigh too much to manhandle out of the dinghy when they are full, and even when empty are a mission to lug along the street.  Getting small ones filled is difficult and expensive and they only last a week or so in winter.  I cook a lot: I get through gas.  And that, of course, is before the safety debate, the complex plumbing, etc, etc. 

Paraffin/kerosene is no longer cheap nor readily available (of good quality) and the spares for a primus-type cooker are very expensive.  I've cooked on paraffin for several decades, but it makes the deckhead grubby and the whole boat ends up smelling of it.  It's a marvellous way of cooking, but ...

Alcohol is the obvious way to go.  However, the Maxie  that I had on Fantail, while an excellent concept, was not well made and corroded out as I looked at it.  It wasn't cheap, either.  I didn't want another one.

I got hold of a pressure alcohol cooker, but spare burners seem impossible to find and as I've no idea how long they last, used on a daily basis, I chickened out - not wanting to have to rebuild my galley around a different cooker.

I was going to go and buy an Origo alcohol cooker, but David, who designed SibLim, says they are useless and that I'll regret it.  There has been some discussion on a JRA forum about them and I must admit that they sound less than perfect.  I had also seriously considered fitting one of their ovens and had even worked out how to get it from the US (they are unavailable here), but after due thought have probably scrapped that idea.  They are eyewateringly expensive and it would be a bit of a shoehorn fit.  I suddenly had visions of what would happen if it turned out to be 5mm too big and got cold feet. As well, I had a horrible feeling that in this case, More might turn out to be Less.  KISS.

In the meantime, David, has decided to make the perfect alcohol cooker, tentatively knows as TGO eco-oker.  He is a very clever man and may well produce something that works, but why, oh why, does no-one produce a good, fast, well-made alcohol cooker for heaven's sake?

In the meantime, I've been trying to work out just what my galley and saloon are going to look like and this, in turn, has put me off installing the deck beams once again.  For me to visualise how it's all going to work, I need the cabin sole down - or most of it.  And that is a big piece of plywood. 

So that led me on to doing a job that I'd been putting off - finishing off the floors in the saloon/galley area and filleting and coating the bulkheads, where necessary, and the bilge area.

Somewhere in the past, I had a panic attack that the cedar floors were a bit dainty and decided to reinforce them with purpleheart ones.  Now I feel that this is entirely unnecessary - there's not much leverage from a 150mm keel that's glued to the bottom of the boat!  However, I'd fitted some forward, so I did the same aft.  they look reassuring.  The photos shows the final one in place, with lead weights and temporary fastenings holding it in place until the epoxy cures.

The next job was to fillet everything - structural fillets along the bottom and up the plywood floor.  Before this could be done, everything had to be cleaned, sanded, scraped where necessary, and generally made ready.  I did it section by section; there was a lot of hand sanding and my fingertips were rubbed raw!

Finally, it was all coated.  In due course, the sides of the hull will be painted, but I shall at least dry fit (some of) the furniture first, to minimise the amount of paint that will have to be taken off again.  However, painting before locker lids go in place is worth a lot of time and grief.

So it doesn't look like a lot has been done, but that's boatbuilding for you!