Search This Blog

Badger

Badger
In Greenland

Iron Bark

Iron Bark
Under full sail

Fantail

Fantail
At Russell Boating Club's Tall Ships Regatta

Blue Water Medal

Blue Water Medal
Blue Water Medal

Books By Annie Hill

  • Brazil and Beyond
  • Voyaging on a Small Income
Showing posts with label Junk Rig Association. Show all posts

25 November, 2018

The bulk of the galley completed.


I'm sorry that I haven't posted for so long.  I went away to Nelson for a week and it took me two weeks to catch up on all the things I neglected to do in Nelson.  (I'd gone with good intentions of sitting at my computer, writing emails, doing tasks that I had neglected as Chair of the JRA, editing articles for the magazine.  Instead, I chatted with my friends, loafed in the sun, pottered around and did a lot of reading.)

I came back full of energy and good intentions, but although I have certainly been putting in the hours, life and hordes of visitors have slowed down progress.  However, I love seeing my friends and if it means that boat is launched a few weeks later than would otherwise be the case, well so be it.  But there are many times when I wish either that there were a few more hours in the day, or that I didn't need to spend quite so much time in bed!

 The next- indeed, tigerwood apart, the final - big job in the galley was making and fitting all the doors.  My technique, now, is to use Gorilla polyurethane glue for the initial glue up, and then let the epoxy coating finish the job.  This allows me to put the doors together more quickly and with less mess, one at a time.

 Any gaps where the panelling meets the frame are filled with neat epoxy, which also percolates between the plank edges.  The result is a very stiff, very light and very attractive door.  I should like to take credit for this wonderful concept, but in truth, they are exactly the same as the doors we fitted to Badger and China Moon.  The only difference is that this time I'm allowed to make the frame, as well as fit the panels!

 I fitted the slats for the vegetable locker, which, I hope,will help keep it dry.

 And remembered that the end of the counter still had to be cut and fitted.  So that was duly done and glued down over the cutlery drawer.

 The shelves being painted and the slats being coated, finally everything could be glued into place.

 One of the very good things about epoxy is that it doesn't require any pressure to set.  The little lead weights were quite sufficient to ensure a good joint.  The slats simply required pushing into place - and at the last moment I remembered not to glue in the final one, so that I could get my hand underneath for cleaning.

 I made up a tray for the second shelf down.  This is to hold my glasses, some of which are Waterford crystal, bought for 5 bucks each from the market.  Well, why not?


 This was made in exactly the same way as the shelf fiddles and, once again, I relied on the coating epoxy to finish off the gluing job.  It is surprisingly robust, considering how flimsy the materials are.

 Four more doors yet to make, so I set up a sort of production line.  This is the one from the veg locker.

 And these are the frames for the lockers under the cooker.  Made in this fashion, I can be sure that they will fit.  I wouldn't trust my measurements to make them 'on the bench'.

I dry fitted them into place before coating them and then facing the agony of fitting the hinges.

 The 'door' at the back is actually going to be fixed in place.

The only thing more heart-stoppingly expensive than barrel bolts, are hinges.  Some time ago I bought a length of brass piano hinge and I used this to make the hinges for the cabinet.  (This was Paul Marine's brilliant idea!)

 Cutting the rebates on the door was the easier of the two to cut, but I find it very difficult judging the correct depth.  My perusal of You Tube didn't help much (what's 1/32 of an inch in real measurements, for heaven's sake?)  For a start, they all assumed that I'd had the sense to plan the hinges before I assembled the cabinets.  Yeah right.

And then, due to a distraction, I drilled the finger hole on the wrong side of the aftermost (right hand) door, which meant that the hinge had to be fitted on a piece of wood that extended beyond the door.  I won't tell you how long it took me to get from the coated doors, to this stage, where they are sanded and fitted.

 But then, they all had to come off again so that the rebates could be coated.  I debated this, but some of the screw holes had been refilled with so many slivers of wood, that the doors and frames looked as though they'd been attacked by woodworm.  I lived to regret it: another distraction caused me to fit a couple of hinges to the wrong frames (having carefully set them down so that they went back where they came from.)  Because the hinges are individually made - 'crafted', I should say!- they were all slightly different.  But not different enough to be noticeable until I tried to shut the door.  It took all day to put the never-sufficiently-to-be-cursed hinges on the correct rebates.

However, the final result is rather splendid don't you think?

So now, I have a bit of trim and a spice rack to make, the portholes to install and I need to machine up a heap of tigerwood for the galley counter, the cabin sole and the saloon table.  Then I can fit the deckliner and call the accommodation finished.

I had been hoping to complete it by the end of they year.  Ah well, nothing wrong with hoping.

30 September, 2018

Mainly drawers

Still moving along in the galley; still scratching my head trying to decide what is going to go where.

 I decided to use offcuts of 12mm ply for the drawer bases.  A bit over the top, perhaps, but there were sufficient around of more or less the right size, most of it coated on one side and none of it much use for anything else.  It seems a shame to waste it. So I cut out the bases and using my wee router, put a rebate on 3 sides.

 I am now in the spectacularly happy position of having heaps of kauri (thank you Gordie!) and as it is about the correct thickness for the sides and front of the drawers, I decided to use it.  Again I routed rebates along the edges.

I found the best way to do this was to clamp a big chunk of wood to a saw horse and then to line the edge of the kauri along it and clamp that.  This worked nicely producing a clean result.

I then offered up my kauri planks, cutting the wood to length as necessary.

And finally ended up with a kit of parts for six drawers.

I laid them all out, coated the edges with epoxy and then coated the joints along the bases with thickened epoxy.  The drawers were then fastened with pins through pre-drilled holes, which ensured that they lined up truly.


My original idea had been to then glue on the fronts, but these seemed impossible to position.  I consulted a friend who told me that even professionals make a full box and then add the front, so this is what I did.  I cut 6mm panels and glued them flush at the open end of the box.

He was quite right!  The fronts were a lot easier to fit now.  I fitted the drawers and then one at a time, fitted the fronts, screwing them into place through pre-drilled holes in the plywood.

Then I disassembled them and glued them back together.  The screws were replaced in their screw holes with infinite care and gently tightened to ensure that new holes weren't created.

 In spite of my best efforts, however, the alignment was far from perfect.  While irritating, this was far from surprising.  My skills may be better than they were, but I'm still a long way from having the necessary tricks of the trade to get these things right.  However, judicious use of fine saw, plane, belt sander and the odd shim got them to look acceptable.

I drilled finger holes, coated the drawers and fitted them one last time.  Good enough.
Meanwhile, I've been cutting, fitting and coating the locker which will be under the sink and hold my two 10 litre water containers.  My eccentricity in not wishing to make a hole even for salt water, even using a glassed-in pipe has been commented on elsewhere.  But actually, with a lot of the rivers and anchorages being quite silty around New Zealand, it will be nice to have clean seawater on tap all the time, even if it does mean hauling the odd bucket.

I need to proofread the magazine for the JRA, so I'm not sure if I'll be getting a lot more done today.  But we are slowly getting there.  Although I have to confess that when a visitor last week, kindly told me that I "still have heaps to do", he was very lucky that I didn't have a chisel in my hand!!


15 April, 2018

Visible progress!

Sometimes, it seems like one works for months and has nothing to show for it.  At other times, you can actually see things moving forwards and the last couple of weeks have been like that.  I confess that I did take time out: as Chair of the JRA, I had to run the AGM over the weekend.  I absolutely hate doing this: I am not really a committee person and in truth, have only the haziest idea of what an AGM is supposed to produce or what I am meant to do.  Mercifully, our Hon Sec is much better versed in this sort of thing and essentially gave me a script to follow.  Once the wretched thing was over, we had a hugely enjoyable gathering of like-minded souls, with plenty to eat and drink, completely taking over Rob and Maren's wonderful house with a superb view over Whangarei Harbour and beyond.  The following day I sailed back up the harbour in Le Canard Bleu  


and then Marcus took me for a delightful sail in his little Freebie.  It was a great break and heaps of fun.  It's ages since I enjoyed anything so much.


I went back to boatbuilding with renewed enthusiasm. Maybe this is why I feel I've made visible progress recently.


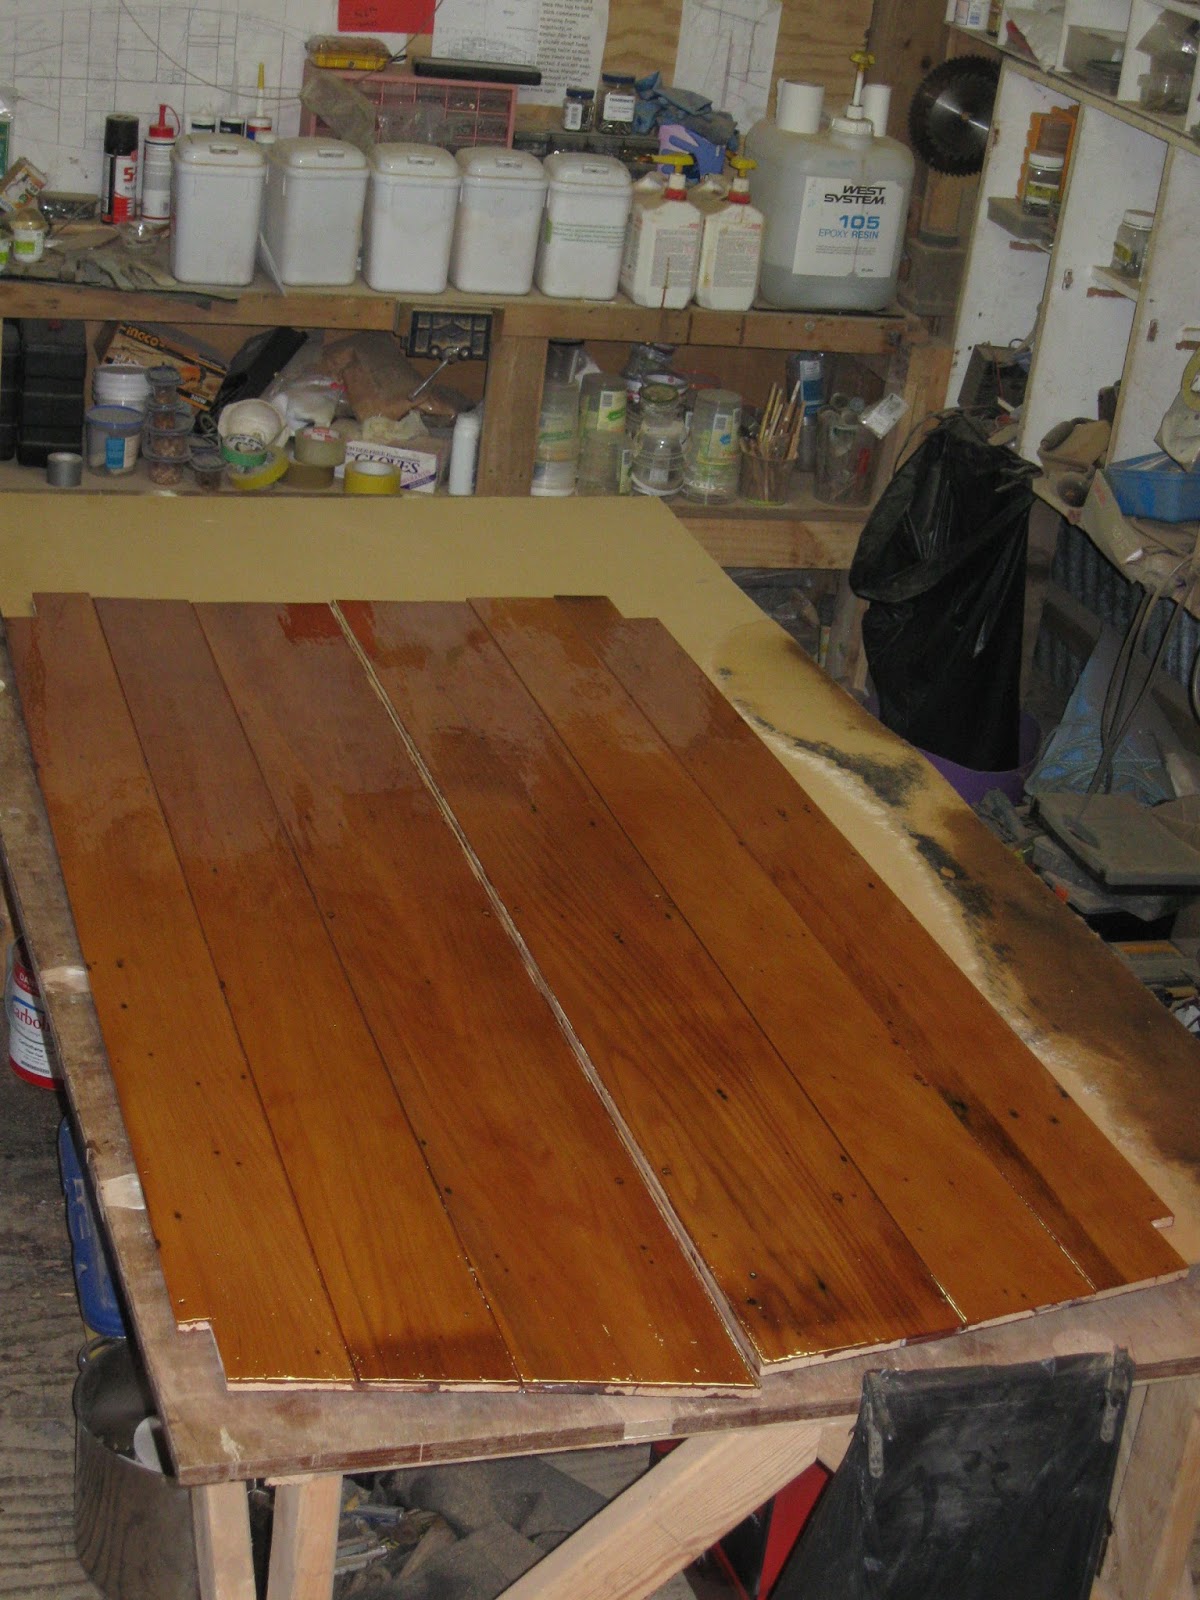
The kauri bulkheads, for the companionway, cleaned up nicely.  Originally, I had hoped to use the original tongues and grooves to reassemble them, but they, particularly the grooves, had got split and broken when the boards were removed from the house they had been on.  So I put pseudo grooves back in, where they are joined together.  This also helped disguise some of the gaps in the joints!

 Then I coated them with epoxy.  They look pretty splendid, although obviously recycled wood.  (Recycled sounds better than second-hand!)  The kauri is a beautiful honey colour.  Lovely stuff.

 With the ends trimmed to fit, they are now ready to be glued into place.  I had had my doubts about fitting these bulkheads, concerned that they would make the interior cramped and the aftermost seat in the saloon claustrophobic.  However, I knew that sooner or later a wave would come down the hatch and dump itself on the settee and that the cooker would otherwise be very susceptible to being blown out.  Having chosen to have bilgeboards, I have to accept that they dictate the accommodation.  I think it's a compromise worth making.

The bulkheads have a length of thicker kauri at the forward end, with a cut-out to make a hand hold.  They were grooved to fit the bulkhead and glued in after the bulkheads.

 The next stage is to fit out the saloon.  Here I am really going for my quart in a pint pot (something that really does not translate into the metric system!).  Originally the plan was to have the saloon slightly raised, but as the topsides are vertical, there is no gain in width from so doing.  The other reason to raise them would be to make it easier to see out of the portholes, but this is unnecessary, too.  If the saloon is at the same height as the rest of the boat, it will be easier to build - and the forward seat more versatile.  So,using a hot-glue gun to stick things in place, I mocked up a rough plan.  I took things down and put them back several times, measured chairs, looked at other designs, asked people what they thought, agonised and worried and finally pencilled in lines: this is where the seats will be built.  Most boats have seats that are too high and are uncomfortable to sit on.  I don't want mine to be like this.

 Another job that was scaring me silly was making the headliner - the underside of the deck.  This is made from (very expensive) plywood and has to be a good fit.  I am not very adept at making small pieces of wood fit, let alone large ones.  The first thing was to lift off the curve of the hull at deck level, for which I used MDF to make a pattern. This took ages, but was worth being patient with, because the plywood was a lot more likely to fit if I got this correct.

 I fitted it to a pre-coated piece of plywood and drew the line.  I used a bevel gauge to get the angles at each end and compared these with the angles on the MDF.  I had also made a table of offsets from the fore and aft stringer that the plywood was to land on, to the deck edge and I know the exact distance from bulkhead to bulkhead.  Using all these bits of information, I finally drew out what I hoped the deckhead would be and - gulp - cut it out.

 I then had to fit it.  As it's nearly 2 metres long and the best part of a metre wide at the after end, this was something of a nightmare.  The tabernacle was a curse to get round and it was difficult to move the sheet without jamming its sharp corners into anything else and damaging the wood.  However, I finally got it into place and to my absolute astonishment it fit perfectly, first go.

 In fact I was so amazed that I left it there for the night, so that I could gloat over it.

 I then had the brainwave to use it as a pattern for the other side, rather than starting from scratch again.  I was rather proud of the fact that I could do this: my boat must be fairly symmetrical!  Here I have just finished cutting the other side to shape, using my newly-acquired battery circular saw.  These are an absolute boon for small women with small hands: a standard size circular saw is far too heavy and awkward for me to handle.

 Here is the other panel being fitted.  All that was required was a little bit of fairing of the outboard edge.  (I made both of them slightly too wide to allow for final fairing.)


 They have to be painted before I glue them in - I've made space on the scaffolding so that I can carry on using the big table, in the workshop.

And the upstairs bench is just large enough for the other panel, which is having to be coated after cutting up, because I didn't precoat that piece of plywood.

And while I wait for paint and epoxy to dry, I can carry on with the saloon.  Here is the first of the framing going in.


30 July, 2017

Still fitting out the heads

Or if you prefer, "Title as Before".  Just half a dozen photos this week - one coat of paint looks much like another, in truth.  However, thank you for the feedback from those who have told me that catching up on my progress via this blog is better than working through the JRA site.  That's good to hear, because it's a lot easier for me, too!

Once I'd coated and sanded the plywood framing around the doors, it looked quite neat.  They're not perfectly even and symmetrical.  My story is that we're going for the country cottage look rather than the super-yacht finish on SibLim.  Not that I would want a super-yacht finish, even if I had the abilities to attain one.


However, the doors lined up in a satisfactory manner - this shows them located with the wooden 'hinges' as I call them attached.


As decent-quality hinges cost the best part of $20, I was seriously motivated to use an alternative.  The little lugs you can see protruding from the backs of the doors are the answer.  It means that when you 'open' the door, the whole thing comes off, but this isn't always an issue, especially if you're trying to get something big out of the locker.  Anyway, the minor inconvenience is a small price to pay for the money saved.  And avoiding the anguish of accurately fitting hinges!


The back of the port side.  The little rectangles aren't strictly necessary with the framed doors - the frame prevents them from going right through the hole.  But I only realised that after I'd made them.  I was thinking of keeping the doors shut with "automatic buttons", which are weighted catches that you fit over the door and which close by gravity and are very effective.  My friendly neighbourhood chandler had a few in stock, but insufficient for my purposes.  At $14 each, they weren't cheap, but I like them and he had no suitable brass turnbuttons.  (Yes, I could make them out of wood, but would prefer metal ones.)  So he contacted Fosters in Auckland who supply them - ah, yes, well the price has gone up.  They are now $40 each.  We looked at each other in horror.


So I went to Classic Marine in the UK.  They were offering them to me at the equivalent of $12.50 each, and I knew from experience that they charge what it costs for P&P rather than using it to make an extra profit.  However, at the same time I discovered that they were selling nice little - and affordable - turnbuttons, so I ordered some of those instead.  (I also discovered that they sell reasonably-priced hinges!)


I had some problems with their website - nothing is easy - so feeling a bit desperate, contacted Davey of London, who make all this lovely gear.  I had the most wonderful reply back from no lesser personage than the managing director and was seriously impressed at the promptness with which he replied, and the care for customers that this implied.  Anyway, Classic Marine's website sorted itself out and, I hope, these nice goodies are on their way.

In the meantime, I've been working on the starboard side of the heads compartment, where I'm fitting the electric panels, solar panel control and a shelf to put things on when I need to get at the electrics to replace a fuse, etc.

PS I finally seem to have worked out how to get my spacing sorted in the blogs.  Practice makes perfect, they say!