Search This Blog

Badger

Badger
In Greenland

Iron Bark

Iron Bark
Under full sail

Fantail

Fantail
At Russell Boating Club's Tall Ships Regatta

Blue Water Medal

Blue Water Medal
Blue Water Medal

Books By Annie Hill

  • Brazil and Beyond
  • Voyaging on a Small Income
Showing posts with label deck lining. Show all posts

17 February, 2019

Closing her in


We are having a wonderful summer, here in New Zealand.  At least it is a wonderful summer for those lucky enough to be able to spend it outside.  I would have been seriously wondering about my sanity at building a boat where the temperature is reaching 38°C by lunchtime and staying there until 5 o'clock or so, but progress had been satisfying and I keep thinking of being out there, anchored in some quiet and beautiful spot ...


 I haven't got that many photos, this time, because one piece of plywood looks remarkably like another!

This one shows me putting the thickened epoxy on a deckhead panel, ready to screw into place.  The rest of the plywood is bare - it will be coated once it's in place.  It's less stiff and recalcitrant if it's not precoated.

 Fitting the deck head panels was definitely not a favourite job.  It was very difficult to cut them accurately to shape because they only need to sag away from the deck beam a tiny bit to end up being marked too short.  Still the trim will hide the gaps.

 The final piece of headliner fitted in place.  I made an extra little 'beam' for it to land one, because I am not going to have the headliner around the pram hood.  Most of it will be cut out anyway, so it hardly seemed worth the effort of fitting.

 This photo shows the extra deck 'beam' with the lining in and ready for its insulation.  Plenty of screws are required to persuade the plywood into place, even along the flat, outside area of the deck.  There has been considerable attrition among the screws, with many making a successful leap for freedom.  I think some sort of toe rail might be a good thing!

 With the high temperatures, even the super slow hardener is kicking off fairly quickly, so I kept the panel sizes down to something sensible.  This also makes them easier to handle especially when I put them down - I don't want them sliding and scraping off all the glue!

 Next one ready to go.  The little grey device is my old barometer, which is convinced that we are in the middle of the deepest depression ever recorded, but still shows the temperature accurately.  It's probably 5 or 6°C warmer at deck level than at ground level, so it's worth knowing.


 Spreading the glue without getting it all over me was a bit of an issue, here.  I am wearing a knee pad, bceause my left knee is suffering from "deck layer's knee", and is presently swollen and rather painful, although it seems to be responding to padding and Ibuprofen.  I remember now that I had the same issue when filling in all the screw holes on Badger.  You can see the blocking next to the hatch, to take the bolts for the winches.


 And here we are - the boat is finally closed in!

"All" I need to do now, is to put down a layer of 4mm plywood all over the deck, followed by the teak and then the deck is done. the lockers next to the bilgeboards require lids and of course there will be various pads for winches, etc.


16 December, 2018

Like British Rail


We are getting there.

I have been trying to work out where to put my herbs and spices.  I'd thought to make a shelf along the stringer, but the stringer was too narrow and it all seemed excessively complicated for what I would achieve.  Then it occurred to me that I didn't really have a handy locker for tea, coffee, salt and pepper, etc, so I had the idea of combining the two.  

One way and another, I seem to have had innumerable distractions since I came back from Nelson and I've realised that when my train of thought gets broken, even for about 5 minutes, it seems to take me about an hour to get back on an even keel.  So I designed, if that's the right word, this little locker with only part of my mind, and in truth, have been worrying that it might look a bit odd.   


 It went together surprisingly quickly - I've had a bit of practice by now.

 Finding the jars was a bit of a mission: glass are nice, but they would have to be secured for offshore work, while plastic ones can fly about with gay abandon without doing any damage.  I saw some of about the correct size at Para Rubber in Whangarei, and bought a couple of dozen.  Then all I had to do was to make some little fiddle rails to keep them in place.  I think conditions will have to be very bad before they start falling off the shelf.

 I'm still ticking off the wiring.  My good friends at All Marine sold me a nice little 600 watt inverter.  This will be more than enough for running my computer, charging battery tools and powering a sewing machine.  I screwed it underneath the counter in the heads, adjacent to where the battery will be situated.

 I ran the wiring for the saloon lights, intending to screw them into place - another job ticked.

 However, the lamps need to be attached to a piece of wood so that the wire can go into the back of them, and the piece of wood needs to be fitted around the deck lining trim and the deck lining trim can't be fitted until all the deck lining is in place.  Net result: I couldn't fit the lamps.

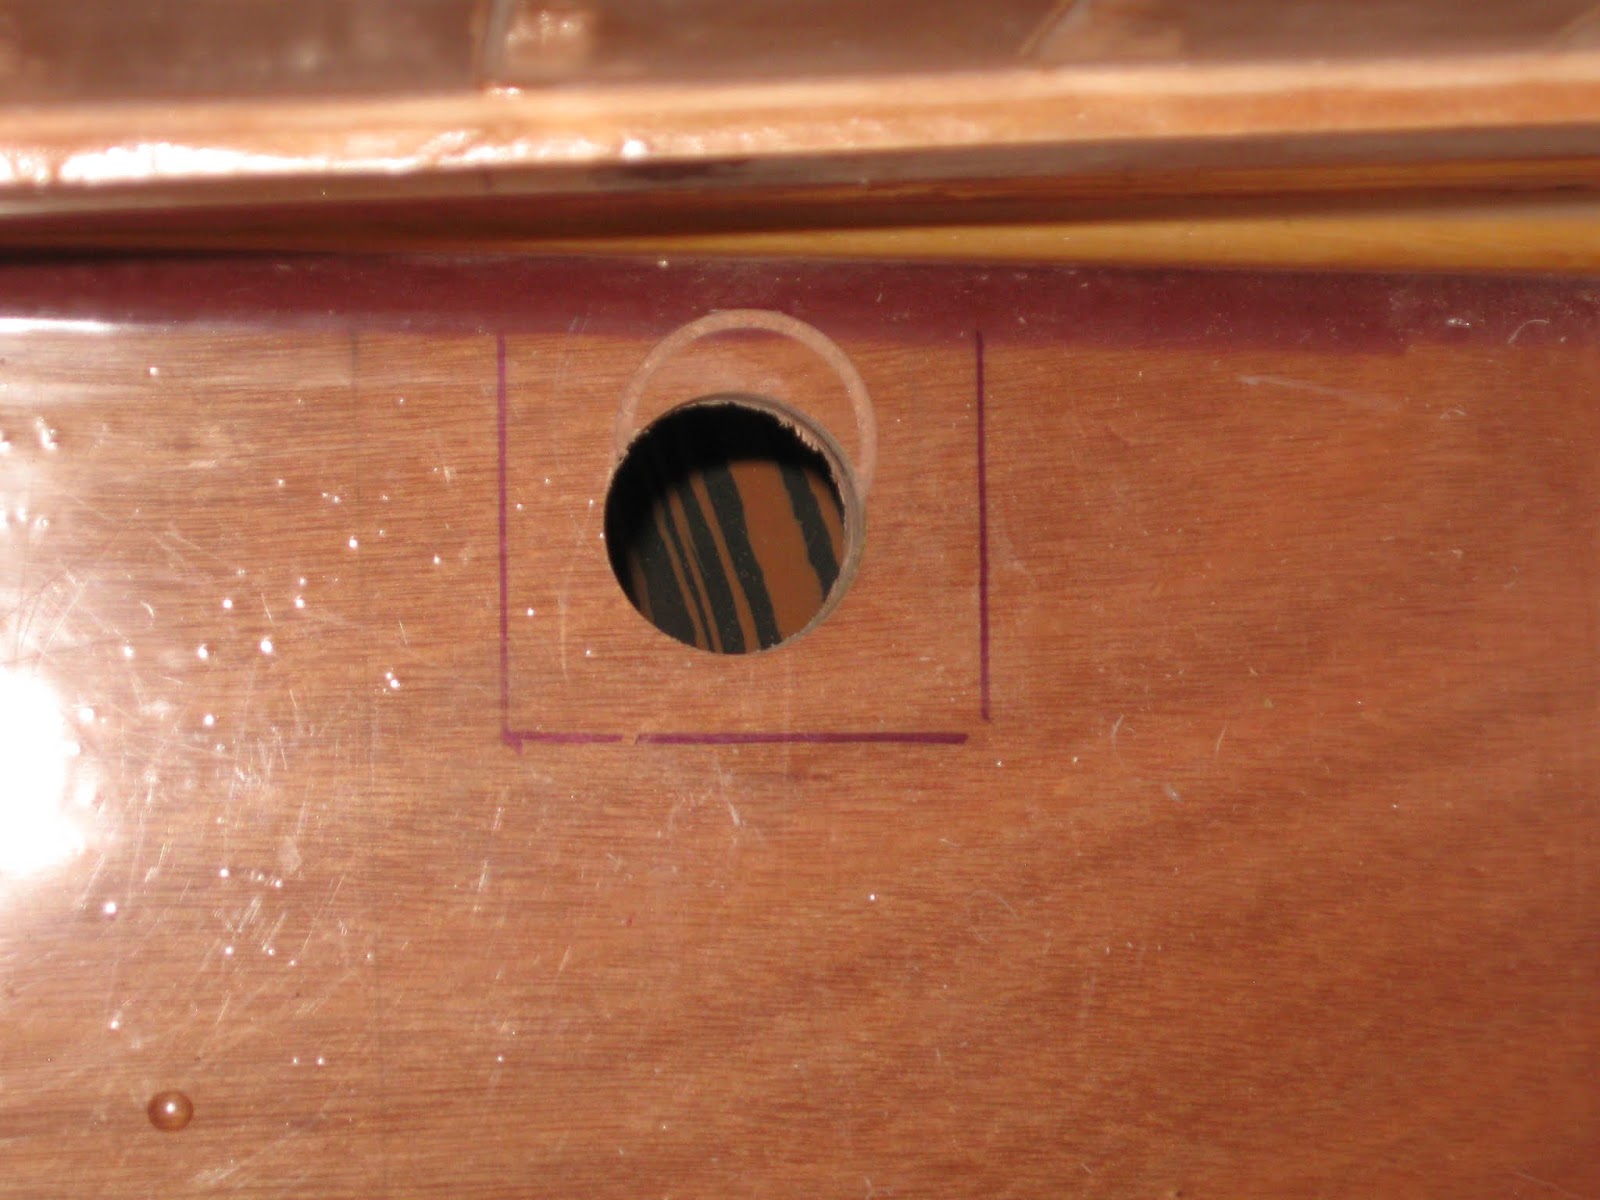
 However, I could fit the transducer for the echo sounder, without committing myself irrevocably to its wiring, although I'm pretty sure where it will end up.  As ever, it was a bit scary drilling a damn great hole through my pristine hull.

 I used some purple heart to support the transducer itself.

And glued it carefully into place over the predrilled hole.  I forgot to take a photo of the finished job.  Apologies.

 Back in the galley, I'd been ticking away at the wee locker, with its various stages of gluing and coating.  Of course I had to fit hinges to the door and have come to the conclusion that my learning curve is completely flat where these are concerned.  I won't say how long it took me to fit the damn things.


 The next job was the really exciting one of putting down tigerwood on the counter.  My friend Murray, kindly gave me a few hours to help me cut up the timber - and by the time most of it ended up as shavings or dust, the weight was reduced to an acceptable level.  I dry fitted it.

 I dislike stainless steel sinks and, besides, they come in a limited range of sizes.  I decided to make one.  At first I thought I'd make it with sloping sides to look nice, but mature consideration convinced me that the sloping sides would simply encourage the water to come out when the boat is heeling.

 My right-angled joinery is usually 'more or less', but I wanted this to be a little more accurate than usual.  Phil and Mark had given me a special clamp some months ago, and this proved to be excellent for the job.  With set squares clamped in place for extra insurance the whole thing went together satisfactorily.

 I filleted it straight away, to ensure that the corners stayed true.  Some of the tigerwood, in spite of having been properly seasoned and properly stored for a few years now (!) goes berserk once it goes through the saw so sometimes it needs to be coerced into cooperating.  I've found I need to pounce on it just at the right time, glue it down and get a coat of epoxy on it to stabilise it as soon as I can.

 But it's soooo beautiful that it's worth it.  I lined the sink up carefully, fitting runners to the long sides so that I could screw it in place.

 Then - sheer silliness this - I used the lengths from the appropriate planks to make the bottom of the sink.

 The base is made from an offcut of 4mm ply. I had glued the tigerwood to it first, carefully marking it to that it would fit snugly, but will admit to being more than a little startled when it did.  I must be improving.

 So then I dry fitted it.  All tickety boo, no?

Well, no, actually.  God only knows how it happened, but when I came to glue it in, it point blank refused to come anywhere near flush and I had to spend ages trimming the runners to get it to fit.  I am still completely bewildered as to what went wrong.  On second thoughts, maybe I'm not improving.

 However, finally I got the planking down and the sink glued in and I have to say that I think it all looks pretty good.  The fiddle is being held in place by clamps, in an effort to persuade it that it would far prefer to be straight than bent like a banana.

So portholes to fit, cabin sole to cover, saloon table to make and then lots of varnishing and that will be about it.  Until I remember all the things that I need that I have so far forgotten!!


16 September, 2018

Mainly galley


Progress is, as usual, in fits and starts.  Lots of pondering still, but some cutting, painting and fitting, too.

 Having finally decided the height of the galley counter, and the exact location of the drawers, I glued in the bulkhead.


 Quite often, people come in and ask me for a 'scrap' of plywood, which usually means a fairly substantial piece.  Actually, these 'scraps' rarely go to waste and I went to the stack of 12mm that I have, to use for the drawer bases.  They could probably be made out of thinner ply, but that would mean cutting into new sheets.  The leftover 12mm will do the job just fine and save me another $100 or so.

 These were cut to size.  It's good to have so many pieces already coated.

 I had already made the other bulkhead for the drawers, but needed to add a bit of kauri trim before installing it.

 I added an extra coat of epoxy to the inside of the cabinet.  Even I draw the line at painting and/or varnishing inside a stack of drawers!

 In the meantime, another major painting job was waiting: the deckliner over the saloon can be fitted now that the bulk of the fitting out is done there.  I say the bulk, you note: I still need to make a table, lay the sole and install the Flick heater.

 Once the first coat had been applied, I moved the sheet up next to the hull, to free up the table.  I could just get alongside it to apply the next three coats of paint.

 I installed the drawer cabinet and fitted the woodwork at the after end, where the cooker will go.  I am doing a lot of temporary work here, concerned that some of my ideas won't work in reality.  I don't want to take out joinery that has been glued in.


 I made an MDF pattern for the bulkheads that will go either side of the sink area.  Under the sink will be a 10 litre container for fresh water and another for salt water.  I made the pattern slightly too big and then little by little trimmed it down until it would fit.
 Then I used it to cut out the real thing in 6 mm ply. It fitted perfectly.  The pattern could then be remade for the second bulkhead, which is slightly smaller.


 I end up with two large lockers at either end of the galley.  The top corners will be a bit awkward to access, but not impossible.  I dislike having lifting hatches in the galley counter.

 Once I had put the final coat of paint on the deck liner, I left it for a couple of days to harden off and then fitted it.


 The next morning, I could remove the props.  I'm pleased with it - it went in fairly easily.  I hope it will still be light inside, once the whole liner is fitted.

Before I can install the bulkheads in the galley, I want to coat them with epoxy.  I can get a much better finish when they are horizontal rather than vertical.


01 July, 2018

Wiring! I must be getting on

Does the boat look any different that it did last week?  Not to me it doesn't, so it's always reassuring when people come in a exclaim how much I've done.  However, my mantra of 'only another couple of years' is working really well.  It has taken away any sense of urgency and I carry on each day, enjoying what I'm doing.  Every now and then I sit back and look at what I've done and feel rather startled at the whole:

Of course, the fact that the photo is taken from the stern and I'm working from the bow back, rather spoils the effect.

Back in the saloon, having sorted out the height of the back rest, I've started work on the locker lids.  These also require a ridiculous amount of thought to ensure that you can open them without having to remove the cushion, which then entails just how I'm going to fit the cushions, which in turn entails my deciding how thick the cushions are going to be, which entails my contacting the foam rubber suppliers to see what size the foam comes in (and discovering that, within the meaning of the act, it's impossible to buy latex nowadays.  Bummer) and then marking everything out.

And then cutting it to shape.  How I love my wonderful, new cordless circular saw - it is perfect for this sort of job.  I then went and priced hinges - I need quite a few - and nearly fainted.  How can they be so expensive?  But my good friend Paul at All Marine, suggested buying piano hinge and cutting it to length.  This turned out to be a much less expensive option; and I used to think piano hinge was dear.  And no, I don't want to use leather instead.  Or plastic hinges.

 (I'm not sure if this is quite how I took the photo, or whether it's been turned around by the computer, but whatever way up it goes, it looks odd!)  This shows some of the reinforcement around the tabernacle.

 And I've been fitting the deck lining in the heads. This is not one of may favourite jobs.  I could do with about five very long arms to hold it in place and another one so that I can mark it. As my mother used to say, 'it fits where it touches', but epoxy and some nice trim tidies it all up.  I'm getting the paint to go on a bit better.  I reckon I'll have the technique just about perfected by the time I finish the boat.


 The port deckliner being glued into place.  Unfortunately, of course, the clamps couldn't be used for the starboard side.  Oddly enough, in spite of that, it went up better.

Forward of the clamps you can see the first layer of the final reinforcing for the tabernacle ready to be glued down.  A bit of the insulation can also be seen.


How I wished I could use more screws to hold this in place!  But the plywood squashed up against the frames and stringers to create a satisfactory 'squodge' of epoxy.  The curve may be less than perfect, but it looks fine, without any obvious flat.


And yes, some wiring.  I am so impressed with myself.  I know it's simplicity itself, but for years I have been unable to get my head around wiring.  Everyone will insist on drawing me diagrams to explain it, and they mean nothing to me.  However, kind Richard at All Marine, patiently (with the aid of diagrams!) spelt it all out to me.  Ignoring the diagrams and concentrating on the words, I finally got it into my head in a 'story' that I can follow.  As soon as I got back, I wrote it down and now I wonder what all the fuss was about.  I am keeping it as clear and as simple as possible.  I fully expect four of the ten switches to be redundant, but - hey - I can join the Real World if I have to!  I have some lights on order, but am wondering how I can check to see if I will have sufficient or require more.  I don't want to buy the battery until I am nearly ready to launch, so I can't test them to see, short of borrowing one.