Search This Blog

Badger

Badger
In Greenland

Iron Bark

Iron Bark
Under full sail

Fantail

Fantail
At Russell Boating Club's Tall Ships Regatta

Blue Water Medal

Blue Water Medal
Blue Water Medal

Books By Annie Hill

  • Brazil and Beyond
  • Voyaging on a Small Income
Showing posts with label Wiring. Show all posts

15 December, 2019

Back to Bling


I'm working on finishing the decks before moving on to bilgeboards and so on. Laying teak in the cockpit was the final job before I could sign if off as finished.

 At the moment, I climb on and off the boat (dozens of times a day) over the stern and so the after end of the deck lockers in 'in my face' time and again.  I have covered them with teak, but wonder how often I'll see it again, because I shall have a boarding ladder for climbing on and off.  (Negotiating two rudders and the outboard motor would not be easy even if I liked getting aboard by way of the stern.  Which I don't.)

The petrol locker lids also get teak, of course.

With all the teak laid and sanded I have to say that I think it looks rather grand. 

The hinges were a shocking price in NZ, so I had to resort to Ebay.  I am very pleased with the quality of them, but they took the best part of a couple of months to get here!

Although they look like brass for some reason, in the photo, they are in fact stainless steel.  Purportedly 316.

It was about time to tackle the companionway, which was much more straightforward that I anticipated, with memories of the rather marathon effort that was required when I rebuilt Fantail's "washboards".  All that was really required was some additional framing for the acrylic to land on.

The plan is to have a Jester style pramhood and a bubble over it, like we had on Badger.  The bubble means that when the hatch is shut in cold weather, there will still be plenty of light coming in.  It also allows my taller visitors to stand up while working out how to negotiate their way to a seat!

The other thing that required fitting is my echo sounder - I should hate to sail without one, although plenty of other people seem happy to do so.  This took a ridiculous amount of time to fit, because I had to run wires from the electric panel under the cabin sole, all the way back to the lazarette.

 As ever, I was more than a little startled when I flicked the switch to see that it is apparently working.  I'm in 2.3 m of water, so it would have me believe!  I'm not quite sure why it's reading this ...

In winter, standing under a Perspex dome can be as effective as standing in a shower.  I had a second one made out of much lighter material (the outer one is 10mm, the inner one 3mm) and stuck them together with what I hope is an appropriate air gap.  Both domes, made to measure, only cost $300, which I reckon to be one of my better bargains.


Actually fitting it to the deck is going to be quite a problem because of the camber.  Indeed, it has caused me some loss of sleep, but this morning it occurred to me that the obvious thing is to make a flat area on deck and put the rings on that.  (I had been intending to build the rings up and shape them to the deck, but to be honest, that is definitely beyond my skills.

This is the piece of plywood from which the upper ring was cut.  It seemed like an awful waste of wood!  If you can't visualise how the pramhood works, All Will Be Revealed ... in due course.


 The framing is now fitted around the companionway and varnishing is underway.


Well, I might as well say it, because I think more than a few people think that my delight in varnish is a little suspect, but I like varnishing.  In fact the reluctance of the average person to put varnish on to their boat is a constant source of puzzlement to me.  In the days when people owned traditionally-built, carvel boats, they usually had quite a lot of brightwork, which had to be maintained every year, together with the work required to keep the topsides in good order.  And in those days varnish only lasted a season before requiring quite a bit of work to bring it up to scratch.


Now people generally have plastic hulls which require little or no maintenance and very little woodwork on deck, but even the little that they have is apparently too much 'work'.  How is it work, I ask myself, to beautify your pride and joy?  A mystery.  Anyway, it's been downright pleasurable to finish laying the teak and to be able to pick out the bits that I want to have a bright finish.  It would also appear that even people who don't like varnishing themselves often like the look of it, so it's nice to know that it will give other people pleasure, too.

And while I had some mixed up, I finally got to varnish the saloon table, which seems to work well.  Sadly, one piece of the tigerwood has developed a bit of a twist, so the table is far from perfect.  I had hoped that the table would be the stand-out feature in the saloon.  Never mind, it still looks attractive.  It slides fore and aft to allow people to get in at either end and now that it's summer, it slides almost too well.  I shall have to put something on it to hold the top in the right place!


09 June, 2019

A bit more teak - and then back inside

I was, I think understandably, quite keen to get my teak decks laid; I still had interior trim, lights and hatch trim to fit, but I thought I'd do it 'when I had some spare time'.  Whatever induced me to come up with this flight of whimsy, I wot not because, needless to say, there was no spare time. So, the teak was laid and the interior had not been touched.  The first job in the cockpit is going to be fitting the bridgedeck.  This is going to make going in and out of the cabin a lot less easy than it is now, so commonsense dictates that I get the interior completely finished before I commence work on the cockpit.

I still had some teak to lay - on the deck box lids, so decided to do that first, because they would need teak plugs and there were a few to be fitted on deck, too.  Besides, my mind finds it difficult to move from one mode of building to another, so it seemed sensible to carry on with teak before I lost the thread, so to speak.

 The deck is laminated, you may recall, from one layer of 6mm ply and one layer of 4mm.  I doubted anything was going to be fitting to the nearest millimetre, so reckoned 9mm ply would be fine for the lids.  These were duly cut out and coated.

 Additional framing had to be added along the sides for the lids to land on.  Much cogitating took place while I decided whether to hinge them inboard or outboard.  Gordon, (Tystie's new owner) mentioned that if they were hinged inboard, like his are, there is a possibility of stuff falling out of them, if you are heeled well over and have forgotten to fasten them down.  Or so he has been told ...  I decided put the hinges outboard, so this also required some more wood fitting around the boxes.

 Then came the fun bit of fitting the teak.

 While I was at it, I took some of the narrower stock (which will get used up in the cockpit) and trimmed along the edge of the cabin.  I raised this to obtain a little more headroom, and as I want the (upper) rubbing strake to run in a fair line along the sheer, it can now run under the teak, which will be varnished.  I trust it will all look as though it was intended from the start, when the boat is completed!

 The deck box with the extra bits of wood fitted around it.  Thank heavens for epoxy, is all I can say.  It is so good for this sort of 'retrofitting', which would otherwise require high levels of joinery.  I'm not quite sure how I could even fasten things together, if I were building conventionally.

 Meanwhile, back on the bench, the deck boxes get their teak glued down ...

 and then sanded smooth.

 Then a 'dry fit' before sealing the edges.  However, even I didn't find these too challenging to fit.

 And for once, I didn't struggle with the (simplest in the world to fit) hinges.

What you may not have noticed, but I shall point them out to you in case, are the 308 teak plugs that have been fitted in the screw holes.  I was astounded that I need so many!

 I hope that the lids will rest at a slight angle against the guard rails.  If they don't I shall have to make some sort of hook and eye arrangement to keep them in place.

 OK, back to the interior.  The piece of kauri is to hold the light fitting.  It couldn't be put in place until the beading was fitted and so the wires have been sticking out of the bulkhead for what seems like months.  (I tested them and was relieved to find that none of the zillion screws that went into my deck had cut through them!)

 None of my kauri is long enough to go right across the cabin.  The camber, as you will note, is pronounced and it is exceedingly difficult to force even these dinky bits of quadrant into place with out fastening them permanently.  I am hoping that I can fit one properly and then cut the second accurately to length.  I would reckon the odds at 10:1 at best!

 Fitting the mounting for the lamp.  The wiring isn't just hidden because I'm precious (although of course I am): it's hidden because there is no appropriate groove in the base of the lamp for it to run down.  It's going to be fun and games when I finally come to fit it, I fear.

 Meanwhile, interior trim will need to be fitted around exterior openings.  The hatches are fitted, but still to go are a decklight over the heads, a dorade ventilator ditto and the big hole for the pram hood.  The first two can be dealt with by using hole saws and I went and borrowed one for the decklight. It was intensely traumatic cutting a hole in my beautiful deck!

 I had to go back and complete the job from inside.

 All so that I can fit this.

 Ah yes, another hole - I need one for the chimney for my wood burner.  I thought the black lacked class, so have repainted a nice green.

 The flue is to be made from copper downspout.  Some teeth have been sucked about this being too thin.  Time will tell, but the price was right, seeing as how the kind people in the shop found me a damaged length.  Of course, it won't look nice and shiny like this once the fire has been lit.

Because the stove was built with the intention of fitting something totally different, the hole for the flue was a completely different size from the downspout.  After much head scratching, I went into Whangarei to see if I could find some sort of reducer.  To cut a long story short, with helpful people passing me along to other helpful people, finally a gentlemen called Carl lent me his dad's crimping tool, saying 'that's how we used to do it'.  I managed well enough, even if I did have to use both hands and was right impressed with the result.

 I reckoned I'd better fit the bit of copper that will be used to protect the bulkhead, while I was at it.  Paul, at All Marine had the brilliant idea of using copper roves to provide for a nice wee air gap.  I felt like a real boat builder, hammering in copper nails!

The +/- 150mm copper strip had been given to me, cut from a wider length.  I could hardly plane it smooth, so took to it with a file: good enough, I think.  (The reason is looks a funny colour is that it still has its plastic film over it.)

Before I can fit the wood burner, I have to light it to 'season' it as it were.  The paint gives off fumes on the first occasion.  Definitely a job for outdoors, fine weather and a calm day.


16 December, 2018

Like British Rail


We are getting there.

I have been trying to work out where to put my herbs and spices.  I'd thought to make a shelf along the stringer, but the stringer was too narrow and it all seemed excessively complicated for what I would achieve.  Then it occurred to me that I didn't really have a handy locker for tea, coffee, salt and pepper, etc, so I had the idea of combining the two.  

One way and another, I seem to have had innumerable distractions since I came back from Nelson and I've realised that when my train of thought gets broken, even for about 5 minutes, it seems to take me about an hour to get back on an even keel.  So I designed, if that's the right word, this little locker with only part of my mind, and in truth, have been worrying that it might look a bit odd.   


 It went together surprisingly quickly - I've had a bit of practice by now.

 Finding the jars was a bit of a mission: glass are nice, but they would have to be secured for offshore work, while plastic ones can fly about with gay abandon without doing any damage.  I saw some of about the correct size at Para Rubber in Whangarei, and bought a couple of dozen.  Then all I had to do was to make some little fiddle rails to keep them in place.  I think conditions will have to be very bad before they start falling off the shelf.

 I'm still ticking off the wiring.  My good friends at All Marine sold me a nice little 600 watt inverter.  This will be more than enough for running my computer, charging battery tools and powering a sewing machine.  I screwed it underneath the counter in the heads, adjacent to where the battery will be situated.

 I ran the wiring for the saloon lights, intending to screw them into place - another job ticked.

 However, the lamps need to be attached to a piece of wood so that the wire can go into the back of them, and the piece of wood needs to be fitted around the deck lining trim and the deck lining trim can't be fitted until all the deck lining is in place.  Net result: I couldn't fit the lamps.

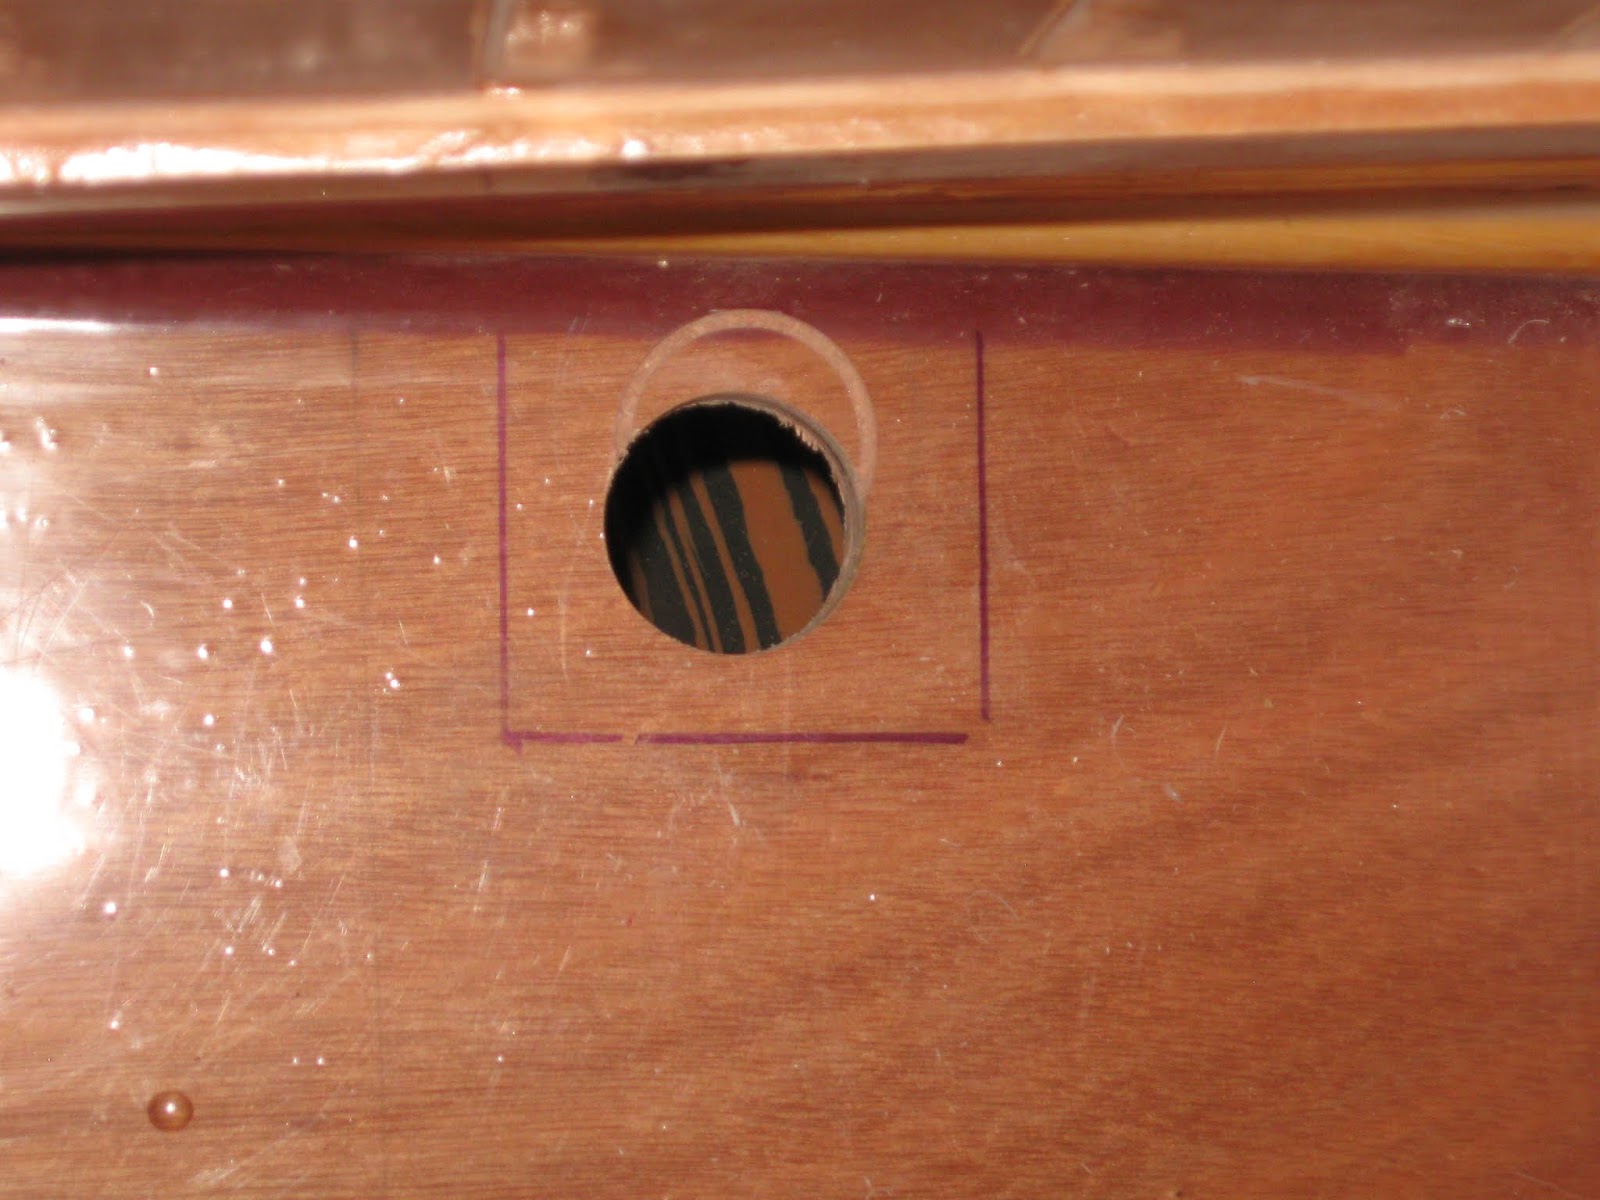
 However, I could fit the transducer for the echo sounder, without committing myself irrevocably to its wiring, although I'm pretty sure where it will end up.  As ever, it was a bit scary drilling a damn great hole through my pristine hull.

 I used some purple heart to support the transducer itself.

And glued it carefully into place over the predrilled hole.  I forgot to take a photo of the finished job.  Apologies.

 Back in the galley, I'd been ticking away at the wee locker, with its various stages of gluing and coating.  Of course I had to fit hinges to the door and have come to the conclusion that my learning curve is completely flat where these are concerned.  I won't say how long it took me to fit the damn things.


 The next job was the really exciting one of putting down tigerwood on the counter.  My friend Murray, kindly gave me a few hours to help me cut up the timber - and by the time most of it ended up as shavings or dust, the weight was reduced to an acceptable level.  I dry fitted it.

 I dislike stainless steel sinks and, besides, they come in a limited range of sizes.  I decided to make one.  At first I thought I'd make it with sloping sides to look nice, but mature consideration convinced me that the sloping sides would simply encourage the water to come out when the boat is heeling.

 My right-angled joinery is usually 'more or less', but I wanted this to be a little more accurate than usual.  Phil and Mark had given me a special clamp some months ago, and this proved to be excellent for the job.  With set squares clamped in place for extra insurance the whole thing went together satisfactorily.

 I filleted it straight away, to ensure that the corners stayed true.  Some of the tigerwood, in spite of having been properly seasoned and properly stored for a few years now (!) goes berserk once it goes through the saw so sometimes it needs to be coerced into cooperating.  I've found I need to pounce on it just at the right time, glue it down and get a coat of epoxy on it to stabilise it as soon as I can.

 But it's soooo beautiful that it's worth it.  I lined the sink up carefully, fitting runners to the long sides so that I could screw it in place.

 Then - sheer silliness this - I used the lengths from the appropriate planks to make the bottom of the sink.

 The base is made from an offcut of 4mm ply. I had glued the tigerwood to it first, carefully marking it to that it would fit snugly, but will admit to being more than a little startled when it did.  I must be improving.

 So then I dry fitted it.  All tickety boo, no?

Well, no, actually.  God only knows how it happened, but when I came to glue it in, it point blank refused to come anywhere near flush and I had to spend ages trimming the runners to get it to fit.  I am still completely bewildered as to what went wrong.  On second thoughts, maybe I'm not improving.

 However, finally I got the planking down and the sink glued in and I have to say that I think it all looks pretty good.  The fiddle is being held in place by clamps, in an effort to persuade it that it would far prefer to be straight than bent like a banana.

So portholes to fit, cabin sole to cover, saloon table to make and then lots of varnishing and that will be about it.  Until I remember all the things that I need that I have so far forgotten!!