Search This Blog

Badger

Badger
In Greenland

Iron Bark

Iron Bark
Under full sail

Fantail

Fantail
At Russell Boating Club's Tall Ships Regatta

Blue Water Medal

Blue Water Medal
Blue Water Medal

Books By Annie Hill

  • Brazil and Beyond
  • Voyaging on a Small Income
Showing posts with label Bending teak. Show all posts

19 November, 2019

It's starting to be worth all the effort!


One thing about laying teak: it may be somewhat tedious and is very messy, but when you stand back and look at it, it's all worth while.  I would have to say, that on odds, fitting out the cockpit (once I'd decided what to do with it!) has been fun, if slow.

 You will remember my agonising over the teak trim around the transom for the outboard, and persuading it into place with a heatgun.  Well, to my astonishment, when I undid the screws and took it off, it retained its shape with hardly any spring back.


It was a cinch to glue in place.  I was so relieved.


 The next job was to paint out the fuel lockers, in which I had put a small platform to take the containers.  There is room for plenty of petrol.  I don't anticipate using a lot; on the other hand, it's not particularly easy to obtain without going alongside a fuel dock for which you generally need a special card.  If I can carry sufficient that I only need to fill up once a year, I shall be very happy and can't see that being an issue.


  There was a certain amount of eye-rolling among my friends as I solemnly set to work cutting out strips of teak and fitting them into the deck lockers.  They were too kind to say it, but I could hear them thinking: "I thought you wanted to get this boat finished"!  However, when (particularly plastic or cloth) containers sit on painted surfaces, the water gets trapped and reduces the life of the paint job.  My aim is to minimise future maintenance and these strips of teak should help keep the lockers less wet.

 
Here is the teak capping in place and sanded flush.

The next thing was to start extending the decking over the lockers so as to form the lids.
 
 While these pieces were being glued up, I cut out the top for the lockers.  I often find it's easier to use my large Japanese saw (for which I recently invested in a new blade) than to set up a guide for the little circular saw, and in this case, one long side had a curve in it, anyway, which the electric saw won't cope with.  It's much easier to follow the line (for me) with a handsaw than with a jig saw, too.

 I was now ready to start laying the first teak.  I puzzled a little while as to whether I should run fore and aft, or parallel with the  cockpit or with the back rests.  In the end I decided it would look better if it was the same as the centre deck and cockpit sole.

In the meantime, I had been fitting the locker top.  Once it was all cut to shape, I then cut out the separate lids for the lockers.  This time I used the hand saw to keep the kerf down to a minimum so that the lids wouldn't be a sloppy fit.  I'd rather sand them down afterwards than try to add extra bits of wood.

 Having said which, I did put teak capping over the sides and ends, which then reminded me that I needed to add teak to the ends of the lockers.  This was done with lots of offcuts left over: it's always satisfying to use these up.

 Here the lids have been pre-coated and I'm preparing to lay the rest of the teak around the cockpit.

 It was quite a fiddle tapering the pieces along the edge, but fortunately I still have heaps of decking left, so the odd mistake isn't too much of a catastrophe.


 Gosh!  That was quick, wasn't it? I wish.  However, when I'm up to my ears in black epoxy, it's not easy to take photos and besides, you have seen the teak-laying process in the past.Although not perfectly symmetrical, the two sides aren't that far out.  The teak varies in width by up to a couple of mm and even I am not so obsessive as to ensure that they match either side.

I fitted the teak to the lids in full length pieces and then took the lid down and cut the lids out, which left me with a kit of teak pieces to fit.


I did all the lids as one, gluing them up in situ with masking tape separating them from each other and from the rest of the locker lid.  Once the glue had cured, I took the hatches off and did the rest of the lid.  This wasn't quite as straightforward as I'd hoped and for the second locker, I glued down the wood on the fixed part first, which made it easier.

The lids than had to be sanded, the gaps filled, sanded, filled, sanded ... you get the idea.

The next stage is to put teak on the fuel lockers.  When that is done, the boat will essentially be finished and I can open the bottle of Bollinger that a kind friend gave me ages ago.  There will be much rejoicing - even if I did hope to have had this finished by the end of October.

Of course, I still need to make the companionway, sort out the pram hood, put on the toe rails and rubbing strakes, fit the stanchions, finish and hang the rudders, work out the tiller arrangement, make the bilgeboards, paint the boat, make the mast, make the sail, sort out blocks and rigging, make the self-steering, fit and wire in the solar panels, finish the davits, make patterns for cushions and sew up their covers and I dare say many other things that I can't think of at the moment.  Please don't remind me of them: I can promise you they won't be forgotten.


20 October, 2019

How can it all take so long?

Well, I dunno, but it does.  I have but a paltry collection of photos to show you: little indeed for the hours that I've been putting in during the three weeks since last I posted.  All I can say is that I've been working long days and there isn't much to show for it.  Still, one day I'll get there!


 With the dividers filleted in place, I made framework for the lids/seats to land on.  As ever, things didn't go perfectly as anticipated, so there was a certain amount of sanding or filling to be done to get everything level so that the lids don't wobble.

 In the meantime, I finished off in the lazarette, making a removable sole panel which is at a little less of a steep angle than the bottom of the boat.  The idea is that it will be a little less uncomfortable to sit there when I am getting things out of the lazarette.

 Belatedly, I recalled that I had intended to make a bar either side, to keep the boxes in place.  Actually, there is not much headroom for them and the fiddle on the shelf is quite high, so they are very unlikely to jump out of their own accord.  Still, if they can, they will!  It would have been a lot easier to fit before I closed in the cockpit!

 The seat framing is glued into place and the screw holes plugged.  (I often find it quicker to use wood plugs for screw holes than to fill them with epoxy.)

 Before I painted the lockers, I cut up strips of decking for slats, in the hope of preventing things in the locker from standing in pools of water.

 I then masked off for the slats and proceeded to paint the lockers with four coats of low-sheen, two-part polyurethane paint.


 I stopped painting when the lockers looked white!

 Pulling the masking tape off was a satisfying job.  The locker is now ready for the teak slats.

 I am trying to fit a nice teak capping to the outboard motor transom.  My thicknesser stops at about 4 mm.  I sanded the teak some more, but it's still rather too thick to bend easily.  Using a silly number of screws and heating the teak with a heat gun, I managed to force it into place.  I will leave it there for a couple of days, but I have no great hopes that I will be able to glue it back in again without it breaking.

 A little bit of teak trim around the cockpit gives a pleasant illusion of solid teak.  I happened to have a long length that I'd made up for the forward end of the centre deck, but which had broken when I tried to bend it too far.  It was made from recycled timber with old screw holes plugged.  This recycled timber will now be recycled again.  Teak is inconceivably expensive and I can't even consider buying any new.

I don't think I've included a photograph of the little rail next to the fire.  It does a good job (assuming it doesn't delaminate due to the heat!), but is still awaiting the varnish brush.

And finally, I have managed to paint around the galley hatch.  I was waiting for the final use of the low-sheen paint to do this.  I'm pleased I remembered - I don't see my using that paint again.  Which is a nice feeling!


07 April, 2019

Teak decks

Well, the first thing I should say is that you shouldn't really try laying a teak deck when you have bursitis of the knee.  The second thing is, resign yourself to it taking a long time, especially if you do happen to have bursitis!  However, I've been asking a lot of my ageing body, so can't really complain if it protests occasionally.  It is slowly improving and would no doubt improve a great deal more if I didn't spend all day climbing up and down ladders, steps and stairs and trying not to kneel on it.

While the covering boards were getting used to the idea of bending, I tackled the front of the cabin.

  I decided to laminate up this time and found some very thin pieces of teak that would be unsuitable for the deck, but were ideal for this job.  They flopped very nicely into place.

 I laid down clear plastic tape and used the deck itself as a former.

 While the glue was going off, I persuaded the covering boards abaft the bilgeboard cases into place and screwed them down.  I won't glue them until the end, because I think it will be easier to fit the final pieces of teak without them permanently in place.

 In spite of being relatively narrow and thin, and in spite of having been bent at a greater degree for several days, they were somewhat reluctant to do as they were bid.  I hope that by the time I come to glue them down they will have finally got the idea.

 With the forward trim glued up, I planed it flat on each side and tidied it up top and bottom.

 It screwed and glued into place very nicely and with a coat of epoxy to protect it for the duration, finished off the cabin front attractively.

 The after one was sanded smooth and the covering board screwed into place and then glued down.


 Then I started laying the decks.  I forgot to take any photos for the first few planks, probably because I was so excited to be using this teak at last.

It's hard to believe, at this stage, that I will end up with a beautiful teak deck.  The black glue makes a terrible mess.

However, for the sake of morale I have cleaned up an area of it as can be seen in this enlargement from the above photo.  It will look pretty splendid when it's all done, I think!


24 March, 2019

Hatches!!


I've been a bit busy and distracted by life outside boatbuilding, recently, which is why I haven't had chance to blog.  Frustratingly I've also been slowed down by having done something to my (other) knee, which makes if painful to walk and excruciating to kneel on.  Ibuprofen is helping.  I've even rested it, but the psychological trauma ensuing from that is probably worse than the physical trauma from using it!!

 With the second layer of plywood on, it was time to fill and sand.

 In the photos, it looks remarkably even.  In reality less so, but I don't mind.  I've done my best and it will do what it is intended to: hold the hull together and keep out the water.

 This is meant to be a photo showing how the centreline of the deck is perfectly over the centreline of the bottom of the boat.  Of course, you can't see it and of course by moving the camera one way or the other I could have fudged it.  But anyway, it's a way of having a quiet boast.  I'm rather proud of myself (not to say more than a little startled!).

 The next step is to put the teak on.  Well, no, actually, I need to put on the hatch frames first and fix the king plank - and the covering boards.  But it's all made of teak so I guess I have started laying the deck.  One of the reasons for marking the centreline was to try to ensure that the hatch framing was parallel to it.  The laid decks would make it horribly obvious if it weren't!

 Having done a lot of measuring both on deck and below I started to cut out the opening for the hatch.  Very scary!  For those who object that it's not on the centreline:
(a) the centreline has been reinforced to take the loads from the mast (b) I like the hatch to be over my bunk (c) it won't leak any more or less off to one side.  Either it leaks, or it doesn't.

 With my natty little battery circular saw, I joined the dots (the holes made using a hole saw.  Wonderful things).

 It ended up just about where I had planned.

 I dry fitted it, but subsequently came to the conclusion that you don't want too snug a fit.  It was hard to get the edges epoxy sealed because the thickness of the epoxy meant that the hatch jammed.

I could have put framing for the hatch in when I was doing the plywood, but I wasn't sure exactly where it would end up.  It was no more difficult to do it now.


 I traded (in advance) my thicknesser for a large piece of teak that my friend, Marcus, had.  With huge trepidation - have you any idea what teak costs?? - I cut it and planed it.  Then I cut mitres and glued it all together to make a framework for the hatch.

 With the glue cleaned up, the wood sanded and a coat of epoxy on, it looked pretty smart.

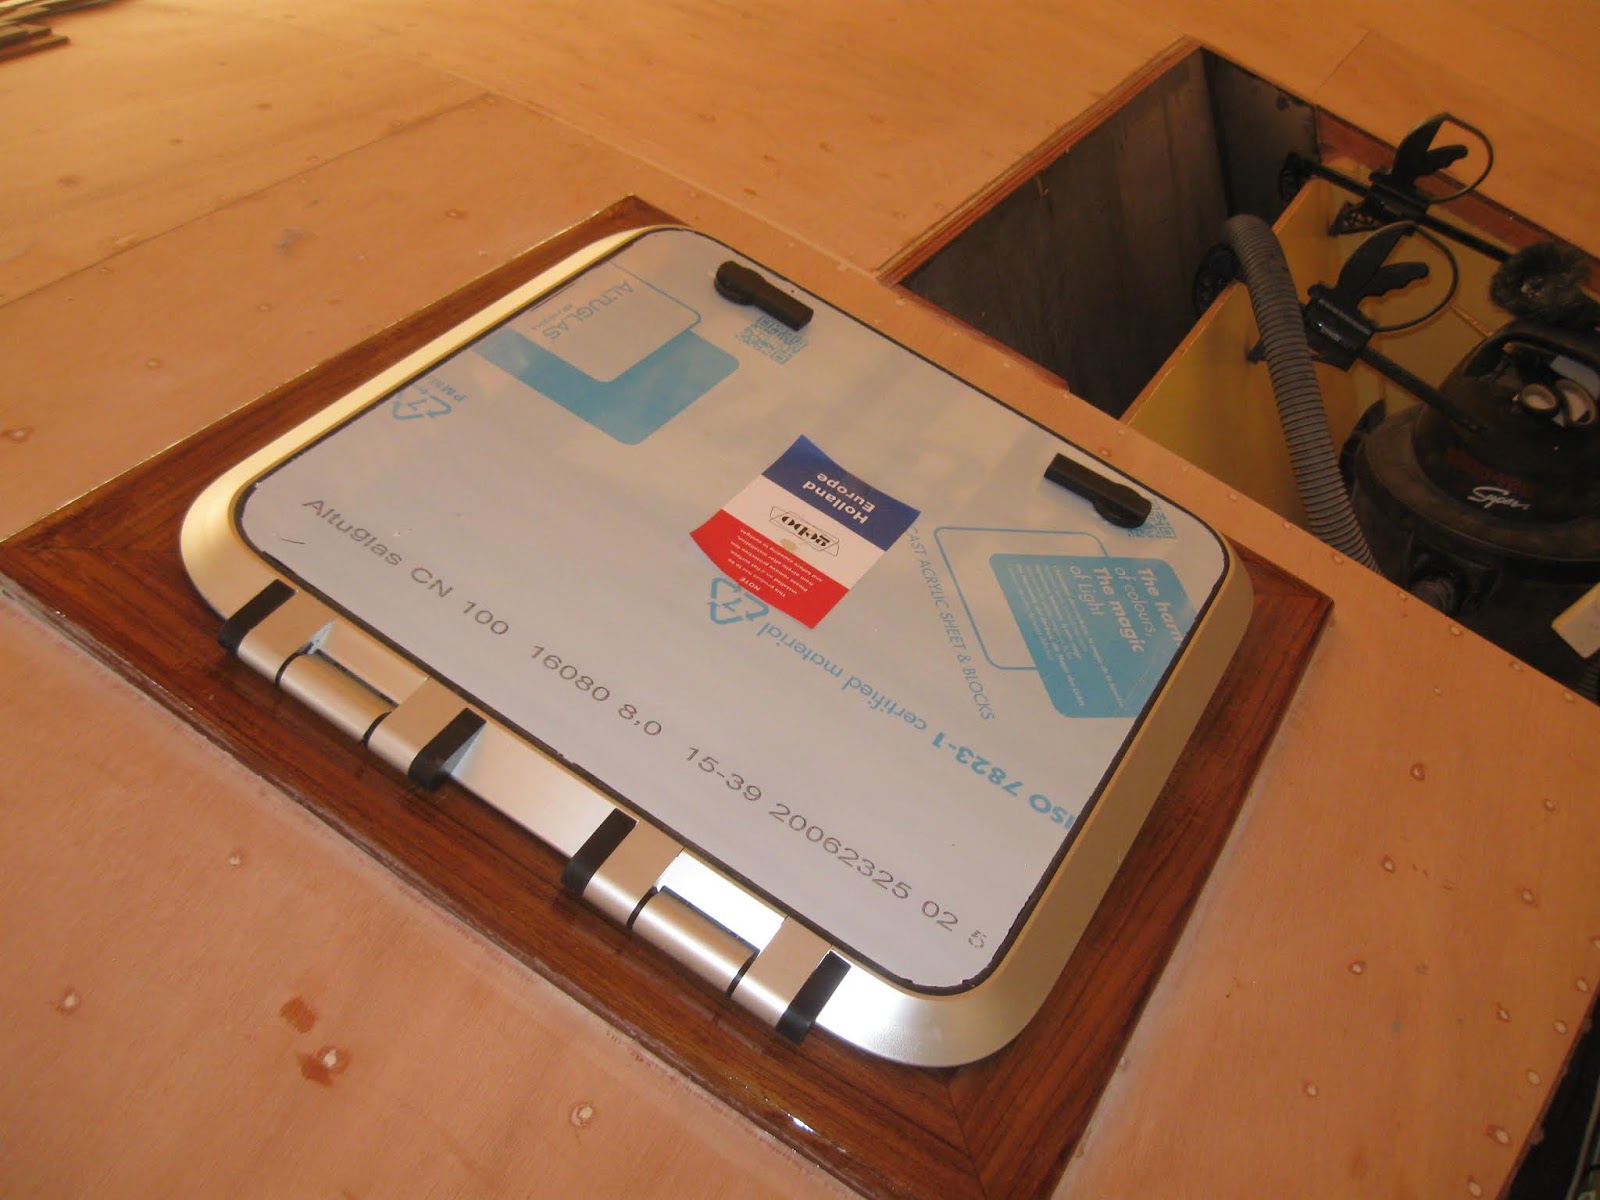
 I also had a small hatch, intended to go over the galley. I bought it at a knockdown price for Fantail, but never fitted it.  Just right for Fánshì.

 Again I made a frame for it.  This time I could salvage some teak from an unwanted galley rack that I had been given.

 Fitting the forehatch.

 The galley hatch frame coated.

 I purchased a tube of grey Simsons Marine Glue and applied it lavishly to the hatch.  Supposedly, these hatches are to be level +/- 1mm.  In my wildest dreams I would never achieve this.  I relied instead on using heaps of mastic and just tightening the bolts gently.  Whether it will leak, only time will show.  Being lightproof is not necessarily the same as being waterproof.

 The little hatch was also framed up.

 As you can see, 'little' is the operative word! Still, it's only a little boat.

 I thought of a very cunning plan to line up the framing, using pieces of ply to overlap the joins to keep it even.  The screw was used as a handle to line up the final piece.

 I then used the wee router to trim the head liner and did the same at deck level.  As you can see, I still haven't fitted the trim; this is supposed to be a Sunday job, but as I am typing this at 3.50 pm and still have a way to go, you can see that Sundays tend to get rather over committed.

 Noel Barrot, a well-known and awe-inspiring boatbuilder, comes by to look at my progress on occasion.  He is very kind and never winces at my 'joints'.  He suggested that I pre-bend my covering boards by slowly forcing them into a curve and then holding them down with thumb cleats, while they get the idea.

 Ready to install the galley hatch.  The Simsons cleans up really easily.  An endearing trait.

 And there it is, finally in place.

So now I can get on with the decks.  My stock is in two widths, due to having come from thicker material that had a rebate and that was split in two.  So I laid out all the teak that is required to cover the centre deck.  I have just enough of the wider material.  I used narrower stock on the foredeck and what's left will be used up in the cockpit until I run out!!

 The camber makes the bending of wood nearly impossible - 230 mm of deflection is a lot.  Anyway, I scavenged through the pile of bits that I've been given and acquired and glued lengths together to get approximately the required shape for the after bulkhead.

It cleaned up quite nicely and I temporarily screwed it in place, out of harm's way.  The forward end is much shorter and I will probably laminate the wood for that in situ, possibly facing it so that the laminates don't show.  Lack of finances does mean that some jobs take longer than they might.  No worries, it's all good fun!

Once the covering boards/margins are in place, it will be time for cutting and laying the deck, proper.