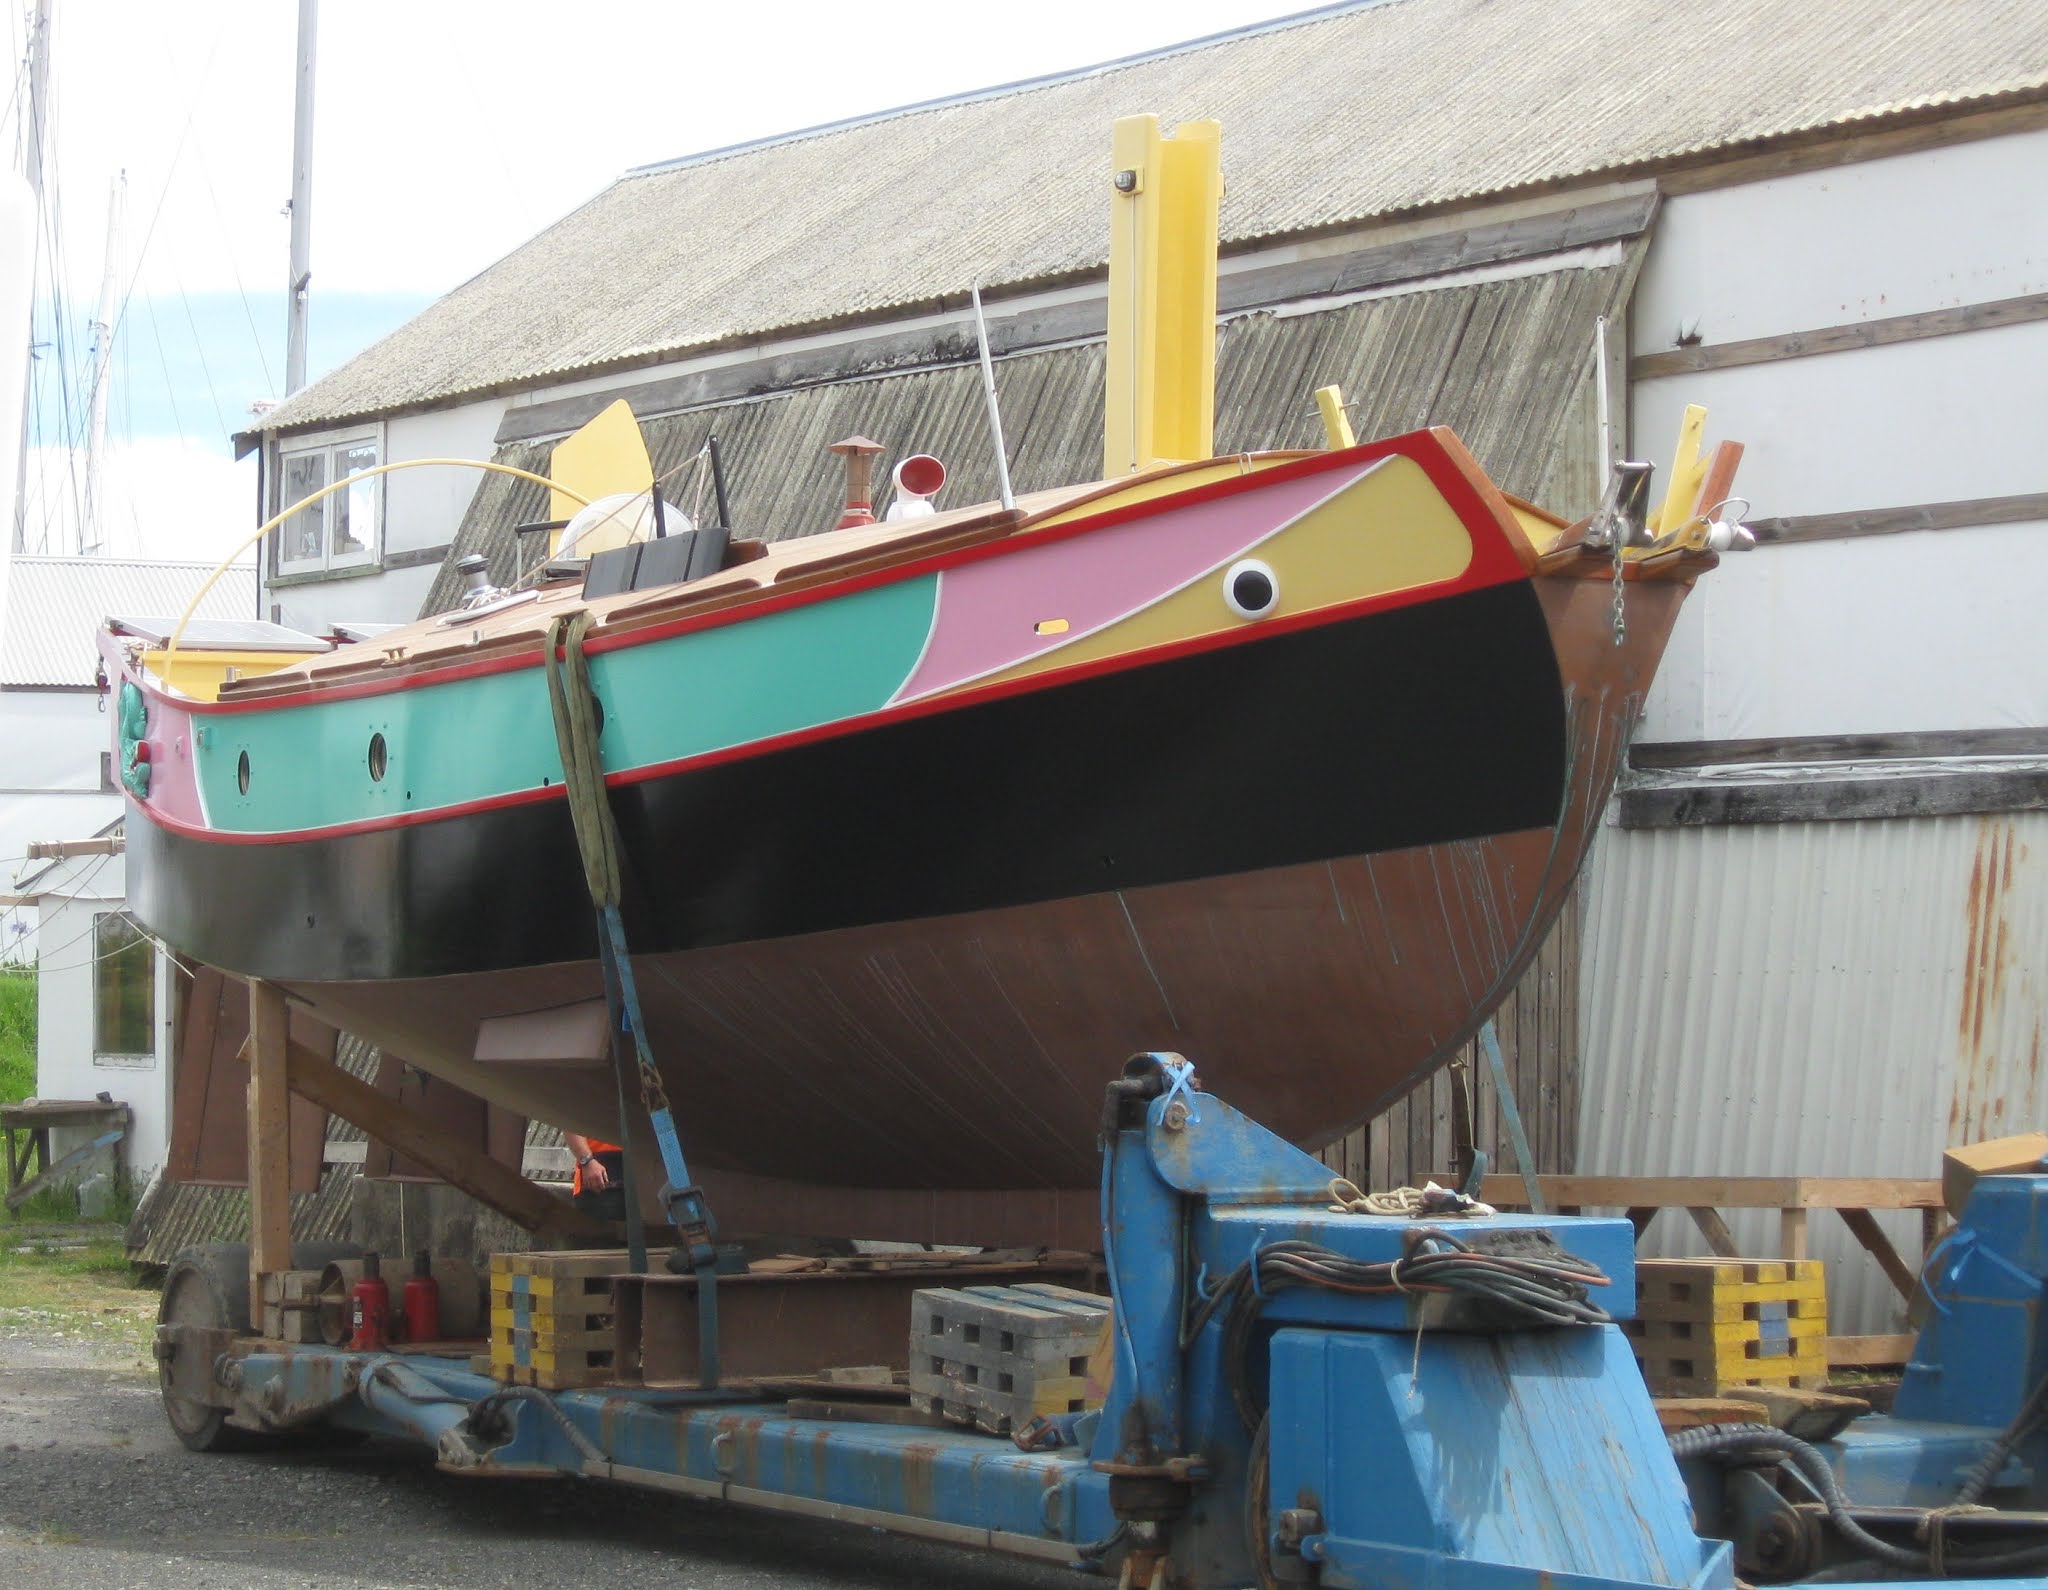
I concluded my last post with the less-than-welcome discovery that the bilgeboards could not be rigged as planned. Obviously a Plan B was required.
If you look carefully at the photo, you can see what the problem is. A block is required on deck to haul the bilgeboard up.
If it is fitted on the piece of teak, intended for that purpose, the
rope will catch on the plastic strip at the after end of the board. The
obvious thing to do was to put the blocks on post, which would bring
them further inboard.
Some years ago, I was given some fibreglass stanchions. They are very strong and well made, but at 33mm diameter at the base, looked far too large when I offered them up for their intended purpose. However, I reckoned they would be ideal for this job, and laminated up some leftover teak decking to make a base for them.
These bases were glued to the decks, joggled around the teak already there.
The stanchions were fitted into holes that were sunk well into the bases, using a hole saw. Extra glue was poured in from the top to ensure a really substantial "root" had been achieved.
The posts in place. In the background is Blackie, a feral cat that thinks the shed is her home.
I capped off the posts to keep the rain out and could then rig the blocks for raising and lowering the boards. Well, as it turns out, lowering them. With no water to float them raising them is impossible, at present: the slope of the cases plus gravity makes for too much resistance.
While this had been going on, I had decided to get my pram hood frame made up. There are very clear drawings in Practical Junk Rig, and I took my copy along to a local company that specialises in making stainless steel stuff for boats. I showed him the drawing, said what I wanted, gave him the semi-circular piece of wood that I had already made and asked him if he wanted to keep the book. He photocopied the relevant page and gave it back to me. I asked him if he really understood the concept and he looked at me as though I had crawled out from under a stone. Of course he did.
Well, apparently he didn't. Not only did he make the frames far too heavy - 18mm stainless steel instead of the 12mm that would have been more appropriate, he made the hinge/connector way too big. You can see it in the top left corner of the photo. Made out of 3mm material, it was impossible to bend to match the wood, and moreover, it was so big that it extended well beyond the hemisphere. And the frames didn't stack properly. I am not the cleverest of people when it comes to following a drawing and it is a slow and painful process for me to reproduce something. However, I worked out a scale from the book and made a pattern out of 4mm plywood in about half an hour. I then adjusted it until I could get the somewhat altered frames to fit. I couldn't afford to get the whole thing made again, and there is nothing actually wrong with 18mm for the frame. It's just unnecessarily heavy.
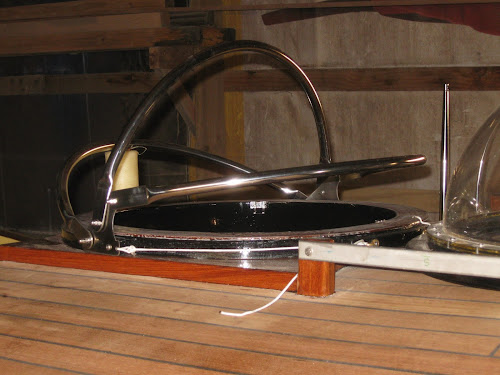
I took my pattern to another shop (I am completely feeble about going back to complain to people) and got them to make what I wanted. They really couldn't go wrong and I drilled out the holes myself. Here is the framework in place.
And this is with the frames folded down. At the end of the day it is a very acceptable job and I give grateful thanks to the good friend who gave me some funds to make this possible. I shall always think of it as his pram-hood.
Joining the rudders together has been something that has puzzled me for a long time. There's all this blather about Ackermann steering which is all to do with car wheels, but apparently applies to rudders, too. Then the rudder bar has to allow the engine to lift. After much cogitation and some discussion with The Great One, who spelt it all out to me in words of one syllable, I decided that the bar would be best fitted abaft the rudders on small 'tillers', attached to the rudders. Some of my invaluable old kauri was sawn up for this purpose, and glued so that the tillers had a small wedge on them, according to Mr Ackermann's theories. I've already forgotten exactly what they are!

The next job was to sort out the self-steering gear. More multitasking! It's really rather stressful, in truth, and leaves me little energy for other things. The Great One, once more had come up trumps, you will recall and really, all I had to do was to make the connections and a wind vane. I had made little tillers for the trim tab rudders, and made the connection between the vane and the nearest (port) tiller from Tufnol. While I am perfectly sure that David made everything correctly, I am never quite sure that I have done an equally good job, so I have made several extra holes in both so that I can adjust the trim of vane to trim tab if necessary.

I think I mentioned about having to put on yards of masking tape - one of my least favoured jobs, so that I could start painting. Anyway, I spread the red paint with gay abandon, but came to regret not putting on any undercoat. The red polyurethane doesn't cover that well (and, to be fair, it says so on the lid) and a base coat would have made it all more even. Five coats were required to get an even (ish) appearance. I shall not make the same mistake with the other colours!

Another issue that has been tasking my poor brain for, literally, years, has been the tiller(s). Having somewhat reluctantly concluded that one tiller was simply not going to work, I have accepted that I will have to have two. However, it's bad enough having one tiller in the cockpit at anchor, but two is beyond a joke. The obvious thing is to hinge them up and I was sure that this would be my solution until it sank into my tiny mind that there is to be a thundering great seat across the lute, over the rudders. This would obviously prevent them lifting. Always, in the back of my mind, is the fear that I might have to clear harbour, one dark and stormy night, with no notice. The idea of removable tillers is therefore anathema to me, but finally I had to accept that if I wanted to be able to have a clear cockpit at anchor, then I will have to be able to take the tillers out. And besides: I don't expect I'll be sailing in wild places that often!

The next question was how to fit the tillers and all I could really come up with was some sort of box into which they could slide in or out. I couldn't put the tillers on top of the rudders, contained between cheeks, because of the trim tab tillers. I didn't want anything too clumsy and the best I could come up with was fitting them into some box section metal. I managed to run down some aluminium of very nearly the dimensions of the section that I had already laminated for my tillers (before I realised that they couldn't be hinged!).
Having finally made my decision, I cut the laminate in half and shaped the tillers. The laminates make them strong, and although they don't look that big, they certainly compare favourably with solid tillers on boats of a similar size and, of course, the rudders are not that big. I am a great believer in reefing out weather helm: I am sure they will be amply strong.
The plan was to screw the cases on to the side of the rudders, bedded on Simson's Marine Glue. It is possible to glue alloy with epoxy, but very messy. I intended to leave two large screws in place anyway, so the Simson's should be more than adequate. A bolt, with an R clip to secure it, will pass though both tiller and rudder head. I scarfed a piece of purpleheart to the base of the tillers because it is both harder and stronger than teak. I then coated them with epoxy and graphite powder.
While I was working on the rudders, I decided to fit a couple of stops. I have never had rudder stops on a boat before, and have often felt that they would be a good idea. Time will tell. On this photo, you can also see the long bolt that fits through the tiller and its case.
I fitted the shaped tillers to check that everything works. They are easy to remove and replace. They lie neatly outboard on the upper seating and don't interfere with anything. Once the alloy is painted, it will be less obvious. I admit that this isn't the prettiest of solutions, but it is practical.
Meanwhile, I was carrying on with the self-steering gear. I bought some 3mm plywood for the vane and cut it to the same shape as the sail will be, which I think looks rather nice. I glassed one side, to stiffen it a little. I didn't want to add the extra weight of glassing both sides.
The trim tab tillers also need to be joined, so I made up a little bar from offcuts of teak. I am getting a bit short of suitable timber and reckoned that the laminated teak would be both strong and light. I had epoxy mixed anyway, to coat the bottom of the seat.
The reason I was trying to keep the vane light is because it is necessary to counterbalance it in order for it to respond to the wind as is required. I added struts to the plywood to attach the vane to the post down to the self-steering mechanism
and to support the counterbalance weight. I was following David's drawing, but when I realised how much lead was required, I rather wished I'd made the lower arm a bit longer. Real boatbuilders would have melted scrap lead to an appropriate shape. I'm terrified of doing that, so went and bought a couple of 500 gram dive weights and a variety of fishing weights to trim it accurately. I glassed the big weights to the lower arm of the wind vane.
I then put it onto the upright and tried adding small weights until the vane balanced. Another 2x8oz and 3x1/4 oz weights were required. The last 1/4 oz made it a little nose heavy, but I still had to add paint to the vane.
I fitted the self steering to check that it all seems to work - and to get it out of the way until I would paint the vane!
Finally the last coat of red paint was on and I covered it with clear polyurethane to protect it from the sun. Counter intuitive, I know, but the commercial, clear two-part polyurethane that I use as 'varnish', has better UV inhibitors than the coloured paint!
I finished off varnishing around the stern and waited for it to harden off so that I could affix the solar panels.
Gordon was painting his dinghy, so I filched the tag end of his white paint to cover the small pieces of wood that will serve as dividers between the colours on the cabin sides.
I had been discussing my bow rollers with a friend and it occurred to me that I might as well fit them. I've been putting it off because it's a bit of a squeeze getting past them, but as I won't be lugging pieces of wood around 'upstairs' any more I decided to secure them permanently.
The next stage was to prepare the cabin sides for undercoating and I decided to do the battens for the sail at the same time. There are seven battens in total, including the boom, and as they are jointed, that means 14 altogether. They take up a lot of space, laid out flat.
Then there was another long day spent masking off the red paint so that I could undercoat the cabin sides. Blackie seems to have got herself into the photo again.
Yay! Here goes the first coat of undercoat on the cabin sides. This
stuff covers wonderfully, as you can see, and has a slight sheen so
that it shows all the bumps and hollows. I'm actually very pleased with
how fair the hull is. There are no fillers apart from what I used over
the scarf joints before covering the hull with fibreglass. The
undercoat is International Perfection.I might have used if for the top coats, too, except for the fact that
the range of colours is so limited. It is certainly the easiest
two-part polyurethane I have used for producing an acceptable finish.
 Acceptable
to me, perhaps I should say. To be honest, even if I had the skills
and the patience, I am not that interested in getting a 'super yacht'
finish on the topsides. A boat that is lived on all the year round is
effectively a work boat. I like her to look smart and tidy, but I aim
for the sort of finish you used to see on fishing boats, in the days
when fishermen loved and cared for their vessels. Life is too short to
spend time and money fairing and sanding, fairing and sanding. If she
looks attractive as I row away from her, that will suit me.
Acceptable
to me, perhaps I should say. To be honest, even if I had the skills
and the patience, I am not that interested in getting a 'super yacht'
finish on the topsides. A boat that is lived on all the year round is
effectively a work boat. I like her to look smart and tidy, but I aim
for the sort of finish you used to see on fishing boats, in the days
when fishermen loved and cared for their vessels. Life is too short to
spend time and money fairing and sanding, fairing and sanding. If she
looks attractive as I row away from her, that will suit me.
It was exciting adding the first layer of coloured paint at the bow.
Even more pleasing was that I am achieving the effect that I was aiming
for.
As I shall be making a yellow sail, the wind vane
is also yellow. Much more so than it looks in the photograph which appears more like cream!
Which reminds me. The undercoat certainly makes for a nice, even base, but at the end of the day, I still end up applying 5 coats of paint!
The varnish around the stern was now hardened enough for me to put the solar panels back in place, permanently.
The panels are lashed down to lacing eyes, that are screwed to the panel frames and to the davit bar aft, and the top of the lute, forward.