Search This Blog

Badger

Badger
In Greenland

Iron Bark

Iron Bark
Under full sail

Fantail

Fantail
At Russell Boating Club's Tall Ships Regatta

Blue Water Medal

Blue Water Medal
Blue Water Medal

Books By Annie Hill

  • Brazil and Beyond
  • Voyaging on a Small Income

03 February, 2019

Finally I get to varnish!


I have been working really hard on the boat these last few weeks, well aware that Time is Going By and that everyone else is off sailing while I'm still in a boat shed.  This has meant that my Sundays 'off' have been more than usually busy, plus of course there was the Tall Ships Regatta.  All this is to explain why I haven't blogged for a while.  So lots of pics today to make up for it.

 I may have already mentioned these natty little floor rings from Classic Marine.  There is still a wee bit of space for dust to get into the bilges around them, but they are the best that I've seen and feel robust when you use them to lift up the sole.  They don't hold the boards down of course.  If I go offshore, I'll probably simply put screws in for the passage.

 Making the cabin sole is definitely one of the 'lolly jobs' and I am so pleased with the end result.  The tigerwood sands to a beautifully, satiny finish that feels lovely under one's bare feet.

 Another lolly job - and a rather scary one - is making the saloon table.  Many boats have tables that are works of art.  A friend has just told me how she inlaid hers, but I don't have that level of skill, so am keeping it very simple.  I had made a 'pattern' out of MDF and scrap plywood to test out the idea.  Because of the fore and aft bulkhead next to the dinette, the table needs to be able to slide so that one can get access.

The table is designed to fold, but instead of the leaf folding down, it will fold up and lie on top of the other one.  This avoids the irritating business of everyone having somehow to remove their knees when you want to extend the table.  It also gives more leg room when the leaf is up.

 I agonised for ages over the height of the table, and finally got my friend, Alan, to sit at it.  I had a moment of cold panic - it was only just high enough and I'd thought of knocking off another 50mm to suit me!  As I would like my friends to be able to be comfortable, I have compromised.  Of course, the definition of compromise is that no-one is happy!  This photo also show the table top slightly off centre - slid to one side.

 I then glued two pieces of tigerwood together to make substantial feet, for bolting the table down.  I cut them to a shape that I hope will avoid toe stubbing.

 Oh no!  More hinges and they caused me just as much grief as all the others.  Somewhere in my brain the synapses fail where hinges are concerned.  I hate fitting them with a passion!

 But they do look rather nice.  As long as you don't look too closely.

 Meanwhile, I've been working on the headliner, cutting the plywood, fitting the pieces, coating it, painting it and finally gluing it up.  Two more pieces are waiting to go in, but I decided to leave them off until I'd done the varnish.

 So while glue is setting on the table and paint is drying on the headliner, I may as well complete closing in the boat by laying the decks.  As you can see, even 6mm ply doesn't exactly flop over the camber.

 I had plenty to screw to at the forward end, with all the reinforcing for the mast.  It was good to start off with a fairly straightforward piece.

 However, the next piece presented rather more of a challenge, requiring far more screws than I'd originally anticipated.  Even my vast weight on the edge of the panel only just persuaded it to bend.


 And the matching one on the other side.  Gluing things down in temperatures of over 35ºC is not a lot of fun, even with super slow hardener, and can get a little stressful.  Thank heavens for battery screwdrivers!

 The next panel has to go between the bilge board cases: I'm still working out exactly how to cut them down.  The original idea was to hang the control blocks from them, but I have visions of some large person slipping and landing with all their weight on the 12mm plywood, breaking it off.  So I think I'll trim them flush and invest in some stand-up blocks to take the lines.

 When I dry fitted the panels, I discovered that once forced into place on the camber, they formed hollows on the fore and aft line.  I don't quite understand this.  I'm hardly 'torturing' the ply, because the deck is horizontal (more or less!) from bow to stern.  However, mine not to reason why, so I put battens along the prevent it happening.

 Before gluing the panels in place, I put down some insulation material, more to prevent condensation than anything else.

 Then I had another session with recalcitrant plywood, trying to get it to bend as I wanted.  It would have been a lot easier if I could have done it in one piece, but the bilge board cases prevent that and I didn't want to cut them off at this stage.

 I doubt you can actually see it in the photo, but in spite of my best effort - and the batten, the panel still has a bit of a hollow.  By the time I have another layer of (4mm) ply and the teak on, I hope it will have smoothed itself out.  Anyway, it will keep out the water and strengthen the boat, which is its major purpose in life.

 I find people's attitude to the camber a bit of a puzzle.  When the boat is heeling, you can walk on the weather deck and have a pretty level area to move along.  When the boat is upright, you can walk along the centre line (sail permitting).  I don't see the issue myself, but the camber draws a lot of negative comment.

 I am leaving the stove installation right to the end.  I've put a few tiles in place behind it.  They don't really do much, but they look nice.  Supposedly you are meant to leave miles of space around a heater, but I've lived with many and I doubt any of them complied.  The one I'm fitting has good heat shields and will be 100mm from 'combustible surfaces'.  I don't think it will set fire to the boat, as long as I don't crank it up too far!  And as I only have a small space to heat, I'm unlikely to do that.

Finally, I could get down to one of my favourite jobs, varnishing this lovely wood.  Masking tape was required around the white paint, which is only a semi gloss finish.


 I put three coats on the areas that will get hard wear, two coats everywhere else. If only paint were so forgiving!

 I varnished under where the heater will be.  It's much easier to remove the dust from a shiny surface!  The varnish really picks out the grain in the wood - the strange mark on the kauri to the left of the passageway is in fact a golden whorl of wood that literally glows.  It's quite beautiful.

 I like the contrast of the tigerwood and the kauri.

 And the little locker doors all look rather sweet now that they are varnished.

And I've treated myself to two lovely brass, pumps for the galley.  I am so pleased with the way my sink has worked out.  Large enough to wash my biggest pot in, but small enough that I can use fresh water to do so.

So back to the decks. 

20 January, 2019

Russell Boating Club's Tall Ships Regatta 2019


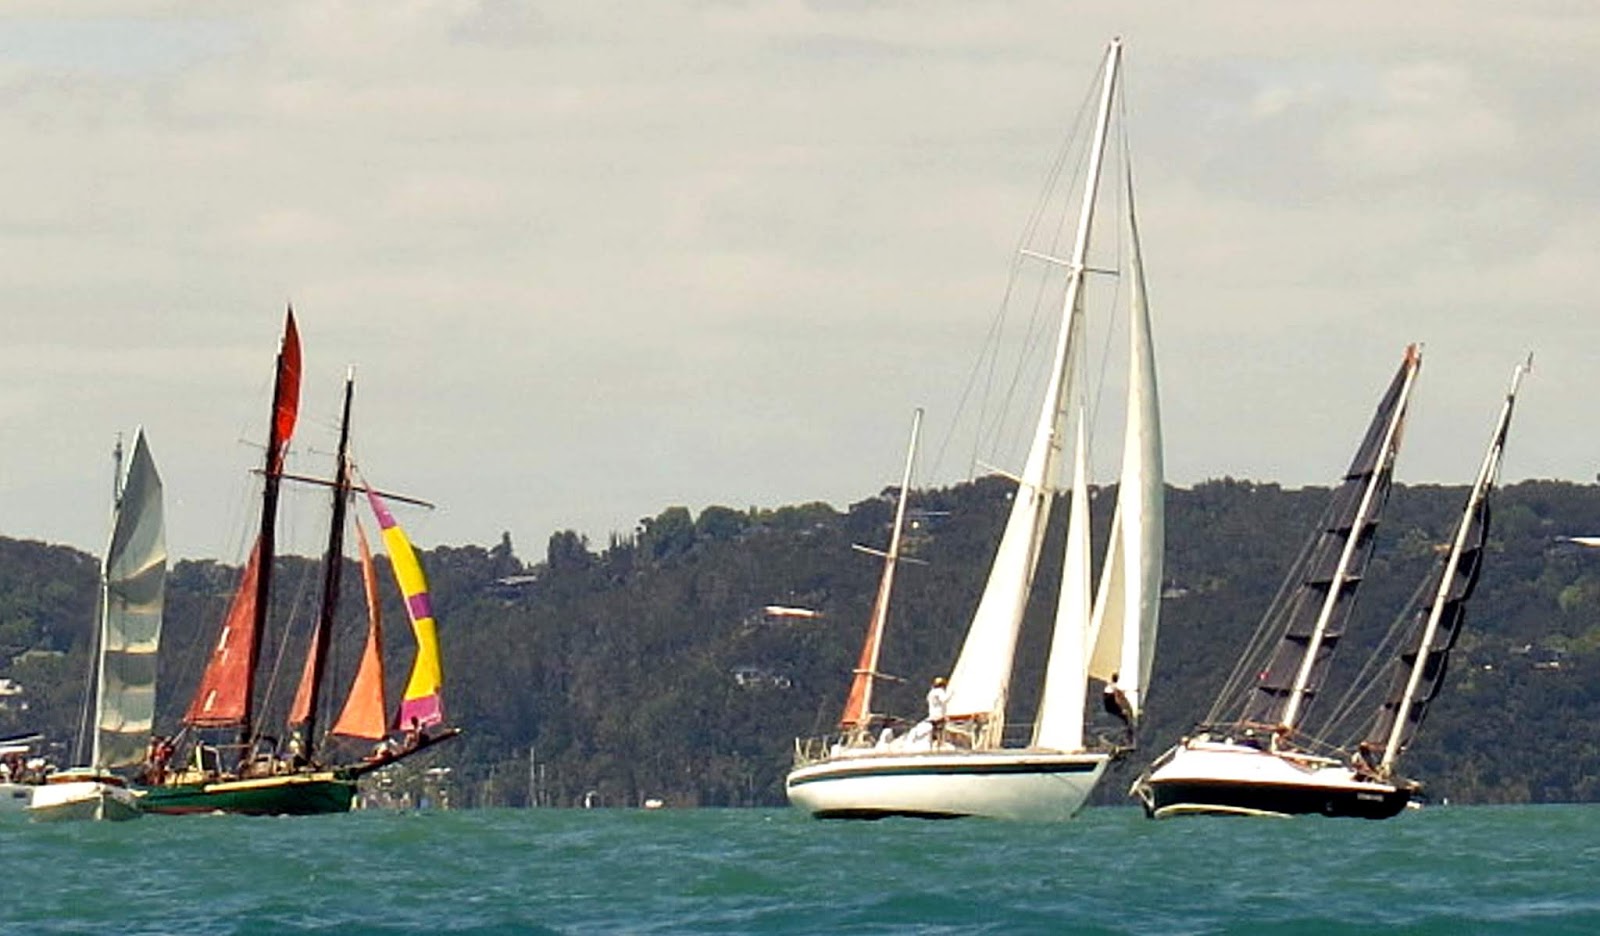
Last weekend I took a break away from boatbuilding to attend the Russel Boating Club's Tall Ships Regatta, along with the junks Zebedee, Tystie, Blondie, Arcadian and Freebie.

I am also going to take a break from blogging about building a boat to blogging about sailing one. In truth, I just want to post a load of pretty pictures!

We couldn't have had a better day for the race, although at first the wind was so light we thought it might be a bit of a disaster.  However, it filled in at about F3/4 and we had a great sail.  A couple of months ago - it's a long story and I won't go into the details - Alan made a new rudder for Zebedee and it has completely transformed his sailing.  Alan took the tiller at the start line, but then handed it over to me, having a fond conviction that I can take his boat better to windward than he can.  Regardless, I certainly took Zebedee to windward better than I have ever done before.  He pointed right up, while still making reasonable boat speed and before long we realised that we were actually overtaking pointy-rig boats - bigger pointy rig boats at that - to windward.  Those who sail junk rig will understand just how gratifying this was: one gets so tired of being told that junks don't sail to windward!

We fair galloped round the course and had some wonderful tacking duals and personal races with several boats, all of which added to the pleasure.  The finish line was breathtakingly exciting as we sped along neck-and-neck with the incredibly fast gaff-rigged yawl, Shanty, beating him by a matter of feet.

At the prizegiving, Alan and Zebedee were awarded a very well-deserved second place.  However, the next day, our friend, Gary, noticed that the comparative times showed us 57 seconds behind Shanty, whereas in fact we were 3 seconds ahead.  When this was pointed out to the Race Committee, it became apparent that someone had done their sums wrong - hardly surprising in the rush to get the results sorted - and the final result is that Zebedee won the Tall Ships Race by 28 seconds on handicap.

Poor old Zebedee's handicap will take a hammering now, so I'll quit while I'm ahead and let someone else steer him next year!  Who knows, I might even be at the helm of my own boat, but far more likely is that I'll be on another friend's junk and maybe enjoy the whole spectacle instead of concentrating on getting the best out of the boat for four and a half hours!!

So here we are: lovely photos from a heap of people.  I hope I have all the picture credits correct.

Sorting out crew tactics at the start line. Arcadian in the background. 

Alan was also showing the non-junkies the ropes.  Literally.  (Colin Courtney) 

Milling around before the start.  With Alan at the helm we had every chance of making a good start.  (And did!)

Zebedee at the start line.

Colin and Gordon each assigned a sheet to pull in or let out as ordered! - Maren Prince. 

Tystie and Arcadian

Even among western junks there is a great variation in the rigs. - Roger Scott.

 Blondie

She is lost among the bigger boats, but holds her own. - RS
 Blondie and Arcadian cross the start ahead of Thalia - CC


Zebedee starts moving ahead - RS


R Tucker Thompson and Tystie - RS

 A convert contemplating a perfect sail.  Colin was impressed at how well  Zebedee goes with his cambered sails - and new rudder! - CC


 Arcadian

I think the gaffer may be Undine, but am not sure. - RS


 Blondie, Rat Bag and  Arcadian - CC

The fleet starts to spread out: Shanty, Rat Bag, Arcadian, Freebie, Blondie and Tystie. - RA

  
Arcadian with Zebedee in the background - RS


Little Blondie shows the big boys how it's done. - RS


 Blondie blasting along.  Zebedee found her had to shake off for a while, which says something about this 20 footer! - RS


 Freebie with his new rig looking very jaunty -  Paul C Gilbert


 An enormous cruise ship gave use something else to think about.  Here Mason Bay and Freebie are trying to avoid the obstacle. - Rachel Alford.


Finally, Freebie  breaks free - RA

 Overtaken by several big ketches on a beam reach, we round Roberton Island and now running, start catching them up - RS

 And then passing them.  Zebedee is going like a train!

- RS

Wing-and-wong, Zebedee occasionally gets a real roll going. - RS


Zebedee approaches Tapeka Point. - RS


And once around we are having to work hard to fight of Shanty's challenge - RS

Shanty, such a beautiful little boat, is sailed superbly well by Jim, her owner. - CC


It was a close run thing, right to the finish line with one boat, and then the other drawing ahead.  A despairing cry of "Damn you!" came from her skipper as we crossed the line less than a boat's length ahead!  PCG

Alan, grinning from ear to ear, at the prize giving. - RS


06 January, 2019

Another year - more boatbuilding


Well, here we are comfortably into the New Year of 2019, and may it be a good one for everyone reading this.  I should like to think that my little boat will swim this year, but to be perfectly honest, I shouldn't like to bet too much on it.  So we'll carry on as before, one day at a time until the job is done.

The best news is that the New Year will see me starting a new project.  The interior is almost complete and I can get on to the decks at last.  That will be exciting.  It will also be very hot as I shall be laying them through the middle of summer in temperatures that will be in the 40°s C at the top of the shed.  However, if my usual progress is anything to go by, it will probably be winter by the time I finish and things will have cooled down.


 My last post saw me fitting the galley sink.  I then coated everything and have to say it looked rather magnificent!  I put this coat on immediately to stabilise the rather excitable tigerwood.

 I then sanded it all down again, and fitted wood plugs to all the screw holes.

 Finally I could start one of the real lolly jobs: putting down the cabin sole.  I've been looking forward to this.  The bits of masking tape have numbers on, so that the pieces all go back in the same place when they get glued down.

 Gluing the pieces in by the settee front was more than a little awkward, as I had to work under the lift-up settee extension. I decided to take the wood up the side of the boat - the white paint just looked out of place.

Screws out, glue cleaned up and everything sanded waiting for plugs to be fitted.

 I rummaged around and found some offcuts of tigerwood that were perfect for fiddles around the top of the drawer locker.  Oddly, the athwartships one looked too heavy and needed to be planed down to look right.

 I have spent a long time agonising about how to drain the sink and finally hit on the idea of a 'grey water tank'.  This eliminates holes through the hull, means I don't need to empty a container every time I use the sink and avoids a lot of pipework cluttering up the space under the sink.  I realise that this solution would not suit many people, but it fits in with my way of thinking.

 The water containers will live under the cabin sole, so the floor boards are effectively hatches, to give me access to the bilge.  In order for them to land securely, once they were cut down, I had to add some thickness to some of the existing floor bearers.

With everything cut to size, I could then start fitting the rest of the planking on the cabin sole.  I decided to fit the planks full length, running across each hatch.  Traditionally, the hatches would be framed, but I felt that would look far too fussy and, besides, the full-length planks look rather lovely.

 Everything was 'dry fitted' and all the pieces of wood were carefully marked so that they would go back in the right places and not get mixed up.

  Again, I covered the side of the boat with tigerwood, leaving white paint only on the stringer, which I think looks rather good.  I used paper to make a pattern

 and then MDF to make a more solid one I could fit accurately.

Finally, all the wood was fitted  and I could get down to gluing it down.

I took out all the hatches and put them on the table.  Quite apart from anything, it's about 5°C cooler down at floor level than it is in the hull, now that summer is well and truly here.  I added some microballoons to the glue mix, so that it is closer in colour to the wood.  Some of the pieces of wood needed a bit of persuasion to line up to the one next to them and occasionally there was a small gap that couldn't be straightened out, however hard I tried.

Then I had another big sanding session, followed by the cutting and fitting of no fewer than 420 tigerwood plugs.  My knees are looking rather the worse for wear after all this!

Because this part of the boat will have stuff spilt on it and a lot of foot traffic, I wanted to be 100% sure that there were no little crevices to trap dirt and go mouldy.  So I mixed up filler and went over the whole sole carefully, filling in every little hole I could find.  And then, of course, it all had to be sanded.  Again.

One major job left to do in the interior: make the saloon table.  You may remember that I mocked one up several months ago.  I got it out and dusted it off.  I tried it out.  It seemed too high.  I cut 50mm off the legs.  It still seemed too high, but everything I read told me that I'd already made it too low, so I daren't take off any more.  I hope it's OK.  I hate eating my dinner at chin level.

I pulled down some more tigerwood from the stack and cut it to length.

I assumed it is called tigerwood because of its stripey appearance, but have come to the conclusion it's because the wood goes wild as soon as it's unlocked.  Send it through the saw and it wriggles and wobbles all over the place.  Somewhat hopefully, I clamped the pieces to be glued into the table leaves, to saw horses to 'keep them straight'.

Then I glued them up and left them overnight to get used to the idea.

After sending them through the thicknesser one leaf was perfect; the other still showed a tendency to bow.

 I slapped epoxy on both sides as quickly as I could, clamping them flat again, each time.  Again, I left them overnight hoping that they would stabilise.  Once this is posted, I'll be taking the clamps off.  Fingers crossed that the tiger has been tamed!