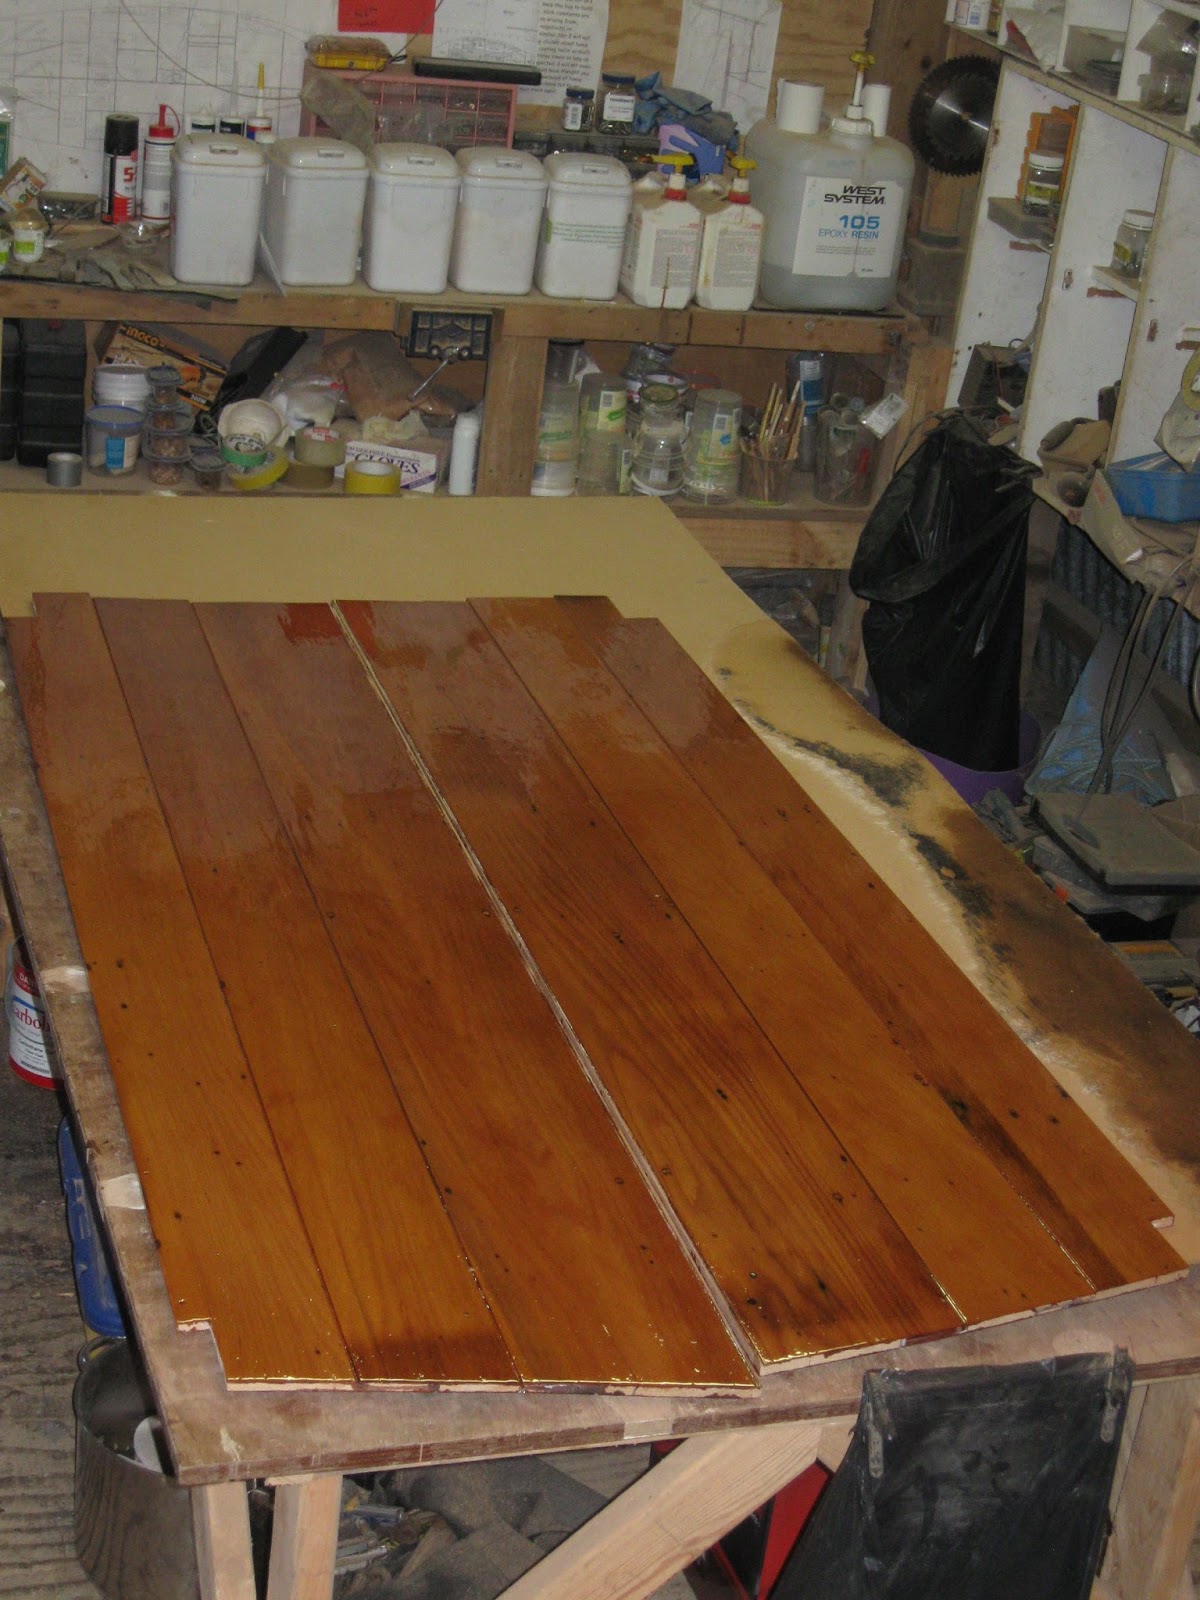
I enjoy painting; I even enjoy sanding (as long as it isn't too fiddly) before painting; It gives my poor little brain a chance to relax and the opportunity to go over the next stage in my mind, and ensure that I'm doing things in the right order.
To me, it also makes sense to paint 'on the bench' or to paint out areas before installing joinery, wherever possible. Most of all, it makes sense to finish as I go. I know that if I left it all until the end, I'd start skimping on the job and not lay on that extra coat of paint and varnish because I'd be impatient to get the job over with.
So I started with the pieces of wood that will make up the dinette
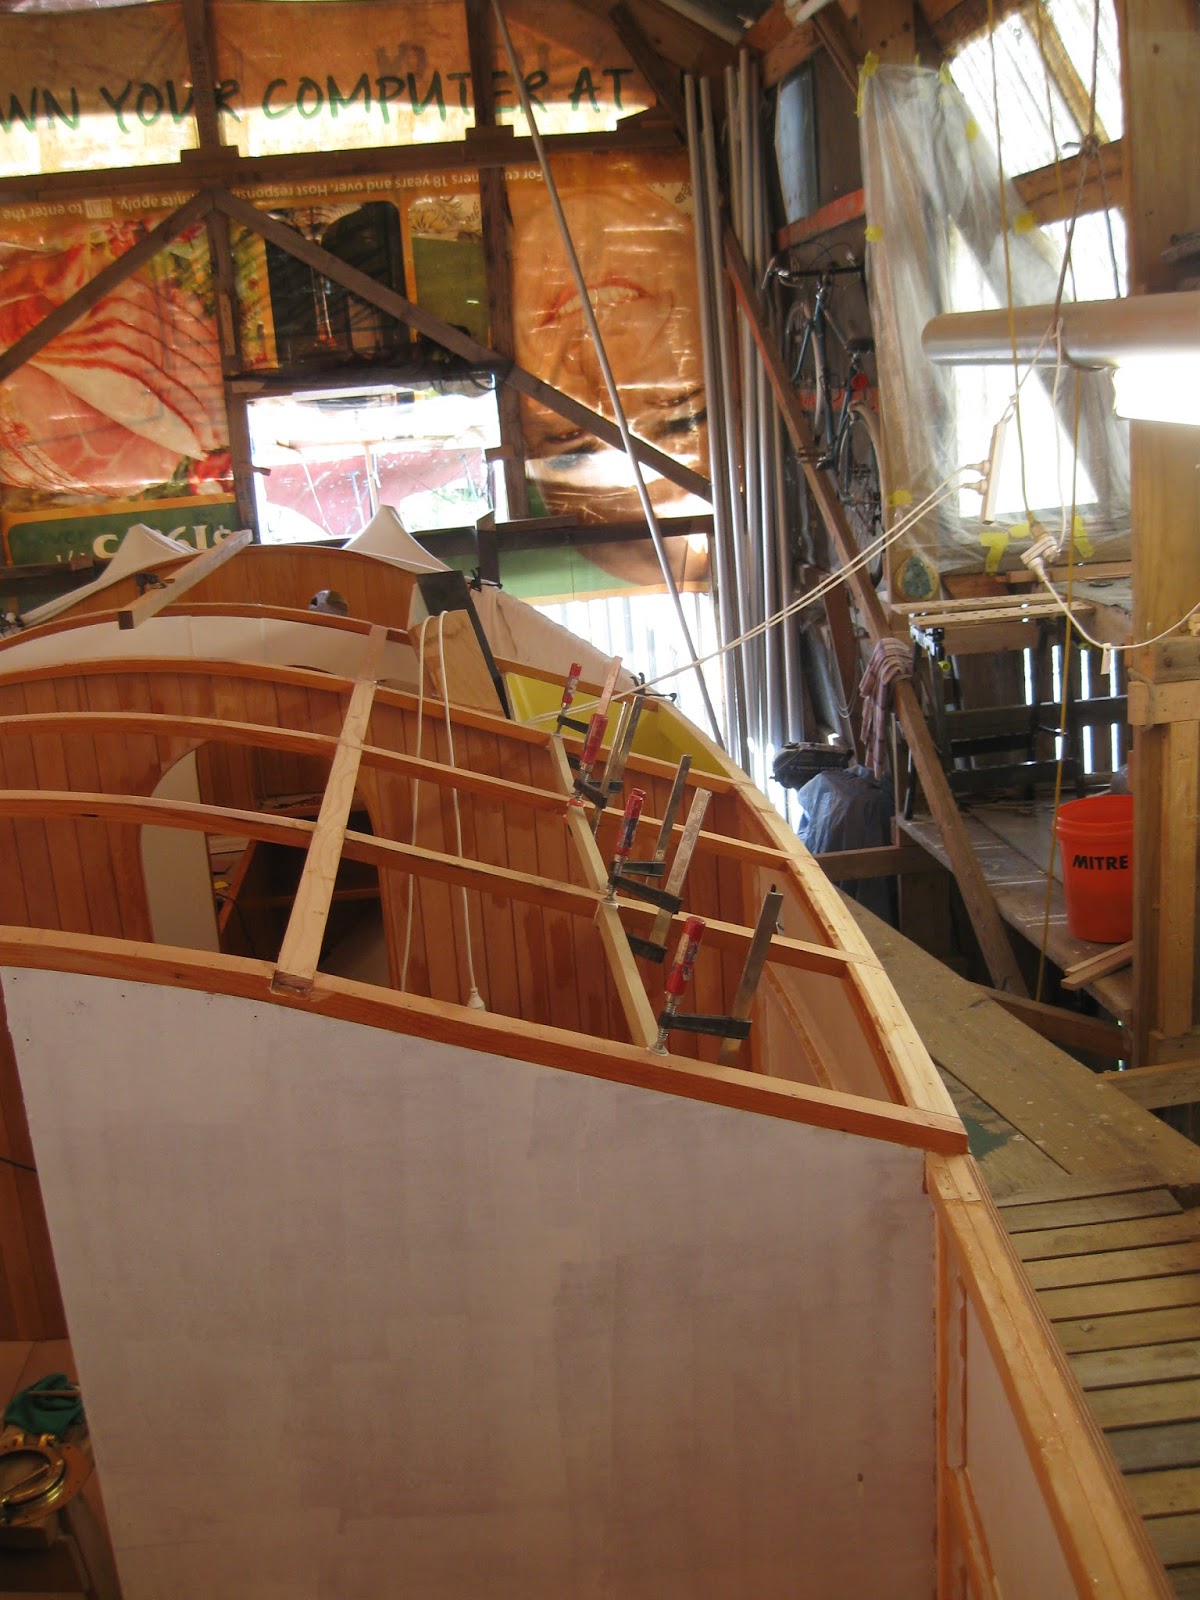
and then moved into the hull to paint what will be the inside of the lockers. I'm using Altex, high gloss, two-pack polyurethane for this job. Slowly poisoning myself, no doubt, but I don't mind when it's for myself. However, it's another argument in favour of leaving off the deck as long as possible.
Four coats sufficed. Because everything is thoroughly coated with epoxy first, there is no need for primer or undercoat. In this photo you can (just) see the framework on the forward bulkhead. I put another coat of epoxy underneath, so that the inside of the locker is shiny and easy to clean. (I couldn't bear to paint the kauri!) The bilge is left clear so that any water ingress will be immediately apparent from the wood becoming discouloured.
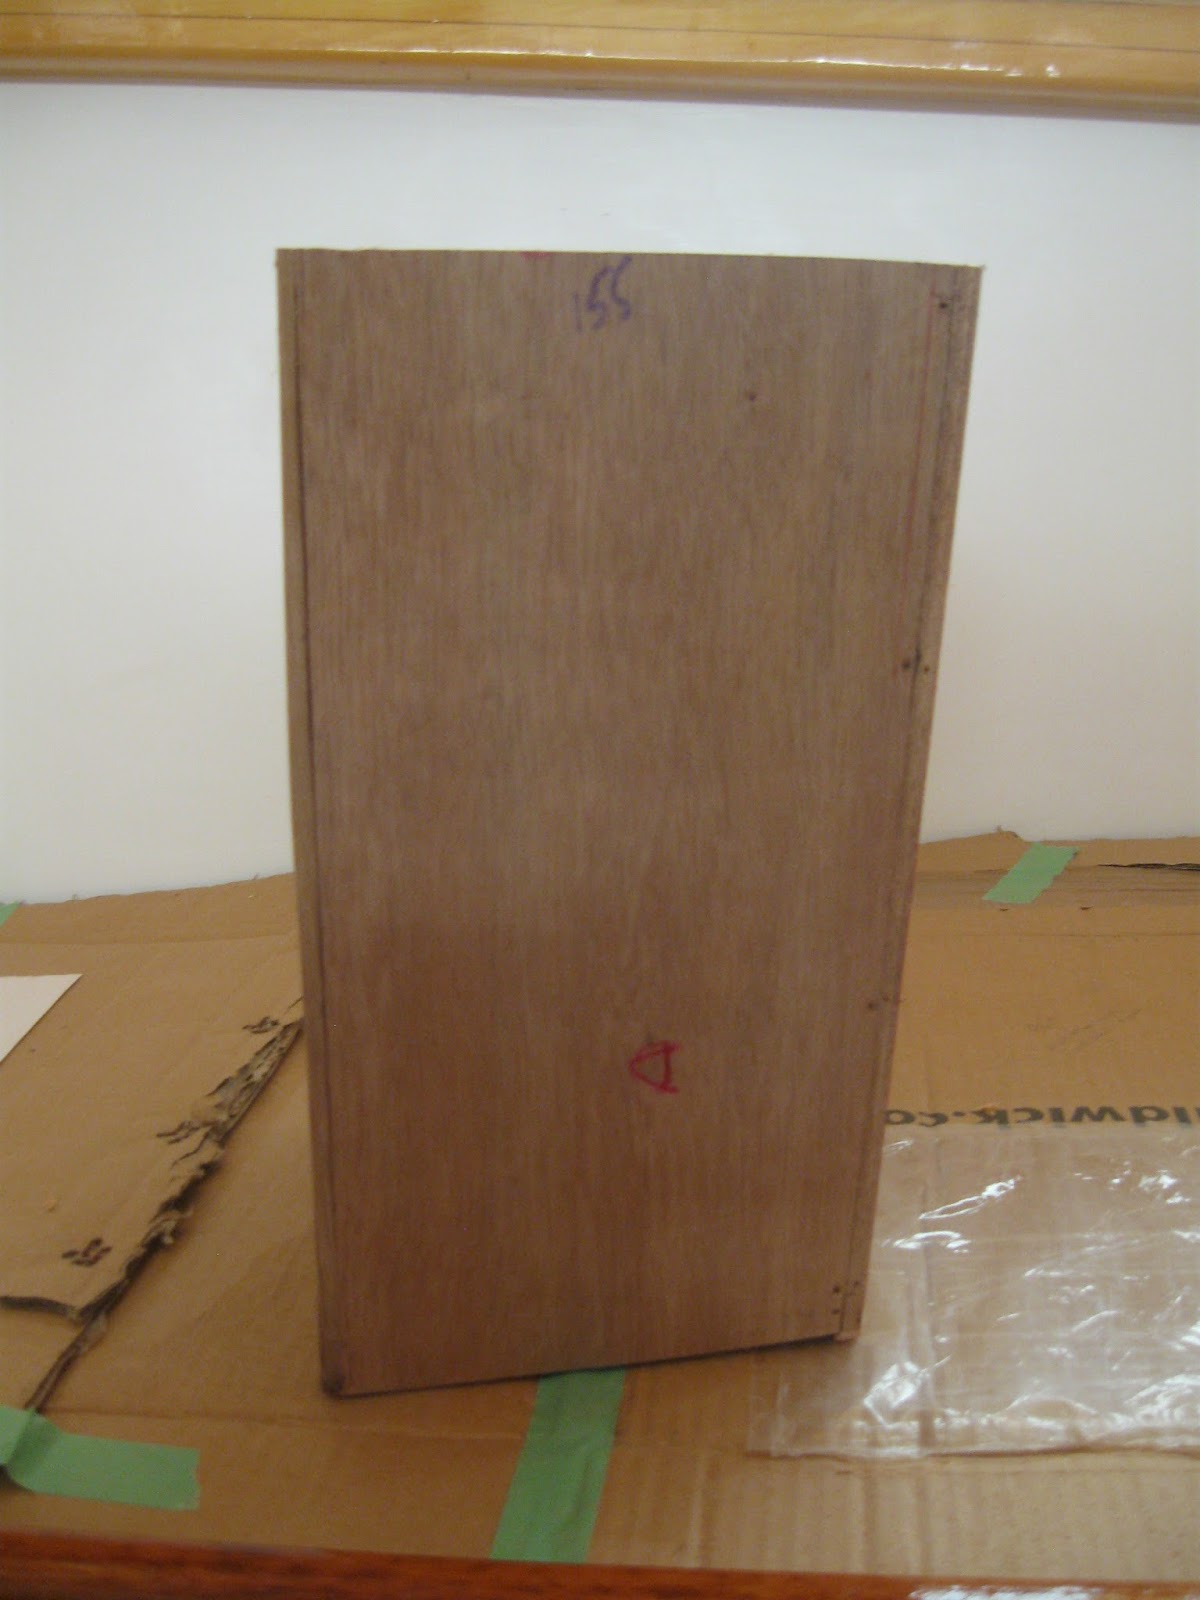
The next job - a lovely one - was to panel the wee bulkheads. First of all I fitted bearers for the cabin sole. Then I cut and fitted the kauri.
I then took the panels back inside the boat to offer up one more time, to check that I hadn't glued on anything that would stop me re-fitting the jigsaw. I took the opportunity to mark the cabin sole which will need a bit more cutting out of it again.
I checked once more that the seating would be horizontal. By the way, I love these single-handed clamps. They are not expensive and great for this sort of job. However, their clamping pressure is inadequate for foaming polyurethane glues, in my opinion.
Then I took the panels out again, to flocoat the kauri. Another satisfying job.
I think I'm just about ready to fit them, now. Exciting stuff!
Badger
In Greenland
Iron Bark
Under full sail
Fantail
At Russell Boating Club's Tall Ships Regatta
Blue Water Medal
Blue Water Medal
Books By Annie Hill
- Brazil and Beyond
- Voyaging on a Small Income
About Me
29 April, 2018
22 April, 2018
Deckhead and saloon
Another week with something to show. There are some - rare - occasions when I think that this boat may even be finished. But I confess that I was a little stymied when David T asked me at the AGM, if I still thought the boat would be finished this decade. Although, apparently, the century commenced in the year 01, a decade begins in the year 0. So let's not bet on it, boys and girls! I may be making progress, but I still have to fit out the saloon, the galley and the cockpit, lay the decks (including the teak- sorry Mr Tyler), put on the rubbing strakes, make the rudders and bilgeboards, make tillers, build a mast, make a sail, wire the boat, make cushions, paint the hull and around the cockpit and no doubt dozens of smaller jobs that presently escape my mind. There is every chance that I'll be drawing my pension before the boat is launched (assuming that the Government doesn't change its mind about giving me one!).
Anyway, having decided, finally, exactly what the seating layout in the saloon is to be, I started marking and cutting out material. The front and sides of the seating will be of 6mm ply, with kauri panelling laid over them.
A certain amount of cutting and shaping was required to fit the panels around the bearers for the cabin sole, which, because I wasn't sufficiently clever to plan everything in advance, did little to aid framing up the structure.
In the meantime, I was painting the deckhead. As anyone who uses them knows, the trouble with commercial two-part polyurethane paints is that they are designed to be sprayed. I tried several techniques to get an acceptable - and that's all it is - finish, so sanding between coats was required to get rid of the lumps. I could have used International 'Perfection' or one of the three shades of white that Altex use for application by brush and/or roller, but not only are they eye-wateringly expensive, they come in a very high gloss, which isn't what I want. (I tried Perfection undercoat, just to see, but apart from the expense, it was an almost blue white, which was a bit bleak to my eye.) So I've come to the conclusion that I'll just have to pretend I like the textured finish.
However, the good news is that the paint is fantastically hard, so even though I had to use props to ensure contact with the deckhead, they didn't do any damage. It was, to say the least of it, a mission putting up the sheet of ply, which is, of course, exactly the same length as the cabin. I had to apply the glue to the ply rather than the deckhead (a) to avoid it dripping off before I got the sheet on and (b) to ensure that I didn't wipe off half of it with my hair while I was preparing everything. But up it went and with very little glue ending up in the wrong place.
The camera, as we all know, frequently lies and the finish is nowhere near as good as it looks in the photos.
But the overall effect is pleasing, I think. I'm going to run quadrant along the edges. I think it will soften the joint between bulkhead and deckhead.
Back in the saloon, I've broken down the kit of parts for coating and panelling. I also need to paint out under and around the settee, before building in the structure. And I need to finish off the deckhead in the forecabin.
This should keep me busy for a while!
Anyway, having decided, finally, exactly what the seating layout in the saloon is to be, I started marking and cutting out material. The front and sides of the seating will be of 6mm ply, with kauri panelling laid over them.
A certain amount of cutting and shaping was required to fit the panels around the bearers for the cabin sole, which, because I wasn't sufficiently clever to plan everything in advance, did little to aid framing up the structure.
In the meantime, I was painting the deckhead. As anyone who uses them knows, the trouble with commercial two-part polyurethane paints is that they are designed to be sprayed. I tried several techniques to get an acceptable - and that's all it is - finish, so sanding between coats was required to get rid of the lumps. I could have used International 'Perfection' or one of the three shades of white that Altex use for application by brush and/or roller, but not only are they eye-wateringly expensive, they come in a very high gloss, which isn't what I want. (I tried Perfection undercoat, just to see, but apart from the expense, it was an almost blue white, which was a bit bleak to my eye.) So I've come to the conclusion that I'll just have to pretend I like the textured finish.
However, the good news is that the paint is fantastically hard, so even though I had to use props to ensure contact with the deckhead, they didn't do any damage. It was, to say the least of it, a mission putting up the sheet of ply, which is, of course, exactly the same length as the cabin. I had to apply the glue to the ply rather than the deckhead (a) to avoid it dripping off before I got the sheet on and (b) to ensure that I didn't wipe off half of it with my hair while I was preparing everything. But up it went and with very little glue ending up in the wrong place.
The camera, as we all know, frequently lies and the finish is nowhere near as good as it looks in the photos.
But the overall effect is pleasing, I think. I'm going to run quadrant along the edges. I think it will soften the joint between bulkhead and deckhead.
Back in the saloon, I've broken down the kit of parts for coating and panelling. I also need to paint out under and around the settee, before building in the structure. And I need to finish off the deckhead in the forecabin.
This should keep me busy for a while!
15 April, 2018
Visible progress!
Sometimes, it seems like one works for months and has nothing to show for it. At other times, you can actually see things moving forwards and the last couple of weeks have been like that. I confess that I did take time out: as Chair of the JRA, I had to run the AGM over the weekend. I absolutely hate doing this: I am not really a committee person and in truth, have only the haziest idea of what an AGM is supposed to produce or what I am meant to do. Mercifully, our Hon Sec is much better versed in this sort of thing and essentially gave me a script to follow. Once the wretched thing was over, we had a hugely enjoyable gathering of like-minded souls, with plenty to eat and drink, completely taking over Rob and Maren's wonderful house with a superb view over Whangarei Harbour and beyond. The following day I sailed back up the harbour in Le Canard Bleu
and then Marcus took me for a delightful sail in his little Freebie. It was a great break and heaps of fun. It's ages since I enjoyed anything so much.
I went back to boatbuilding with renewed enthusiasm. Maybe this is why I feel I've made visible progress recently.
The kauri bulkheads, for the companionway, cleaned up nicely. Originally, I had hoped to use the original tongues and grooves to reassemble them, but they, particularly the grooves, had got split and broken when the boards were removed from the house they had been on. So I put pseudo grooves back in, where they are joined together. This also helped disguise some of the gaps in the joints!
Then I coated them with epoxy. They look pretty splendid, although obviously recycled wood. (Recycled sounds better than second-hand!) The kauri is a beautiful honey colour. Lovely stuff.
With the ends trimmed to fit, they are now ready to be glued into place. I had had my doubts about fitting these bulkheads, concerned that they would make the interior cramped and the aftermost seat in the saloon claustrophobic. However, I knew that sooner or later a wave would come down the hatch and dump itself on the settee and that the cooker would otherwise be very susceptible to being blown out. Having chosen to have bilgeboards, I have to accept that they dictate the accommodation. I think it's a compromise worth making.
The bulkheads have a length of thicker kauri at the forward end, with a cut-out to make a hand hold. They were grooved to fit the bulkhead and glued in after the bulkheads.
The next stage is to fit out the saloon. Here I am really going for my quart in a pint pot (something that really does not translate into the metric system!). Originally the plan was to have the saloon slightly raised, but as the topsides are vertical, there is no gain in width from so doing. The other reason to raise them would be to make it easier to see out of the portholes, but this is unnecessary, too. If the saloon is at the same height as the rest of the boat, it will be easier to build - and the forward seat more versatile. So,using a hot-glue gun to stick things in place, I mocked up a rough plan. I took things down and put them back several times, measured chairs, looked at other designs, asked people what they thought, agonised and worried and finally pencilled in lines: this is where the seats will be built. Most boats have seats that are too high and are uncomfortable to sit on. I don't want mine to be like this.
Another job that was scaring me silly was making the headliner - the underside of the deck. This is made from (very expensive) plywood and has to be a good fit. I am not very adept at making small pieces of wood fit, let alone large ones. The first thing was to lift off the curve of the hull at deck level, for which I used MDF to make a pattern. This took ages, but was worth being patient with, because the plywood was a lot more likely to fit if I got this correct.
I fitted it to a pre-coated piece of plywood and drew the line. I used a bevel gauge to get the angles at each end and compared these with the angles on the MDF. I had also made a table of offsets from the fore and aft stringer that the plywood was to land on, to the deck edge and I know the exact distance from bulkhead to bulkhead. Using all these bits of information, I finally drew out what I hoped the deckhead would be and - gulp - cut it out.
I then had to fit it. As it's nearly 2 metres long and the best part of a metre wide at the after end, this was something of a nightmare. The tabernacle was a curse to get round and it was difficult to move the sheet without jamming its sharp corners into anything else and damaging the wood. However, I finally got it into place and to my absolute astonishment it fit perfectly, first go.
In fact I was so amazed that I left it there for the night, so that I could gloat over it.
I then had the brainwave to use it as a pattern for the other side, rather than starting from scratch again. I was rather proud of the fact that I could do this: my boat must be fairly symmetrical! Here I have just finished cutting the other side to shape, using my newly-acquired battery circular saw. These are an absolute boon for small women with small hands: a standard size circular saw is far too heavy and awkward for me to handle.
Here is the other panel being fitted. All that was required was a little bit of fairing of the outboard edge. (I made both of them slightly too wide to allow for final fairing.)
They have to be painted before I glue them in - I've made space on the scaffolding so that I can carry on using the big table, in the workshop.
And the upstairs bench is just large enough for the other panel, which is having to be coated after cutting up, because I didn't precoat that piece of plywood.
And while I wait for paint and epoxy to dry, I can carry on with the saloon. Here is the first of the framing going in.
and then Marcus took me for a delightful sail in his little Freebie. It was a great break and heaps of fun. It's ages since I enjoyed anything so much.
I went back to boatbuilding with renewed enthusiasm. Maybe this is why I feel I've made visible progress recently.
The kauri bulkheads, for the companionway, cleaned up nicely. Originally, I had hoped to use the original tongues and grooves to reassemble them, but they, particularly the grooves, had got split and broken when the boards were removed from the house they had been on. So I put pseudo grooves back in, where they are joined together. This also helped disguise some of the gaps in the joints!
Then I coated them with epoxy. They look pretty splendid, although obviously recycled wood. (Recycled sounds better than second-hand!) The kauri is a beautiful honey colour. Lovely stuff.
With the ends trimmed to fit, they are now ready to be glued into place. I had had my doubts about fitting these bulkheads, concerned that they would make the interior cramped and the aftermost seat in the saloon claustrophobic. However, I knew that sooner or later a wave would come down the hatch and dump itself on the settee and that the cooker would otherwise be very susceptible to being blown out. Having chosen to have bilgeboards, I have to accept that they dictate the accommodation. I think it's a compromise worth making.
The bulkheads have a length of thicker kauri at the forward end, with a cut-out to make a hand hold. They were grooved to fit the bulkhead and glued in after the bulkheads.
The next stage is to fit out the saloon. Here I am really going for my quart in a pint pot (something that really does not translate into the metric system!). Originally the plan was to have the saloon slightly raised, but as the topsides are vertical, there is no gain in width from so doing. The other reason to raise them would be to make it easier to see out of the portholes, but this is unnecessary, too. If the saloon is at the same height as the rest of the boat, it will be easier to build - and the forward seat more versatile. So,using a hot-glue gun to stick things in place, I mocked up a rough plan. I took things down and put them back several times, measured chairs, looked at other designs, asked people what they thought, agonised and worried and finally pencilled in lines: this is where the seats will be built. Most boats have seats that are too high and are uncomfortable to sit on. I don't want mine to be like this.
Another job that was scaring me silly was making the headliner - the underside of the deck. This is made from (very expensive) plywood and has to be a good fit. I am not very adept at making small pieces of wood fit, let alone large ones. The first thing was to lift off the curve of the hull at deck level, for which I used MDF to make a pattern. This took ages, but was worth being patient with, because the plywood was a lot more likely to fit if I got this correct.
I fitted it to a pre-coated piece of plywood and drew the line. I used a bevel gauge to get the angles at each end and compared these with the angles on the MDF. I had also made a table of offsets from the fore and aft stringer that the plywood was to land on, to the deck edge and I know the exact distance from bulkhead to bulkhead. Using all these bits of information, I finally drew out what I hoped the deckhead would be and - gulp - cut it out.
I then had to fit it. As it's nearly 2 metres long and the best part of a metre wide at the after end, this was something of a nightmare. The tabernacle was a curse to get round and it was difficult to move the sheet without jamming its sharp corners into anything else and damaging the wood. However, I finally got it into place and to my absolute astonishment it fit perfectly, first go.
In fact I was so amazed that I left it there for the night, so that I could gloat over it.
I then had the brainwave to use it as a pattern for the other side, rather than starting from scratch again. I was rather proud of the fact that I could do this: my boat must be fairly symmetrical! Here I have just finished cutting the other side to shape, using my newly-acquired battery circular saw. These are an absolute boon for small women with small hands: a standard size circular saw is far too heavy and awkward for me to handle.
Here is the other panel being fitted. All that was required was a little bit of fairing of the outboard edge. (I made both of them slightly too wide to allow for final fairing.)
They have to be painted before I glue them in - I've made space on the scaffolding so that I can carry on using the big table, in the workshop.
And the upstairs bench is just large enough for the other panel, which is having to be coated after cutting up, because I didn't precoat that piece of plywood.
And while I wait for paint and epoxy to dry, I can carry on with the saloon. Here is the first of the framing going in.
01 April, 2018
Recycling wood
I was very lucky, at the start of this project, to acquire a pile of kauri, which had originally been milled for cold-moulding. This is what I've been using to panel the bulkheads, and make the doors, etc. Along the way, I've managed to acquire some more, but it's not easy. The reason that it's not easy is that the magnificent kauri forests that covered the north of North Island, when the British settlers arrived here, were swiftly cut down and the large trees - which can grow to tremendous size, almost entirely eradicated. (You can see photos, and read about one of these remaining giants, here.) The trees are now protected and you need permission to cut one down (although this is too often either given or ignored), which makes buying the timber difficult. My good luck is holding however: as I mentioned earlier, my friend Gordie has been preparing his mother's house to sell, and stored underneath was a pile of kauri cladding, some of which came my way.
Covered in old paint and the dust of ages, it was less than prepossessing, but it has cleaned up beautifully. Because of the lead in the old paint, a full-face respirator was needed - unpleasant in hot weather. However, JRA membership secretary, Linda, who is presently visiting NZ, wanted to join the SibLim Club, so valiantly donned the mask and cleaned up some of the boards for me.
The paint generally came off easily, but some green paint underneath, was quite stubborn. However, when I took to it with the random-orbit sander, I could remove it with no problems.
The reason for getting some of this cleaned up is that it should be perfect for making the small fore and aft bulkheads I am installing by the companionway. One of the drawbacks of putting bilge boards in a small boat is that it pushes all the accommodation that much further aft. However, the anchor tackle on this boat is as heavy as I can handle, so this is a compromise I have to work round. If you happen to be running with the washboards open, a dollop of water can land on the settee or the cooker, which is something I would prefer to avoid. Rain can also pour in when you are having to go in and out to check on the chart, etc. I would prefer for this not to happen, so am installing these bulkheads to prevent it.
I put down an almost full sheet of plywood in the galley/saloon area, so the first thing I had to do was cut this to fit. I plan to install a grating between these bulkheads to catch drips from oilskins, etc, which made things easier.
The now-cleaned boards of kauri were fitted one at a time, with a lap cut in the edges of each one to join them together.
Here you can see where the lap has been cut. You can also see that there are plenty of marks in the timber from its previous life. Not the sort of thing that would be acceptable in a superyacht, but I like the idea of using recycled timber, so can live with these marks quite happily.
When they were all cut out I dry fitted them, so that I could work out where the fore and aft deck stringers are to be fitted.
The next job was to glue them up. Noel, a well-known boatbuilder who fortunately works for Norsand and has an incredible collection of tools, once again kindly lent me some sash clamps for the job. As well as pushing the joints together, the weight of the clamps tended to keep the bulkheads flat. It's still occasionally getting very hot in the middle of the day, and even century-old kauri will start to move.
Once they were glued together, the holes and odd gap in the seam were filled with epoxy. I drilled out some of the nail/screw holes and put kauri plugs in, so that they were less obtrusive. It was a bit tricky to decide at what stage to do this: too many plugs in the bulkhead would look a bit odd, too.
In the meantime, I have been fitting, routing, coating and preparing the framing for the deck, the reinforcing around the mast and the liner.
As well as the continuing task of getting the portholes polished up, so that I can install them. I really want to get these done soon, so that when I fit the deck liner in the forecabin, I can close it off from all the dust.
Covered in old paint and the dust of ages, it was less than prepossessing, but it has cleaned up beautifully. Because of the lead in the old paint, a full-face respirator was needed - unpleasant in hot weather. However, JRA membership secretary, Linda, who is presently visiting NZ, wanted to join the SibLim Club, so valiantly donned the mask and cleaned up some of the boards for me.
The paint generally came off easily, but some green paint underneath, was quite stubborn. However, when I took to it with the random-orbit sander, I could remove it with no problems.
The reason for getting some of this cleaned up is that it should be perfect for making the small fore and aft bulkheads I am installing by the companionway. One of the drawbacks of putting bilge boards in a small boat is that it pushes all the accommodation that much further aft. However, the anchor tackle on this boat is as heavy as I can handle, so this is a compromise I have to work round. If you happen to be running with the washboards open, a dollop of water can land on the settee or the cooker, which is something I would prefer to avoid. Rain can also pour in when you are having to go in and out to check on the chart, etc. I would prefer for this not to happen, so am installing these bulkheads to prevent it.
I put down an almost full sheet of plywood in the galley/saloon area, so the first thing I had to do was cut this to fit. I plan to install a grating between these bulkheads to catch drips from oilskins, etc, which made things easier.
The now-cleaned boards of kauri were fitted one at a time, with a lap cut in the edges of each one to join them together.
Here you can see where the lap has been cut. You can also see that there are plenty of marks in the timber from its previous life. Not the sort of thing that would be acceptable in a superyacht, but I like the idea of using recycled timber, so can live with these marks quite happily.
When they were all cut out I dry fitted them, so that I could work out where the fore and aft deck stringers are to be fitted.
The next job was to glue them up. Noel, a well-known boatbuilder who fortunately works for Norsand and has an incredible collection of tools, once again kindly lent me some sash clamps for the job. As well as pushing the joints together, the weight of the clamps tended to keep the bulkheads flat. It's still occasionally getting very hot in the middle of the day, and even century-old kauri will start to move.
Once they were glued together, the holes and odd gap in the seam were filled with epoxy. I drilled out some of the nail/screw holes and put kauri plugs in, so that they were less obtrusive. It was a bit tricky to decide at what stage to do this: too many plugs in the bulkhead would look a bit odd, too.
In the meantime, I have been fitting, routing, coating and preparing the framing for the deck, the reinforcing around the mast and the liner.
As well as the continuing task of getting the portholes polished up, so that I can install them. I really want to get these done soon, so that when I fit the deck liner in the forecabin, I can close it off from all the dust.
Labels:
kauri,
Norsand Boatyard,
SibLim Club,
Tane Mahuta
18 March, 2018
In the forecabin again
With the tabernacle in place, I can now think of getting the deck liner in. This will help keep the forecabin clean and allow me to fit out the saloon, with a certain knowledge of where I have full headroom.
Please forgive the quality of this shot. It was the only one I took showing the dowelling put into the deck beams, through to the beam shelf/sheer clamp - whatever the correct word is. While I am fairly sure of my glue joints, adding 'trenails' gives me an increased confidence in them.
My next job was certainly what is known in this country as a 'lolly job': fitting the cabin sole. Once again I milled up a heap of tigerwood and planed it down to about 5mm. I worked out how many square metres were required and prepared that much timber, to be sure that it was all the same thickness. In fact, I ended up sailing a little bit close to the wind, but just had enough.
There are two lifting hatches in the forecabin and I indulged myself in buying some natty little brass rings from Classic Marine to help in lifting them up. Thus far, there is no way to secure these hatches, but if I went offshore, I would have to screw them down, or find some locking device. I was very pleased with the looks of the floor, once it was all sanded. The paint and varnish now require touching up, of course, but I expected that. Indeed, I only put a couple of coats of varnish on the side of the bunk, in anticipation of needing to do it again.
The unstayed mast puts quite severe loads on to the deck structure. Because there is minimal framing in the boat, and there are no hanging knees, I am going to stiffen up the deck with some more layers of plywood. Two layers of 6mm ply will run fore and aft on either side of the tabernacle (and in front of and behind it) and a further small deckbeam will be fitted abaft the tabernacle to allow for the same thickness of plywood to be carried out to the sides.
Please forgive the quality of this shot. It was the only one I took showing the dowelling put into the deck beams, through to the beam shelf/sheer clamp - whatever the correct word is. While I am fairly sure of my glue joints, adding 'trenails' gives me an increased confidence in them.
My next job was certainly what is known in this country as a 'lolly job': fitting the cabin sole. Once again I milled up a heap of tigerwood and planed it down to about 5mm. I worked out how many square metres were required and prepared that much timber, to be sure that it was all the same thickness. In fact, I ended up sailing a little bit close to the wind, but just had enough.
There are two lifting hatches in the forecabin and I indulged myself in buying some natty little brass rings from Classic Marine to help in lifting them up. Thus far, there is no way to secure these hatches, but if I went offshore, I would have to screw them down, or find some locking device. I was very pleased with the looks of the floor, once it was all sanded. The paint and varnish now require touching up, of course, but I expected that. Indeed, I only put a couple of coats of varnish on the side of the bunk, in anticipation of needing to do it again.
The unstayed mast puts quite severe loads on to the deck structure. Because there is minimal framing in the boat, and there are no hanging knees, I am going to stiffen up the deck with some more layers of plywood. Two layers of 6mm ply will run fore and aft on either side of the tabernacle (and in front of and behind it) and a further small deckbeam will be fitted abaft the tabernacle to allow for the same thickness of plywood to be carried out to the sides.
04 March, 2018
Two satisfying achievements
My apologies for not having posted for so long. Life does get in the way and today it's already half past two in the afternoon, I've been on the computer since 10 o'clock and haven't written the three letters that I was definitely going to deal with today. But I really must catch up with my blog - the boat will just have to wait a bit longer for me.
In the past, I have tended to work on one project at a time. This is not only because it's hard for me to keep several balls in the air at once, but also because it seemed like a logical way to do things. Recently, however, I seem to have been working on a variety of tasks, but with all the deckbeams fitted aft, I could prepare to install the tabernacle. This needed to be done concurrently with the forward deck beam in the forecabin, because the tabernacle is not quite what David envisaged, nor in the same place as originally planned, so measurements from the design could only help me so far. Indeed, the only two things that really counted were that the after face of the tabernacle should be at station 2, and that it should end up at an angle of 4°.
Another matter to take into consideration is that I had no design for a mast step, the solid and secure woodwork that will stop the tabernacle from moving to the left, when the mast wants to move right and vice versa. With no rigging, the step has to be immovable. Normally, one would build up a large box and that would be that, but in my case I had a fore and aft backbone, surmounted by the side of the bunk, and an athwartships floor, backed up by a floor for the keelbolts.
It seemed to me that the obvious thing to do was to utilise the purpleheart floor to build up the mast step. As I still have some purpleheart left, I cut this to shape and stuck it to the floor, in two layers, leaving space to access the keelbolt nut. (In theory. It would be a hell of a job to get a socket there and use it, in practice!) As the floor had been left coated in epoxy, it was a simple task to sand it down and slather some more around. I put on one layer and then decided to build up the step to 100 mm, so stuck on another layer.
While the glue was going off, I carried on fitting the deck stringers, which will help in fitting the plywood deck, inside and out.
In the meantime, I sweated blood over a pattern of the base of the tabernacle, so that I could make the mast step the correct size. As the tabernacle is tapered and was over length, this took a ludicrous amount of measuring and cutting: pattern making is not my strong suit. And, tell it not in Gath, but the base of the tabernacle was not absolutely square.
I placed the pattern on the bottom of the boat alongside the bunk and started building up the step against the hull. This obviously had to be pretty strong - 12mm of plywood on its own is not going to resist much sideways movement. However, Arne Kverneland, a Norwegian member of the JRA, who has been involved in numerous junk rig conversions, has evolved an excellent method of making a mast step - simply gluing layers of plywood together until you have the requisite height and shape. This is a lot easier than taking a 100mm block of wood and trying to fit it to the complex shape of the hull.
Eight layers later, and I had a good, strong step alongside the hull, spreading the loads from hull to floor to backbone. Great stuff, epoxy.
Back on the deck framing, I fitted intermediate stringers. More framing makes for a stronger deck and ensures that the thin plywood lining will follow the intended shape. I am using treated kaihikatea for this: a very light, New Zealand wood. It soaks up resin like a sponge, so you have to take your time over gluing it together, to avoid dry joints.
And now, for the first of the two satisfying achievements mentioned in the title: I finally fitted a porthole! Doesn't it look great? Admittedly, I haven't yet set it on mastic: until I have roughed out the saloon, I'm not entirely sure that when it's open, hinged up, it will be away from my head, so I might have to turn it 90°. But as I'd got it all polished and perfect, I didn't want to leave it around where it might get damaged.
With the after part of the tabernacle sorted out, I turned my attention to the port side. Again I cut purpleheart to shape and laminated it in place, this time straight to the 24mm bottom of the boat. Both purpleheart floors have had holes drilled in them, through which coachscrews will be wound to help secure the tabernacle. I am fairly sure that, considering that it is also going to be glued in place, it isn't going to go anywhere! At least I hope not.
I had spent quite a lot of time debating whether to make a sloping step or to cut the rake onto the foot of the mast. In the end I decided that it was better to have a level base to glue to, so that the glue wouldn't run off while we were faffing around getting the tabernacle into place. With the help of trigonometry, I had worked out that I needed to start 11.7mm from the horizontal with my saw cut. You can imagine how many times I checked to ensure that the tabernacle would end up leaning forward, rather than aft. It was a bit scary, in truth. And hard work, too - it was too big to fit under the drop saw.
I was ready to do a dry run, and as Pete had his boat hauled out here, Marcus was around and, coincidentally Rob and Maren had called by for a visit, I took the opportunity of doing so. For a while there was, perhaps, an excess of chiefs who all knew what I should be doing next, but we got it standing,
slipped in the piece of plywood, on which I had marked the 4° angle,
lined it up,
and clamped it into place.
Then we took careful measurements to the front of the cabin
so that I could mark for where the forward deck beam should go.
At the same time, I drove the coach screws part way into the tabernacle, so that I could drill the holes for them, in the right place.
Then we took it out again and everyone went home.
The next job was to cut the notches for the beam and to glue it into place. I clamped a stick of wood in place to ensure that the forward face of the beam was 516mm from the forward beam, as we had measured.
The next day, I was ready for the second satisfying achievement: finally gluing the tabernacle into place. About time, you might say: it's been kicking around for about a year, now!
Having had a dry run, and only having to put glue on the butt of the tabernacle, getting it into place was quite straightforward. Pete and Marcus did the heavy work and with the beam in place to lean against, there wasn't too much stress, although I did start fretting that the epoxy would be going off when we realised that the trim along the top of the bunk was stopping the tabernacle from being quite vertical.
That was trimmed off and I got down to cranking in the coach screws.
With those in place, we could be sure that the tabernacle would stay solid until the glue cured. I was pleased that Pete could be here to see his contribution to SibLim taken to its conclusion.
After that, I had only one beam left to secure. I have had to take the forehatch into account here. Putting it on the centreline, as tradition and dogma demands didn't make much sense: there will be reinforcing running fore and aft from the tabernacle, and I don't want to cut a damn great hole through that. For that matter, the forehatch could well interfere with the rigging for the sail. It will go over the head of my bunk, so that I can look out of it at night. As I don't intend to put sails in and out of it while underway, and as it will be dogged in anything but the calmest of conditions, I cannot see that it should be a problem.
I thought it about time to have an overview of the boat. It's starting to look something like now, with deck framing and the tabernacle in place. I have to decide what colour to paint said tabernacle - it's pretty big and I'm not sure I want it to stand out too much!
Now I can complete the cabin sole in the forecabin, covering it in tigerwood. A job I'm looking forward to.
Marcus had just been given a ute from an old friend, and when he brought it back, it was loaded with second-hand kauri that Gordy had contributed for Marcus's boat and mine. Thank you Gordy: what a fantastic gift. Now I should have sufficient kauri to finish the job. There's plenty of work in cleaning it up, but you can see from the piece on the right hand side, that it's well worth the effort.

In the past, I have tended to work on one project at a time. This is not only because it's hard for me to keep several balls in the air at once, but also because it seemed like a logical way to do things. Recently, however, I seem to have been working on a variety of tasks, but with all the deckbeams fitted aft, I could prepare to install the tabernacle. This needed to be done concurrently with the forward deck beam in the forecabin, because the tabernacle is not quite what David envisaged, nor in the same place as originally planned, so measurements from the design could only help me so far. Indeed, the only two things that really counted were that the after face of the tabernacle should be at station 2, and that it should end up at an angle of 4°.
Another matter to take into consideration is that I had no design for a mast step, the solid and secure woodwork that will stop the tabernacle from moving to the left, when the mast wants to move right and vice versa. With no rigging, the step has to be immovable. Normally, one would build up a large box and that would be that, but in my case I had a fore and aft backbone, surmounted by the side of the bunk, and an athwartships floor, backed up by a floor for the keelbolts.
It seemed to me that the obvious thing to do was to utilise the purpleheart floor to build up the mast step. As I still have some purpleheart left, I cut this to shape and stuck it to the floor, in two layers, leaving space to access the keelbolt nut. (In theory. It would be a hell of a job to get a socket there and use it, in practice!) As the floor had been left coated in epoxy, it was a simple task to sand it down and slather some more around. I put on one layer and then decided to build up the step to 100 mm, so stuck on another layer.
While the glue was going off, I carried on fitting the deck stringers, which will help in fitting the plywood deck, inside and out.
In the meantime, I sweated blood over a pattern of the base of the tabernacle, so that I could make the mast step the correct size. As the tabernacle is tapered and was over length, this took a ludicrous amount of measuring and cutting: pattern making is not my strong suit. And, tell it not in Gath, but the base of the tabernacle was not absolutely square.
I placed the pattern on the bottom of the boat alongside the bunk and started building up the step against the hull. This obviously had to be pretty strong - 12mm of plywood on its own is not going to resist much sideways movement. However, Arne Kverneland, a Norwegian member of the JRA, who has been involved in numerous junk rig conversions, has evolved an excellent method of making a mast step - simply gluing layers of plywood together until you have the requisite height and shape. This is a lot easier than taking a 100mm block of wood and trying to fit it to the complex shape of the hull.
Eight layers later, and I had a good, strong step alongside the hull, spreading the loads from hull to floor to backbone. Great stuff, epoxy.
Back on the deck framing, I fitted intermediate stringers. More framing makes for a stronger deck and ensures that the thin plywood lining will follow the intended shape. I am using treated kaihikatea for this: a very light, New Zealand wood. It soaks up resin like a sponge, so you have to take your time over gluing it together, to avoid dry joints.
And now, for the first of the two satisfying achievements mentioned in the title: I finally fitted a porthole! Doesn't it look great? Admittedly, I haven't yet set it on mastic: until I have roughed out the saloon, I'm not entirely sure that when it's open, hinged up, it will be away from my head, so I might have to turn it 90°. But as I'd got it all polished and perfect, I didn't want to leave it around where it might get damaged.
With the after part of the tabernacle sorted out, I turned my attention to the port side. Again I cut purpleheart to shape and laminated it in place, this time straight to the 24mm bottom of the boat. Both purpleheart floors have had holes drilled in them, through which coachscrews will be wound to help secure the tabernacle. I am fairly sure that, considering that it is also going to be glued in place, it isn't going to go anywhere! At least I hope not.
I had spent quite a lot of time debating whether to make a sloping step or to cut the rake onto the foot of the mast. In the end I decided that it was better to have a level base to glue to, so that the glue wouldn't run off while we were faffing around getting the tabernacle into place. With the help of trigonometry, I had worked out that I needed to start 11.7mm from the horizontal with my saw cut. You can imagine how many times I checked to ensure that the tabernacle would end up leaning forward, rather than aft. It was a bit scary, in truth. And hard work, too - it was too big to fit under the drop saw.
I was ready to do a dry run, and as Pete had his boat hauled out here, Marcus was around and, coincidentally Rob and Maren had called by for a visit, I took the opportunity of doing so. For a while there was, perhaps, an excess of chiefs who all knew what I should be doing next, but we got it standing,
slipped in the piece of plywood, on which I had marked the 4° angle,
lined it up,
and clamped it into place.
Then we took careful measurements to the front of the cabin
At the same time, I drove the coach screws part way into the tabernacle, so that I could drill the holes for them, in the right place.
Then we took it out again and everyone went home.
The next job was to cut the notches for the beam and to glue it into place. I clamped a stick of wood in place to ensure that the forward face of the beam was 516mm from the forward beam, as we had measured.
The next day, I was ready for the second satisfying achievement: finally gluing the tabernacle into place. About time, you might say: it's been kicking around for about a year, now!
Having had a dry run, and only having to put glue on the butt of the tabernacle, getting it into place was quite straightforward. Pete and Marcus did the heavy work and with the beam in place to lean against, there wasn't too much stress, although I did start fretting that the epoxy would be going off when we realised that the trim along the top of the bunk was stopping the tabernacle from being quite vertical.
That was trimmed off and I got down to cranking in the coach screws.
With those in place, we could be sure that the tabernacle would stay solid until the glue cured. I was pleased that Pete could be here to see his contribution to SibLim taken to its conclusion.
After that, I had only one beam left to secure. I have had to take the forehatch into account here. Putting it on the centreline, as tradition and dogma demands didn't make much sense: there will be reinforcing running fore and aft from the tabernacle, and I don't want to cut a damn great hole through that. For that matter, the forehatch could well interfere with the rigging for the sail. It will go over the head of my bunk, so that I can look out of it at night. As I don't intend to put sails in and out of it while underway, and as it will be dogged in anything but the calmest of conditions, I cannot see that it should be a problem.
I thought it about time to have an overview of the boat. It's starting to look something like now, with deck framing and the tabernacle in place. I have to decide what colour to paint said tabernacle - it's pretty big and I'm not sure I want it to stand out too much!
Now I can complete the cabin sole in the forecabin, covering it in tigerwood. A job I'm looking forward to.
Marcus had just been given a ute from an old friend, and when he brought it back, it was loaded with second-hand kauri that Gordy had contributed for Marcus's boat and mine. Thank you Gordy: what a fantastic gift. Now I should have sufficient kauri to finish the job. There's plenty of work in cleaning it up, but you can see from the piece on the right hand side, that it's well worth the effort.
Labels:
Arne Kverneland,
JRA,
Kaihikatea,
kauri,
Portholes,
Tabernacle
Subscribe to:
Posts (Atom)