Search This Blog

Badger

Badger
In Greenland

Iron Bark

Iron Bark
Under full sail

Fantail

Fantail
At Russell Boating Club's Tall Ships Regatta

Blue Water Medal

Blue Water Medal
Blue Water Medal

Books By Annie Hill

  • Brazil and Beyond
  • Voyaging on a Small Income

30 June, 2019

Just a few little jobs

I wonder if it's just me, or does everybody find that "I'll just do this ..." jobs are the ones that take forever.  Its seems to be the silliest little jobs that take the longest.

While I was laying the deck, the intention had been to 'pop' down below and finish off all those little jobs that hadn't been done, while I was waiting for glue to dry.  Great idea, but failed in practice because there were always so many other things to do while the glue was drying.  No worries, I said to myself, I'll just knock them over and get on with the cockpit.  That was three weeks ago and last week I wrote out the list of what still needs to be done.  I don't think I'll be starting the cockpit next week, either.  I seem to have spent half of the past few weeks going in an out of Whangarei looking for bits and pieces.  Most of what I've been doing is hardly worth photographing (finishing the wiring to a 12 volt plug in the saloon, which involved trying to find decent cable clips - Paul at All Marine ended up giving me some nice copper ones he had left over from one of his jobs; cutting hose for the 'plumbing' to exactly the right length, etc, etc,)  However, there are one or two photos that might be of interest, so it's probably worth writing my blog today.

 Many moons ago, I tried to purchase the most wonderful little woodburner, only to find it was no longer in production.  So I bought Raoul's Flick which was almost as nice, but was black all over.  I like a bit of colour and as the poor wee thing was a bit scratched from having been ordered long before it was required, I decided to paint it in two colours.  So part of it is a sort of dark sage colour and the rest is black.  It looks pretty good, actually, but more so in the flesh than in the photo.

 However, when reading the instructions (yes, I do!) I saw that they suggested firing it up before installing it, because the paint has to be 'seasoned', so to speak, like a good frying pan.  What fun!  I've been desperate for an excuse to see how it goes.

 Well, as you can see, it goes very well indeed.  It was the easiest thing to light and went off like a little rocket.  The damper is just amazing: close it off and the fire almost goes out, open it a wee crack and it comes back to life: wide open and you have a little blast furnace going.  As so many people have told me that I'm installing the fire all wrong, it's nice to know that I can shut if off so effectively.  It should reassure them.  Anyway, I left the damper wide open and sure enough, once the stove had got good and hot, I could see fumes rising from the surface.  I just hope it was hot enough for long enough.

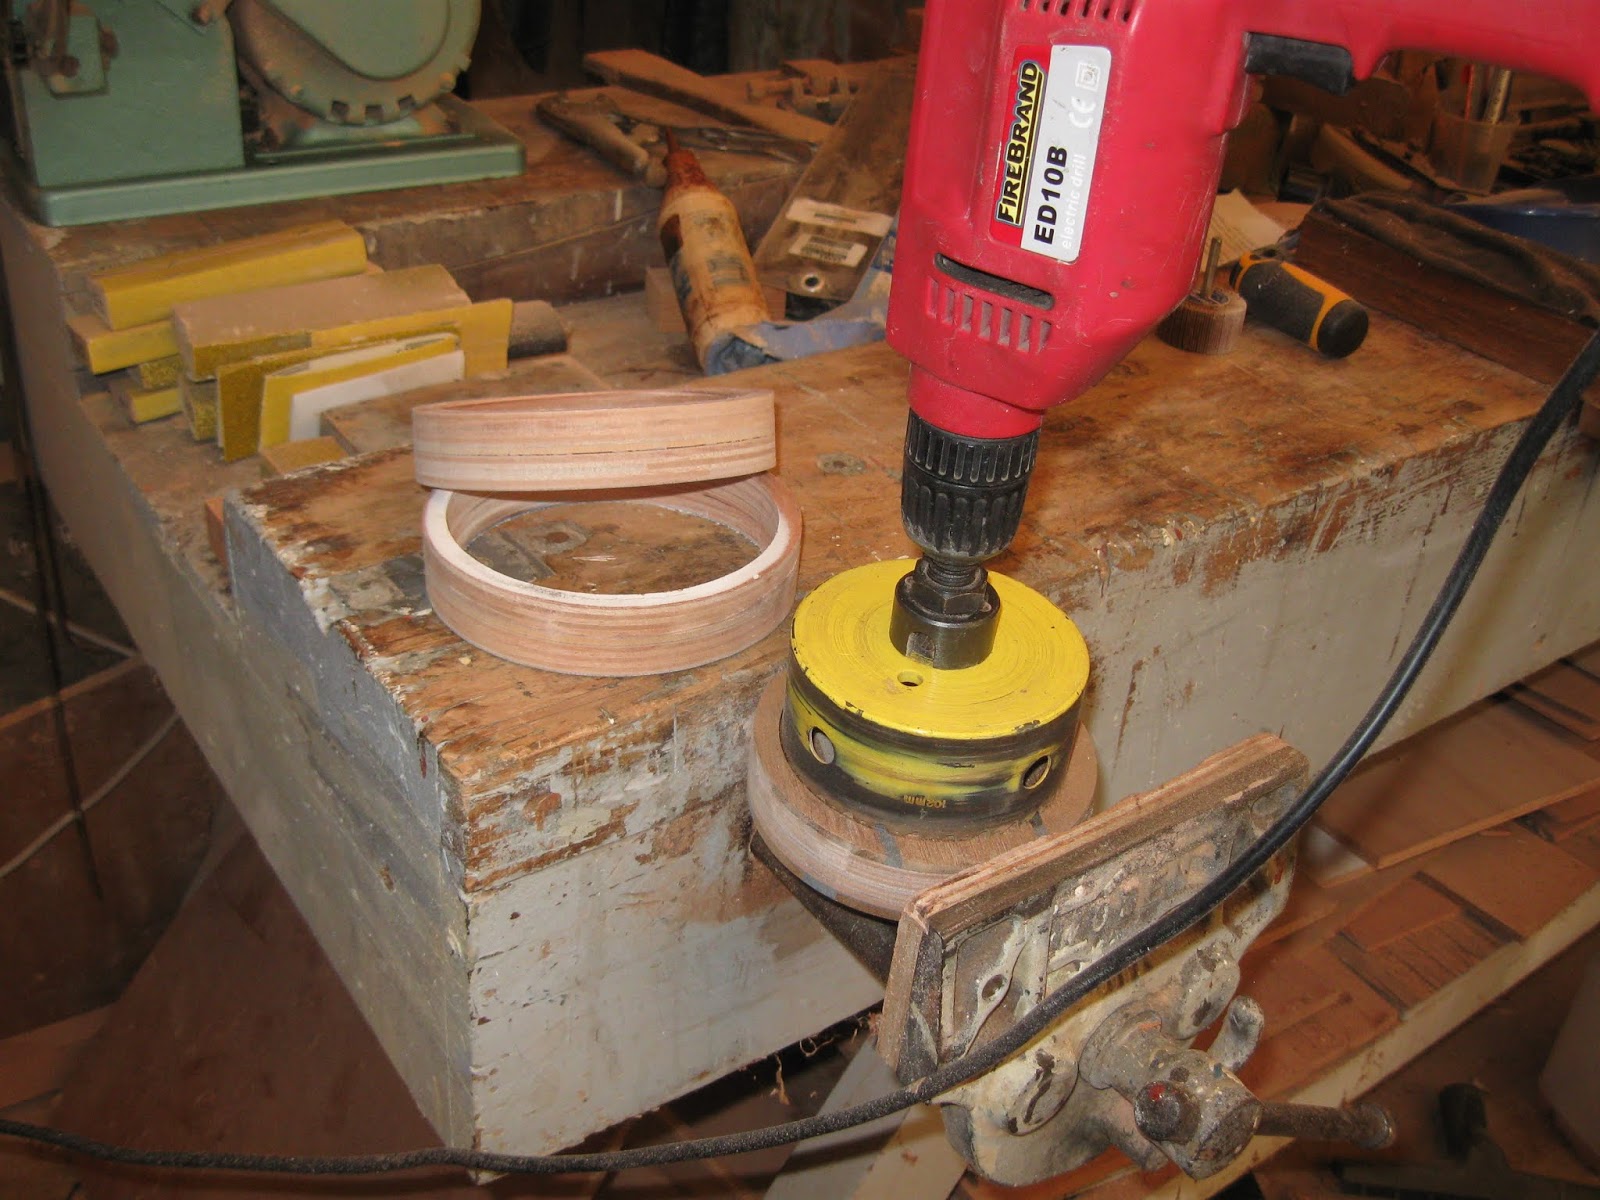
 A lifetime of being short of cash has made me somewhat chary of throwing things out and sometimes this pays off.  Again, many moons have passed since I cut out the holes for the port holes, but I couldn't bring myself to throw them away, so stacked them under the bench.  Well, I had cut out two 127 mm holes in my deck (for the decklight and chimney) and needed spacers around these holes between the headliner and the deck.  Not only were my cutouts the ideal size, but the hole up the middle allowed me align them perfectly.

 I then took the 127mm hole saw (thank you, Norsand) and cut out the correct size hole.  Clever, eh?

 In the meantime, I had got out varnish for some reason, so could put some on the brass and finally fit the remaining portholes.  (Or starboard holes as one wag would put it.)  Finally, they are all in.  You might think it's extremely idle of me to try and put off polishing these.  Correct.

 Neurotic as I am about leaks and rot, I did the WEST thing on the machine screws for the chimney.  The red thing in the background is (inexplicably) known as a chimney jack and is of a very special silicone rubber that is supposed to tolerate a higher temperature than is normally the case.  It comes in red, red or red, to differentiate if from the less heat-resistant type of  'jack'.  I dare say I can live with it.  The best thing I can see with it is that it can move up and down with the chimney, as it expands and contracts.  From past experience, the vertical component of this can be disconcerting to say the least.

 This is one of the holes in the deck.  I think the one for the chimney, but they all looked much the same.

 And here I am fitting the Air-only ventilator that goes in the heads.  They are complicated things to fit, and being somewhat dumb about these things, I had to print out the instructions to ensure that nothing was forgotten.

Having fitted it, I am entirely convinced that it will keep the water out (watch this video if you want to be reassured); however, I'm not entirely convinced that it will let any air in!!

 Still, it looks very seamanlike on deck, next to my lovely little decklight.  (Davey's via Classic Marine)

 These chimney jacks are a wonderfully snug fit, but my copper downspout (yes, I know it will probably melt) has a seam on the back.  I had to go and buy some bolts for it from Steelmasters because the ones that came with the jack were (a) magnetic stainless and (b) the wrong length.  While I was there I saw they had this (apparently) magic silicone tape, which bonds to itself and is very heat resistant.  I could press it into the seam, and rolled up a couple of little sausages of the tape to put on either side.  I hope it works!

And finally, I have just about got all the trim cut and fitted.  These fiddly little bits of wood are enough to drive me into a nervous decline.  Dry fitted, they certainly made a big difference, however.  Once they are all varnished they should finish off the deckhead very neatly.


09 June, 2019

A bit more teak - and then back inside

I was, I think understandably, quite keen to get my teak decks laid; I still had interior trim, lights and hatch trim to fit, but I thought I'd do it 'when I had some spare time'.  Whatever induced me to come up with this flight of whimsy, I wot not because, needless to say, there was no spare time. So, the teak was laid and the interior had not been touched.  The first job in the cockpit is going to be fitting the bridgedeck.  This is going to make going in and out of the cabin a lot less easy than it is now, so commonsense dictates that I get the interior completely finished before I commence work on the cockpit.

I still had some teak to lay - on the deck box lids, so decided to do that first, because they would need teak plugs and there were a few to be fitted on deck, too.  Besides, my mind finds it difficult to move from one mode of building to another, so it seemed sensible to carry on with teak before I lost the thread, so to speak.

 The deck is laminated, you may recall, from one layer of 6mm ply and one layer of 4mm.  I doubted anything was going to be fitting to the nearest millimetre, so reckoned 9mm ply would be fine for the lids.  These were duly cut out and coated.

 Additional framing had to be added along the sides for the lids to land on.  Much cogitating took place while I decided whether to hinge them inboard or outboard.  Gordon, (Tystie's new owner) mentioned that if they were hinged inboard, like his are, there is a possibility of stuff falling out of them, if you are heeled well over and have forgotten to fasten them down.  Or so he has been told ...  I decided put the hinges outboard, so this also required some more wood fitting around the boxes.

 Then came the fun bit of fitting the teak.

 While I was at it, I took some of the narrower stock (which will get used up in the cockpit) and trimmed along the edge of the cabin.  I raised this to obtain a little more headroom, and as I want the (upper) rubbing strake to run in a fair line along the sheer, it can now run under the teak, which will be varnished.  I trust it will all look as though it was intended from the start, when the boat is completed!

 The deck box with the extra bits of wood fitted around it.  Thank heavens for epoxy, is all I can say.  It is so good for this sort of 'retrofitting', which would otherwise require high levels of joinery.  I'm not quite sure how I could even fasten things together, if I were building conventionally.

 Meanwhile, back on the bench, the deck boxes get their teak glued down ...

 and then sanded smooth.

 Then a 'dry fit' before sealing the edges.  However, even I didn't find these too challenging to fit.

 And for once, I didn't struggle with the (simplest in the world to fit) hinges.

What you may not have noticed, but I shall point them out to you in case, are the 308 teak plugs that have been fitted in the screw holes.  I was astounded that I need so many!

 I hope that the lids will rest at a slight angle against the guard rails.  If they don't I shall have to make some sort of hook and eye arrangement to keep them in place.

 OK, back to the interior.  The piece of kauri is to hold the light fitting.  It couldn't be put in place until the beading was fitted and so the wires have been sticking out of the bulkhead for what seems like months.  (I tested them and was relieved to find that none of the zillion screws that went into my deck had cut through them!)

 None of my kauri is long enough to go right across the cabin.  The camber, as you will note, is pronounced and it is exceedingly difficult to force even these dinky bits of quadrant into place with out fastening them permanently.  I am hoping that I can fit one properly and then cut the second accurately to length.  I would reckon the odds at 10:1 at best!

 Fitting the mounting for the lamp.  The wiring isn't just hidden because I'm precious (although of course I am): it's hidden because there is no appropriate groove in the base of the lamp for it to run down.  It's going to be fun and games when I finally come to fit it, I fear.

 Meanwhile, interior trim will need to be fitted around exterior openings.  The hatches are fitted, but still to go are a decklight over the heads, a dorade ventilator ditto and the big hole for the pram hood.  The first two can be dealt with by using hole saws and I went and borrowed one for the decklight. It was intensely traumatic cutting a hole in my beautiful deck!

 I had to go back and complete the job from inside.

 All so that I can fit this.

 Ah yes, another hole - I need one for the chimney for my wood burner.  I thought the black lacked class, so have repainted a nice green.

 The flue is to be made from copper downspout.  Some teeth have been sucked about this being too thin.  Time will tell, but the price was right, seeing as how the kind people in the shop found me a damaged length.  Of course, it won't look nice and shiny like this once the fire has been lit.

Because the stove was built with the intention of fitting something totally different, the hole for the flue was a completely different size from the downspout.  After much head scratching, I went into Whangarei to see if I could find some sort of reducer.  To cut a long story short, with helpful people passing me along to other helpful people, finally a gentlemen called Carl lent me his dad's crimping tool, saying 'that's how we used to do it'.  I managed well enough, even if I did have to use both hands and was right impressed with the result.

 I reckoned I'd better fit the bit of copper that will be used to protect the bulkhead, while I was at it.  Paul, at All Marine had the brilliant idea of using copper roves to provide for a nice wee air gap.  I felt like a real boat builder, hammering in copper nails!

The +/- 150mm copper strip had been given to me, cut from a wider length.  I could hardly plane it smooth, so took to it with a file: good enough, I think.  (The reason is looks a funny colour is that it still has its plastic film over it.)

Before I can fit the wood burner, I have to light it to 'season' it as it were.  The paint gives off fumes on the first occasion.  Definitely a job for outdoors, fine weather and a calm day.


12 May, 2019

A pocket super yacht

You may be wondering why I haven't posted for so long.  (There again, you may not!)  Well, the reason is that, in all honesty, laying a teak deck is a long and very unphotogenic business.  There was really nothing to write about.  But now it's all down and you are allowed to ooh and aah, as I have been for the past few days!

 Early on in this process, I decided that the idea of leaving the sanding until the end of the project was a bad idea, for two reasons.  The first was that as time goes on, the epoxy gets harder and harder and the second, as I discovered the hard way, is that it's easy to make a mistake as to where two planks join.  After I fitted one about 6mm out, which doesn't sound much but absolutely shouts at you, I started a routine of gluing, sanding and filling before moving on to the next set of planks. 

 Framing round the deck boxes was tricky - mitres are always a nightmare and, yes, I got one of those wrong, too!  I never said I was a boatbuilder.

 You may recall that I bought a job lot of decking teak (thank you, Zane, for drawing my attention to it), which is nearly all beautiful, quarter sawn stuff.  It was too thick and came with a little rebate.  I had it sawn down the middle (at vast expense), so ended up with half at about 48mm and half at about 42mm.  I divided it in two and did sums, but knew I had only just enough for the centre deck.  That being so, I fitted all the longer lengths first.

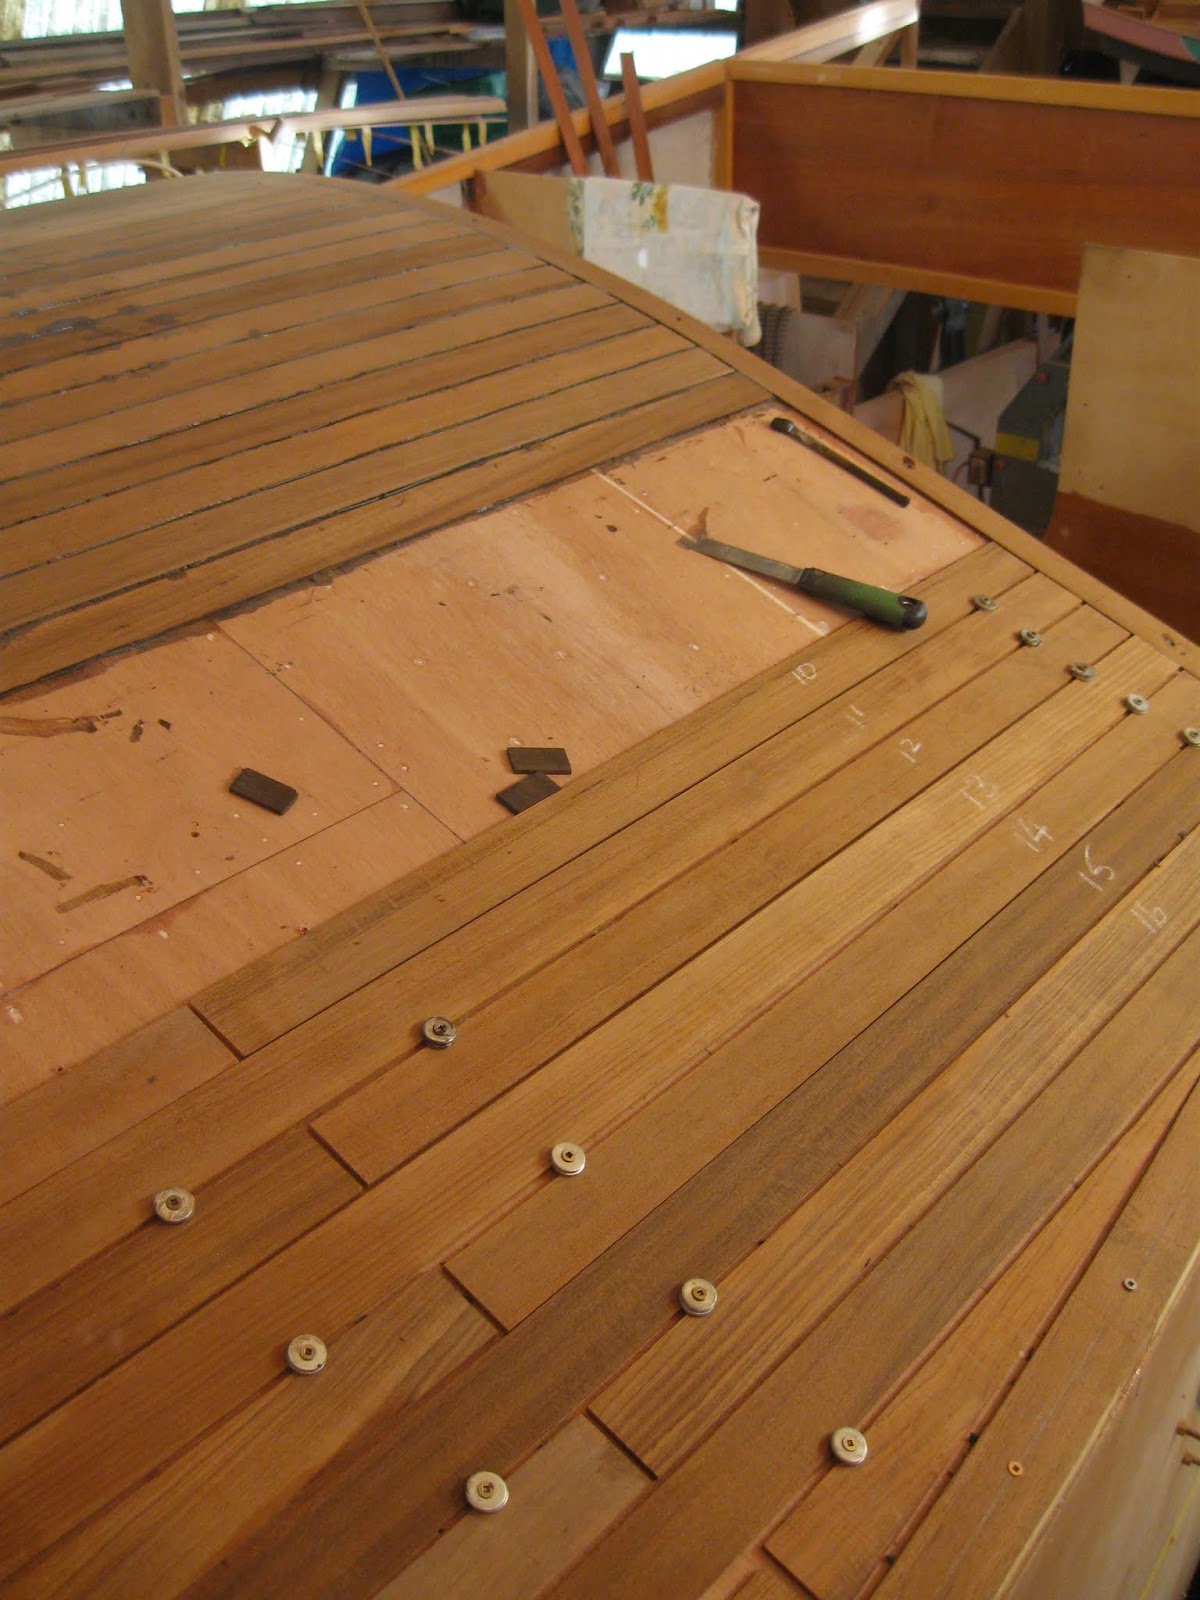
 I used plastic spacers to try to keep the gaps even and washers under the screws held the planks down until the glue went off.  Because I couldn't reject any of the planks, I had to use some distinctly warped pieces, which means that the black lines wobble more than a little in places!

 These two photos are also a bit swanky - I was impressed (and astounded) that the final planks were almost the same on both sides.

 Generally, I used 'penny' washers, because they spread over more of the plank to hold it down.  I have zillions, but still ran out occasionally and had to use smaller ones.  Because the sub deck is only 10 mm thick, I needed to use 2 washers to stop the screws from going right through.

 I was worrying about my supply, so started fitting large areas at a time so that I could make some sort of plan (I'm not sure what!) if I didn't have quite enough.  Thankfully, I did.

 Fit, remove, glue, clean, sand.  Day after day.  (My bursitis, not surprisingly, didn't go away.)


 I was very relieved when I got to the bow and realised that I would have sufficient wood - and even some left over for the deck box lids, which had been a concern.


 Fitting around the big hatch was a little tricky. Because some of the wood was so stubbornly warped, the planks had crept a tiny bit out of parallel, so some fudging was required.

 With the shorter lengths, it was easier to apply the glue on a bench and carry them across to the deck.  Whatever I did, it was a pretty messy job and carbon powder is very dirty stuff to work with.

 These are the final pieces going into place on the starboard side.

 And here they are on the port side.  I am pleased to say that these matched, too.  I hadn't been entirely sure that the cabin front was symmetrical and true, so this was more than a little reassuring.  Not that it matters, but it's nice to know.

 The filled gaps ready for sanding.

 Before and after sanding.  It's a tedious and grubby job, even with the vacuum cleaner attached to the sander, but immensely satisfying to see the nice, clean teak emerging from all the black mess.


  And, finally, the whole deck is covered in teak.
 

I must say, that I think it looks absolutely wonderful.  What is it about teak decks that is so attractive?


It's the sort a deck a superyacht would be proud of - in my humble opinion.  OK, so I'm blowing my own trumpet, but what the hell.  I'm not only very proud of my achievement, I'm truly delighted with the result.  Already I know it was worth all the grief and hard work for the pleasure it will give me on a daily basis.  Gloat, gloat, gloat!!!