- they are not centreboards; while centreboards go through the bilge, bilgeboards do not go through the centre
- they are not twin keels, because they are neither fixed nor ballasted
- for the same reason they are not bilge keels
- they are not leeboards, because they are not on the outside
of the boat.
This is the sort of job I like least. It is critical that I don't make any mistakes, but they require large, heavy pieces of wood to be machined, which are difficult to handle and wearing to move around, particularly in the recent extreme heat. I would much rather handle dinky pieces of kauri than full sheets of 12mm plywood, but the consolation is that I think I have now sawn up my final sheet of plywood. I must be making progress! I have also needed to manhandle large saligna boards, which weigh a ton and threaten to remove my finger ends whenever I put them down. The bilgeboards themselves are as tall as I am and nearly a metre wide, so that moving them around is a bit fraught. However, progress is being made, as you will see. Firstly, however, I completed the companionway, in order to keep the dust from getting inside the boat.
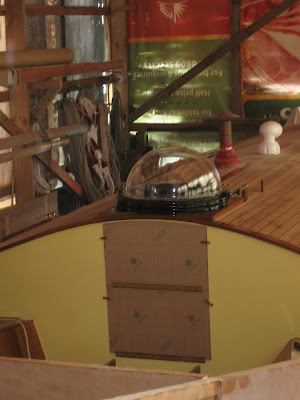
I loved my fold-down washboards on Fantail and decided to use them again on this boat. My first issue was getting the acrylic cut. I made a template that fit perfectly (for once) and took this along to my local Metroglass and asked that the pieces be cut out of 10mm acrylic ('Perspex'). After taking the acrylic back for the third time, I finished shaping it myself. Something I could have done without, knowing how brittle and easily scratched it is. But my patience had worn a little bit thin and so too, had that of the man at the shop. I should have gone for a looser fit, obviously.
The trouble with fold-down washboards is that the need hinges, my personal bête noir. The easiest way to make sure I got this right was to fit the boards and hold them firmly in place. I could then add the piano hinge in situ.
This is the piece that caused all the problems. I have finally, carefully, planed and sanded it until it fits.
With the bottom hinge secured, I could put the top flap in place and mark for the middle hinge. One advantage of it ending up too large was that it allowed me to remedy my mistake: I have asked for the pieces to be cut at right angles instead of at an angle to encourage water to drip down the lower board rather than through the gap. However, the area has been designed in the assumption that rain and the odd splash will come down, so a slight leak won't be an issue, anyway.
When I fitted the lower hinge, I realised that I had made the 'sill' too high so had to chisel out for the nuts. I suppose I could have put the machine screws in the other way round, but that would would have meant countersinking the acrylic and I would have been worried about cracking it. Next time I get the yellow paint out, I'll touch it up and it will be good as new!
The 'washboards' fitted and closed. There are two teak struts for them to land on, when opened. This means you can safely stand or sit on them. I ensured that it was level, too, so that it serves as a handy little table.
I had two, pre-coated sheets of 12mm plywood left over, just what was needed for the bilgeboards. I had forgotten what hard work it is, manoeuvring these big sheets about. When I lift them up as high as I can, they are only about 20mm off the floor!
I made a full size drawing of the bilgeboard, so that I could measure from it and match it to what I was making. When there are plenty of things that I can get wrong, I like to make the process as fool proof as possible.
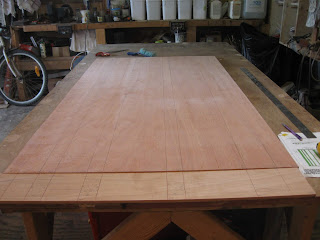
The first face of the first board, cut to size and marked out.
I had spent half a day hauling out boards of saligna from the stack and machining one of them to make the framing. As I laid them in place I realised that they were going to make the board so heavy that I'd be unable to lift it. Obviously, I need to be able to shift them about and ideally, without risk of injury. Fortunately, I had some big lumps of totara, which I'd bought for another job but which had proved unsuitable. I had just enough to do the framing and the wood was a delight to work with.
The best thing about the totara was that it was just about the correct thickness, while the saligna needed laminating after being machined. Instead of taking several days, I had the first board framed up in a day!
And the next day, I did the second board.
Fortunately, I can just about get the two of them on the big table and move them around.
The framework provides the basic shape of the board. I knocked the hard edges off the high points to make it easier for the plywood to make a fair curve.
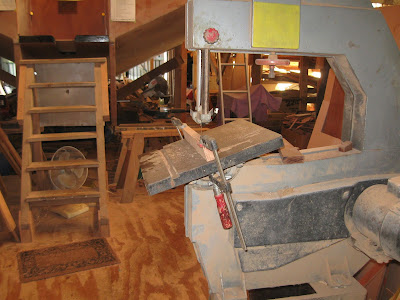
When I first started using the big woodworking machines, I was terrified of them and didn't dare adjust the table. Now I tilt it without a second thought. (The bandsaw I am more reluctant to adjust, because it is difficult to put it back plumb.
As much out of curiosity as anything else, I decided to try the basic board in the slot - while I could still move it around. The flat side goes outboard, which seems odd to my tidy mine - surely the curve should follow the curve of the hull? Of course, it's obvious that the shape of the board has little to do with the shape of the hull: it is a wing and the curve is to help "lift" the boat to windward.
In reality, it won't come down quite as far as this. It is designed so that about 1 metre of board protrudes when it is down.
With all the other things in the photo, it's not really that clear, but you can just about see the shape of the board created by the framing.
And this is the view from above, with a couple of wedges pushed in, to hold it into place.
In the hope of producing the desired result, I followed David's design slavishly. I check both the dimensions of the machined wood and the gaps in between carefully, before gluing them into place.
If I had known then what I know now ... Once again, the 6mm plywood was more difficult to bend than I'd anticipated. It seemed fine at the 'dry run' stage, shown here, but when I came to glue it down, it buckled along the leading edge and required a lot more screws to hold it down. I should have used 4mm - it would have taken a little longer, but been a lot less stressful - especially with temperatures in the 30s. Even the super slow hardener was starting to kick off.
As you can see, the leading edge looks fine, here.
In this photo, it is obvious that I've doubled the number of screws. To add to my woes, I had heaps of 4mm plywood knocking around and had to go and buy an additional half sheet of 6mm to finish the job!
After gluing down the first layer, I then cut out the slot. A block is attached at the lower part of this to allow the board to be raised and lowered.
Temporarily, I left the boards alone to do another job. I had been given some fibreglass stanchions, but when I came to consider fitting them, they were really too big for my little boat, being 35mm at the base and about 32mm at the top. The size meant I needed to make bases, too and I could get them fairly inexpensively via E-Bay. The extreme camber of the deck meant that they needed big wedges of teak to level them up. The extreme expense of teak meant that I essentially had to make it from thinner stock and then shape it on the bandsaw.
And because Thinking Ahead doesn't come naturally to me, I had to cut the toerail back to fit the stanchions. The stanchion bases I chose (ie the ones I could afford) were high aspect ratio, which meant that the teak needed to be even thicker at the outboard edge.
Cutting the wedges so that the stanchions will be (more or less) vertical took a bit of working out, but I am happy with the results.
I held them down with long, 12g screws. They were then backed out and reset with the WEST hardware bonding method. I am always worried about shearing screws off when doing this: you don't want to leave traces of grease when something is a permanent fitting, so the only way to back them out is, ideally, just before the glue sets. Using an electric screwdriver is asking for trouble. My cranked, ratchet screwdriver gives sufficient leverage to slowly break the screw out. Square head drives are almost essential for this type of work.
There are three stanchions each side. The middle ones needed a different base, because the triangular ones wouldn't fit against the hinged lid. No doubt the pundits will tell me that the rectangular ones fitted here will pull out. Tough.
That job done: back to the bilgeboards, but that will have to wait for the next time I blog!
That job done: back to the bilgeboards, but that will have to wait for the next time I blog!


8 comments:
I’m assuming the bilge boards ift vertically rather than swing?
Yes, indeed, Paul. I should have mentioned that. Things that seem perfectly obvious to me, because I am completely immersed in this project, are far from obvious to others! A block and tackle system will be used to raise and lower them.
Thanks for the clarification, will you be able to sail without them in shallow water? And I guess much like leeboards you only have the leeward one down at any one time,unless short tacking up a narrow channel?
One of the reasons that I wanted the little stub of a keel was so that the boat would still make (more or less!) to windward in shallow water. David, who designed the boat, has made some comments about the bilgeboards - https://junkrigassociation.org/technical_forum/4315719#8773533 As he has sailed tens of thousands of miles with them on "Tystie", he knows what he's talking about!
Awesome job Annie.Any glass sheathing going on the boards? Cant wait for the up-wind sailing report, crack on!
Awesome job Annie. Any glass sheathing going on those boards? Look forward to the up-wind sailing report, crack on!
Oops - I seem to have published your comment twice! Yes, I'll put a layer of glass on the boards, wrap them over the leading edge and put a heavier layer on the bottom.
Hmm. Like me, the boat is short and beamy - she will be great in smooth water, but I suspect will take her time getting anywhere in much of a chop. However, taking your time is often more comfortable, even if it does take longer.
Wise words indeed!
Post a Comment