Badger

In Greenland
Iron Bark

Under full sail
Fantail

At Russell Boating Club's Tall Ships Regatta
Blue Water Medal

Blue Water Medal
Books By Annie Hill
- Brazil and Beyond
- Voyaging on a Small Income
About Me
08 September, 2019
Putting things together
And then taking them apart! The cockpit is even more a put-together-and-take-out again than most of the things I've been making. But it is slowly coming together.
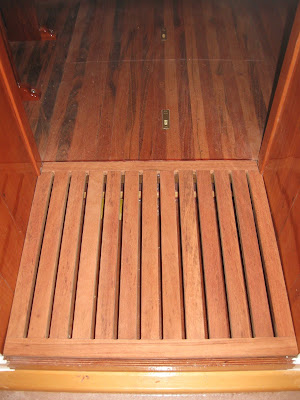
The grating glued up nicely and was then sanded to remove excess epoxy.
I installed the lower shelves first, carefully filleting them to the side of the boat.
This shows the port shelf with the locker for the meths containers also glued into place. The latter appears to be at a crazy angle, but part of the idea is to make it easier for me to drag the full one towards me to swop for an empty one. A 20litre container is quite a lot for me to manoeuvre around.
With the lower shelves glued and filleted into place, I could then turn my attention to the sidedecks/cockpit seats. I had gone to a lot of effort to get these to fit and it paid off as they simply dropped into place. The 9mm plywood barely flexed along the outboard edge, noticeably stiffened by the layer of fibreglass I had added.
The starboard side is finished, the port side is being glued up.
And here is the grating. The bilge area underneath is separated from the rest of the bilge, so drips won't spread any further. With some sort of curtain rigged up, I could even use it for a shower stall!
The bridgedeck slots into place between the sidedecks. However, I don't intend to glue it in place until the cockpit well is hung. In many ways, it would have been easier to make the well first because it would be easy to clamp in place, but for a number of reasons, I decided to put on the sidedecks/seats first.
Here the sides are getting a layer of fibreglass put on the side that is out in the weather - and gets kicked.
Such is the cussedness of a wicked world, that the lowest point of the sidedeck landed on a stringer. I have to remind myself that I have no intention of sailing across the ocean, being regularly swept by seas built up from gale force winds. One or two of my friends gently pointed out that a hole of around 30mm would be more then enough to drain any water - which is more than likely to be rain water, anyway! So I used a hole saw and made a modest scupper, which I then almost flooded with epoxy to ensure it drains.
I then offered up the cockpit well to check that things fitted. It took quite a few attempts, particularly because nothing wanted to stay vertical.
The view from aft.
I decided to fillet up the corners in situ, to ensure that I get the three sides back in. With a generous fillet, the structure is surprisingly robust, but sufficiently flexible to make it a tad less difficult getting it in and out.
Left to its own devices, the structure flops open, so sticks and tape are being used to ensure that the after end is the correct width.
The cockpit sole is of of laid teak, which I fitted with the intention of routing to size, so that the sides and back of the cockpit would fit snugly.
That done I fitted the base and sides together and offered it up. Many, many times. To be perfectly honest, fitting this cockpit well has been more than a little challenging. The clever little "Clinometer" device on my phone assured me that the cockpit sole is at an angle of 4°, which might be a bit excessive, but will ensure that no water stands in the cockpit. There are few things more annoying than standing in the cockpit in stocking feet, only to find a pool of rainwater. I really needed something to tell me just how much of an angle it was, because with nothing else being horizontal fore and aft the whole thing is rather confusing.
The well is having its final fitting. It's level athwartships, has the appropriate rake and (more or less) fits around the teak. The next stage is to paint the faces that will end up inside the lazarette.
And I was so excited about doing this, that I forgot to mark and mask off for where it's going to be glued, so I shall have to offer it up again and mark it.
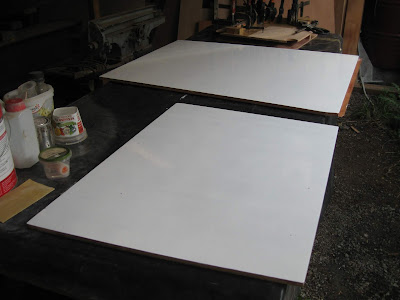
In the middle is the cockpit sole: in the foreground is the bridgedeck, also getting its underside painted.
The object will all the clamps is - I hope - a laminated end for the forward seat in the saloon. It occurred to me that without something physically separating people from the wood burner, you can be sure someone will lean on it while it's lit. They probably still will, but at least I will have tried. I just hope it won't get hot enough to soften the glue and spring apart!
Labels:
Bridgedeck,
Cockpit,
Companionway,
Filleting,
Laminating,
lazarette,
saloon,
Scupper,
Teak deck
Subscribe to:
Post Comments (Atom)


No comments:
Post a Comment